16.2KVIEWS
14REPLIES
22APPRECIATES
06-08-2026LAST POST

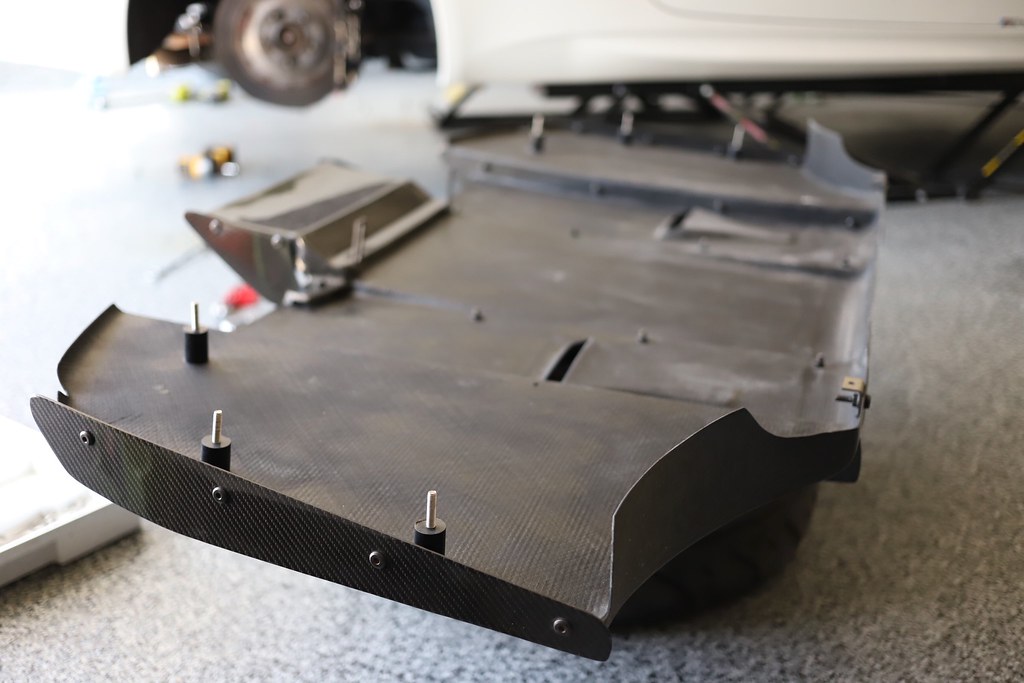
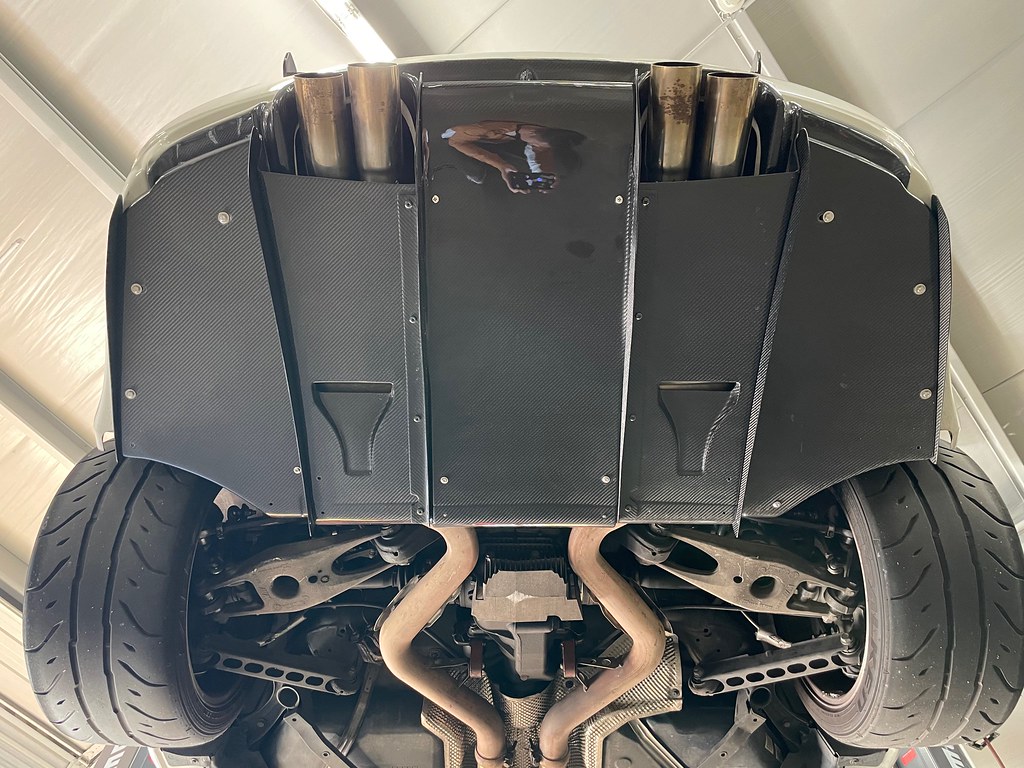
DIY - E92 M3 Varis Style Diffuser Install - RW Carbon

Image hosted on: live.staticflickr.com


Hello E9x M3'ers. I wanted to put together a comprehensive installation guide for the RW Carbon or similar Varis style full diffuser and under tray. To my knowledge and search, no one has personally documented their Varis or Varis style diffuser installs. Matt at RW Carbon asked that I help the community with a comprehensive DIY to install RW and other Varis style diffuser/under tray since the work is very intimidating for those who haven't done this type of install. Matt also asked that I push the speed threshold of this setup on the track in excess of 130mph, see if I can find any flaws with it at speeds.

I hope this DIY will help you guys and gals to be more comfortable to tackle this on your own. This DIY assumes you know how to jack a car up safely, have hex bits, socket set, vise (or a way to bend brackets), have an angled grinder or Dremel, and roll of 3M VHB tapes. Do this at your own risk as improper installation can cause damage to your diffuser, car, and cause safety concerns for others on the road driving behind you.

Main Reference:

Image hosted on: live.staticflickr.com

Image hosted on: live.staticflickr.com

Image hosted on: live.staticflickr.com


Step 1: Prep the tray, use 5/16" drill bit to enlarge the holes of A, C, D, and E. For (B), use 3/8" drill bit to enlarge the holes by 1/4" each direction.

Step 2: Trim exhaust openings. After testing fitting with my OEM exhaust, I needed to cut 1/2" both sides of the exhaust openings. You can use an angled grinder or Dremel. Be sure to wear a mask.

Image hosted on: live.staticflickr.com

Step 3: Prep hardware for (A) on the tray, using 2qty #1, 2qty #6 and 2qty #8. Note, I didn't use #8, I bought shorter M6 panhead bolts from the hardware (see below)

Image hosted on: live.staticflickr.com

Image hosted on: live.staticflickr.com

Step 4: Prep hardware for (F) on the tray, using 2qty #3, #9, #10, #14.

Image hosted on: live.staticflickr.com

Step 5: Prep hardware for (B) and (C) on the tray, using 6qty #11, #13, 4qty short #7 for (C) and 2qty long #7 for (B).

Image hosted on: live.staticflickr.com

Prepped tray:
Image hosted on: live.staticflickr.com

Step 6: Prep vehicle for (A) (B) (C), remove OEM clip and replace with 8qty #6. Use flat head to assist.

Image hosted on: live.staticflickr.com

Image hosted on: live.staticflickr.com

Image hosted on: live.staticflickr.com

Step 7: Secure bumper or heat shields to trim for (B) and (C). Once new clips are installed, use 6qty #8 or #9 to loosely align the bumper for (C) / heat shield for (B) to the plastic trims above it. Then use 6qty #15 (self tapping plastic screws) to secure the bumper / heat shield to the plastic liner above it so the holes won't move on you. Once all 6qty #15 are screwed on, remove the #8 and #9.

Image hosted on: live.staticflickr.com

Step 8: Install brackets for (A). Use 2qt #2, #9, and #14 washers.

Image hosted on: live.staticflickr.com

Step 9: Bend brackets for (E). Use 2qty #5 and bend exactly to how it is below. Pay attention to where the 2" are bent.

Image hosted on: live.staticflickr.com

Image hosted on: live.staticflickr.com

Step 10: Install brackets for (E). Use the OEM 8mm bolts, do not over tighten. Snug is fine. Add #6 clips to the brackets to secure the tray to it later.

Image hosted on: live.staticflickr.com

Image hosted on: live.staticflickr.com

Step 11: Bend bracket for longer point D. Pay close attention to the measurements below. Use 1qty #1, #4 and #6, assembly hardware for L brackets are #12 and #10.

Image hosted on: live.staticflickr.com

Step 12: Assemble bracket for shorter point D. Use 2qty #1 and 1qty #6, assembly hardware for L brackets are #12 and #10.

Step 13: Mount both brackets for (D) to the chassis.

Image hosted on: live.staticflickr.com

Step 14: Point (F) extra security. I bought 2qty M12 1.5 stainless steel bolts, large washers and drill a hole on the edge, and some springs to attach (F) to the steering arm bolts. You don't have to use springs, can use wire ties. I'm going to reach over 130mph often with this setup, so this is added security for my peace of mind.

Image hosted on: live.staticflickr.com

Completed the mounting hardware:
Image hosted on: live.staticflickr.com

Step 15: Prep the diffuser. Use a 5/16" drill bit to loosen up the 4 holes for easier install. Wipe down the mounting points on the diffuser and bumper with alcohol then install 3M VHB 1/2" tape.

Image hosted on: live.staticflickr.com

Image hosted on: live.staticflickr.com

Step 16: Install the diffuser, loosely bolt the diffuser (2 middle bolts are from reference point "A" and 2 outer are OEM 8mm bolts). Make sure it can sit flush, then remove the 3M tap then secure the diffuser with masking tape so it doesn't move. Tighten the 4 bolts holding the diffuser.

Step 17: Install the tray. Use 4qty #8 for (D) and (E) first. Note, one side of (E) may require drilling a new 5/16" hole if the bracket doesn't reach. Then tighten the rest of the bolts. For (A) assembly hardware for L brackets are #12 and #10, I use an angled needle nose to hold the nut while I bolt them down.

Image hosted on: live.staticflickr.com

Image hosted on: live.staticflickr.com

Image hosted on: live.staticflickr.com

Extra security using springs for (F) (you can use wires instead)

Image hosted on: live.staticflickr.com

I have EAS 80mm exhaust tips, which were riveted to the OEM modded muffler. I had a local shop fab 1.5" longer base for the tips to rivet to in order to extend the tips further back. Otherwise, the stock tips or non-adjustable tips will be too sunken in.

Image hosted on: live.staticflickr.com

Enjoy. I've personally tested this tray to 135mph. Track season is at an end, will do more testing in the springs. Cheers.
Still hanging on at 130mph+... cough, on the "track"

Checked all bolts, none were missing. :D

Update after 500mi: I will use 3M panel adhesive for the diffuser part to glue it to the bumper. 3M VHB ain't holding due to little touch points. Once 3M panel adhesive is applied, it's stuck to the bumper for life. The tray is fine with bolts, don't glue that part, lol.
Attached image
Thank you very much bro
Alight guys, here's the update on the RW Carbon Under Tray and Diffuser.
For the diffuser, I went ahead and took the tape off then use 3M Body Panel Adhesive to make it permanent. 3M VHB tape kept coming off after car washes and drove me nuts.

For the tray, RW Carbon's supplier uses non-zinc coated hardware so it started rusting. Other than that, I have 0 complaints about the product which is holding strong at speeds and strong wind gusts. I replaced the hardware with titanium bolts below and 304 SS nuts. I'm loving the look and the couple ounces of weight savings :D

Titanium bolts:
(22) M6 x 15mm
(2) M6x12mm
https://www.aliexpress.us/item/2251832460881302.html

(2) M6x25mm
https://www.aliexpress.us/item/3256804544484260.html

1 pack of M6 Serrated 304 SS Nuts:
https://www.amazon.com/dp/B071XHYWLW?psc=1&ref=ppx_yo2ov_dt_b_product_details
Attached imageAttached imageAttached image
Thread referenced by Sublivion in Varis Install on E90 M3 04-01-2023
How has it held up in the months since install?
Great write up. I hope to get one of these installed someday. Fingers crossed for a good deal on one.
Update: Swapped the clips out with Plus Nuts. For faster removal and installs (track vehicles, nice to be able to remove the trays for diff service / links etc.).. You will need to remove the rear bumper (super easy) and replace the clips supplied with these M6 plus nuts.

Note, plus nuts (makes a plus when contracted with a tool) are stronger than rivnuts (expands). Tray help up great at 130mph with 40mph cross gusts.
Attached imageAttached image
Got the titanium bolts on Amazon. Great tip.

Varis Undertray and 3D Design on an E90 M3 Sedan coming soon. Custom Holes...
PPF and ceramic coat are 50% the cost of the CF Japanese parts.

Great DIY and a tip of the hat to Matt at RW Carbon.

Cheers
nyc_dude wrote
Got the titanium bolts on Amazon. Great tip.

Varis Undertray and 3D Design on an E90 M3 Sedan coming soon. Custom Holes...
PPF and ceramic coat are 50% the cost of the CF Japanese parts.

Great DIY and a tip of the hat to Matt at RW Carbon.

Cheers
Glad it was helpful.
Get the plus nuts, remove rear bumper and install M6 plus nuts. You'll cuss a lot less whenever you remove and reinstall the tray, lol.
This is amazing thank you. Any chance you have a list of the hardware that’s needed? Hard to tell which size bits, bolts, washers, etc.
Ayamazin wrote
This is amazing thank you. Any chance you have a list of the hardware that’s needed? Hard to tell which size bits, bolts, washers, etc.
RW Carbon shipped with hardware. I upgraded most to titanium which I've listed. Most M6x 12mm and 15mm.
Over a year in and a track season... Once I've updated most hardware to titanium and true stainless, changed the bumper M6 clips to M6 plus nuts, everything is still held on strong..
Attached imageAttached imageAttached imageAttached image
Thread referenced by Case-sensitive in WTB: Varis Diffuser Hardware 03-05-2025
You don't happen to have a list of all the hardware and sizes do you ?
Late to the game but loved reading this write up. The titanium hardware is a game changer. Maybe we can start offering it with our diffuser.
I was just doing a google search of how to install this diffuser, didn't realize this is actually my car now until I saw the pictures and see Jimmy did this when he owned the car. LOL!

Rubin