354KVIEWS
849REPLIES
516APPRECIATES
08-06-2026LAST POST
bigjae1976 wrote
Epic like your S54 DIY!

How much of a pain was it to just drop the front subframe and not remove it? I found with the E46 it was a total PIA and just easier to remove the subframe and front suspension.
I finally did it! Hehe

I have a big preference for doing as little as possible. I feel with every fastener you touch you increase the probability of forgetting something, etc.
With a lift, I'd do it like this. On jackstands I would remove everything because it's so cramped

As this oil pan gasket does not have any rtv, I felt it was pretty easy to leave things hanging as you see here. In the E46, I used rtv and then was under pressure to reinstall quickly due to that

Apparently the job can be done without removing the fan, so you can be sure next time I won't remove that either!
Doing mine slowly while it is snowing out. Great post, this helps out a lot!
admranger wrote
FWIW, I've done this twice now w/o removing the fan. YMMV.
Care to share how you did it without removing the fan?
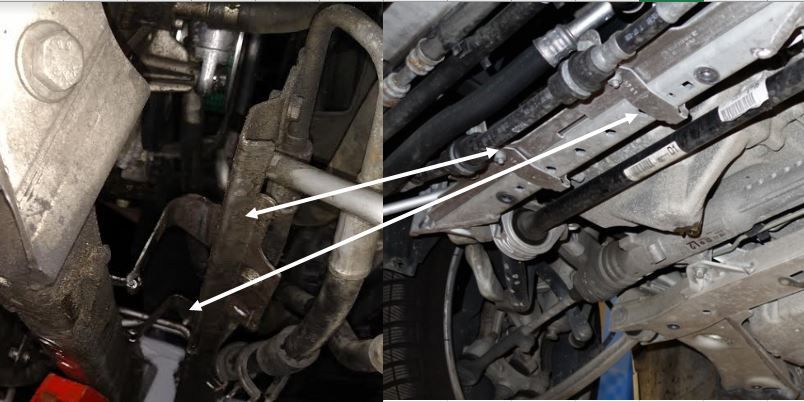
I still have my fan in and the sub frame is lowered. In the following pic that I took from the OP you can see where I unhinged the two brackets that allowed me to lower the subframe and not pull down the hoses with it. This might not be the best approach but it is my first attempt.

Image hosted on: i165.photobucket.com


javarithms wrote
Care to share how you did it without removing the fan?
bvrider1 wrote
I still have my fan in and the sub frame is lowered. In the following pic that I took from the OP you can see where I unhinged the two brackets that allowed me to lower the subframe and not pull down the hoses with it. This might not be the best approach but it is my first attempt.

Image hosted on: i165.photobucket.com
I removed the two nuts on the padded clamps to move the hoses. Tip: put the nuts back on the studs so you don't misplace them.
javarithms wrote
Care to share how you did it without removing the fan?
I just didn't remove it. No secret to that. Not sure what you're getting at to be honest. :confused2

You can still get to the pulley nut no problem.
admranger wrote
I just didn't remove it. No secret to that. Not sure what you're getting at to be honest. :confused2

You can still get to the pulley nut no problem.
Oh I see.... Do you access the belt tensioner from above or below with the fan in place? Can one person put the belt back on?
World class DIY. Thank you so much!!
javarithms wrote
Oh I see.... Do you access the belt tensioner from above or below with the fan in place? Can one person put the belt back on?
Below. Easy peasy for one person to take belt off and put it back on.
Thread referenced by pbonsalb in To buy an e92 M3 or not? Rod bearings 01-05-2017
Absolutely fantastic. Hats off to SYT_Shadow. I could never even attempt this DIY, mainly due to stroke. Makes you realize the importance of finding a good Indy shop with a mechanic that is going to take the time and care to do this right.
Any chance you guys can give me a hand with my car? I am in NJ not too far from you guys. I will also provide you with food. Pm me if you could do it with how much you are willing to do it for.
Ely21 wrote
Absolutely fantastic. Hats off to SYT_Shadow. I could never even attempt this DIY, mainly due to stroke. Makes you realize the importance of finding a good Indy shop with a mechanic that is going to take the time and care to do this right.
Yes, you don't want someone crossthreading a bolt and just ramming it in anyway and hope it'll hold...
Ely21 wrote
Absolutely fantastic. Hats off to SYT_Shadow. I could never even attempt this DIY, mainly due to stroke. Makes you realize the importance of finding a good Indy shop with a mechanic that is going to take the time and care to do this right.
Stroke a typo? If not it is awesome that you are still with us!!!
Tellmee wrote
Any chance you guys can give me a hand with my car? I am in NJ not too far from you guys. I will also provide you with food. Pm me if you could do it with how much you are willing to do it for.
PM sent. We will begin doing this for members in the area on a case by case basis.
L4ces wrote
Stroke a typo? If not it is awesome that you are still with us!!!
+1!
Great DIY, I just completed this job over the weekend and used this thread as my primary guide, thanks!

Minor suggestions for the DIY:

1. Add in the necessity of a 12mm "Double Hex" (aka Bi-Hex or Bi-Hexagon) socket for the OEM rod bolt removal.

2025 Edit: I have since learned the rod bolts were manufactured with the German "DIN" standard dimensions and contours required by that standard (similar to SAE and ASME standards from the U.S.). Because of this, sockets manufactured to DIN standards or manufactured specifically for DIN standard fasteners fit better on these BMW rod bolts and all of the other screws/bolts on the car. German branded tools present with a better/tighter fit such as Hazet, Stahlwille and Wera in my more recent experience.

2. Add in the necessity of an E12 specific wrench for the transmission to oil pan bolts.

3. To lower the sub-frame, remove 6 sub-frame bolts, add in "plus the 2 nuts for the engine mounts."

Extra tips and time savers:

1. Use a piece of piece of thick tape, placed on the steering column across the joint, and then use a box cutter to slice the tape right at the joint. The 3 dimensional marker works great and makes lining things up afterwards super easy.

Image hosted on: www.m3post.com

Image hosted on: www.m3post.com

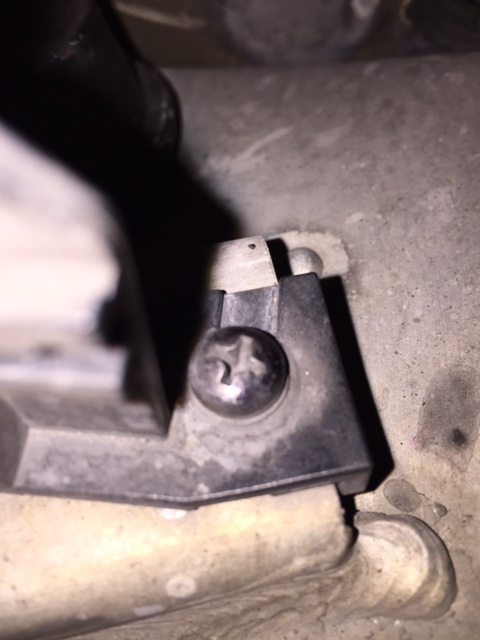
To get the box cutter into the tight space, remove this plastic Servotronic wiring harness holder found on the driver's side of the car. It has a phillips head screw. Use a mini ratchet and bit set (like this one here) to remove it. A typical stubby screw driver isn't short enough to fit in that tight space:
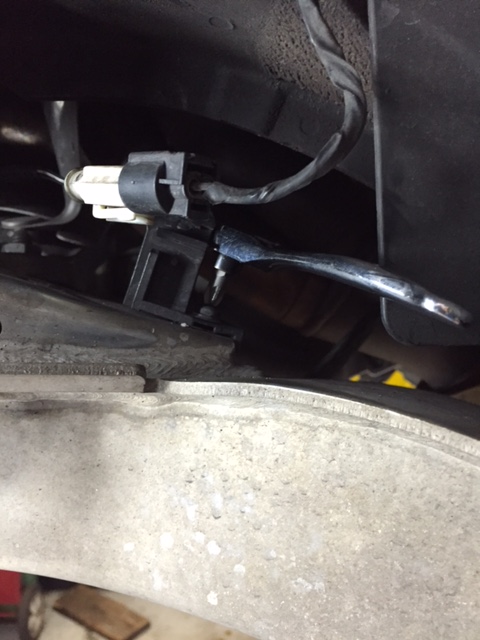
Image hosted on: www.m3post.com

Image hosted on: www.m3post.com

2. To create more of a production line type efficiency, consider buying 3 inexpensive 3/8" 12 point sockets for the ARP bolt install and a cheap torque wrench for an initial 30 ft lb of torque and a better torque wrench for the final 50 ft lb of torque tightening. A 3rd socket connected to a 3/8" drive extension with a rough gripping surface to allow quickly threading on the rod bolts most of the way.

Image hosted on: www.m3post.com

3. Ratcheting box end wrenches are very nice time savers and buying off-brand, single pieces specific to this job do not add that much to the overall cost. A 16mm ratcheting wrench like this one for the engine mounts, an E12 specific ratcheting wrench for the transmission to oil pan bolts and a 10mm ratcheting wrench for the front oil pan to A/C lines bracket removal.

4. Use an underhoist stand while working with a lift helps ease the sub-frame upwards to guide the steering column into alignment 1/4" at a time. A floor jack if you working with the car on jack stands should have the same effect.

5. Using the hanging sub-frame approach, replace the rear most engine bearings first before the front engine bearings. Starting at the rear of the engine gives you the most room to work with as you refine your bearing removal/replacement technique.

6. If you have trouble pulling a rod back down on to the crank after installing the new bearing, re-thread one of the original rod bolts 7 to 10 threads deep by hand into whichever side of the rod is most accessible and then pull the rod (by the bolt) back down towards you.

Next time I do this job I plan to:

1. Buy or borrow a bolt stretch gauge, measure and record the specs on each bolt I install so that I can check them if I ever remove them in the future and reuse them.
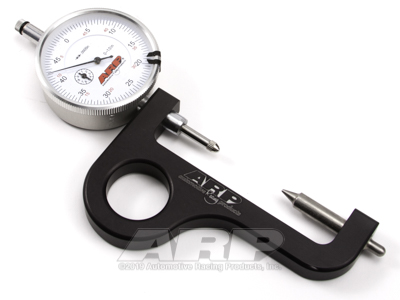
Image hosted on: arpcatalog.com

2. Measure the clearance of each bearing with plastigauge and document each one as described in this thread here in order to qualify for the BE Bearings warranty.

3. Remove one extra bolt on the "front of the oil pan/AC lines bracket" from the A/C lines themselves and get that thing completely out of the way. The bracket kept getting in the way of the oil pan re-installation.

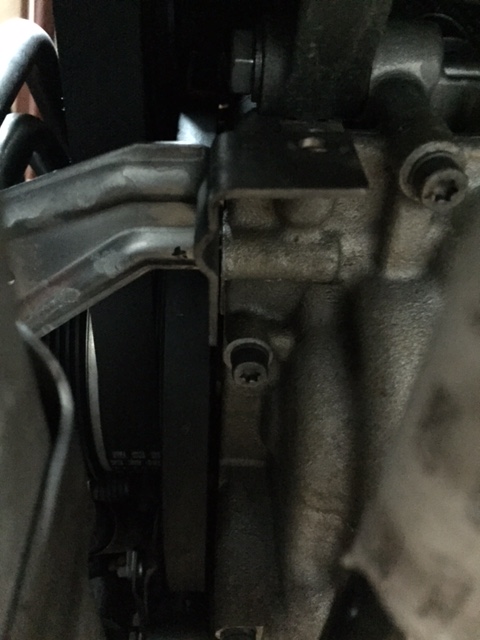
Image hosted on: www.m3post.com

Image hosted on: www.m3post.com

4. Organize all of the bolts better. The 3 magnetic dishes (in addition to the cardboard for the oil pan) were overflowing and didn't offer enough real estate to keep things neatly organized.

5. Purchase a 4 inch T30 torx in addition to the required 6 inch T30 torx to make the job easier. The 6 inch tool was almost too long for some of the the oil pan bolts as the 6 inch tool handle was nearly touching the hanging sub-frame for some bolts leaving very little room for my hand to turn it.

6. Consider dropping the sub-frame entirely. Standing over 6 feet tall, I found myself crouching down under the sub-frame constantly, where I probably wouldn't have had to do much if any crouching had I removed the sub-frame (while using a standard shop lift).
Excellent Write up and major props for DIY!!!
Theodore wrote
Great DIY, I just completed this job over the weekend and used this thread as my primary guide, thanks!

Minor suggestions for the DIY:

1. Add in the necessity of a 12mm 12 point socket for the OEM rod bolt removal.

Extra tips and time savers:

1. Use a piece of piece of thick tape, placed on the steering column across the joint, and then use a box cutter to slice the tape right at the joint. The 3 dimensional marker works great and makes lining things up afterwards super easy.

2. To create more of a production line type efficiency, consider buying 3 inexpensive 3/8" 12 point sockets for the ARP bolt install
Thanks for adding to the group knowledge with the additional thoughts/tips! I just wanted to emphasize the points above, having done this recently I think these are excellent tips (as are the rest). :clap:

Thanks again to SYT_Shadow for the full DIY and best of luck to others who take this job on.
///Mobbin wrote
Thanks for adding to the group knowledge with the additional thoughts/tips! I just wanted to emphasize the points above, having done this recently I think these are excellent tips (as are the rest). :clap:

Thanks again to SYT_Shadow for the full DIY and best of luck to others who take this job on.
I agree, Theodore's points are excellent. I'm adding them to post #2 for future reference
SYT_Shadow wrote
I agree, Theodore's points are excellent. I'm adding them to post #2 for future reference
Good additions to the DIY, Theodore! :clap:
Great points and very helpful tips!
Theodore wrote
Next time I do this job I plan to:

1. Buy or borrow a bolt stretch gauge, measure and record the specs on each bolt I install so that I can check them if I ever remove them in the future and reuse them.
Someone can correct me if I am wrong, but I believe this tool is meant to measure the stretch of the bolt when it is torqued into the rod and the rod allows for it (S65 rods do not, rod bolt holes do not go all the way through. Also I don't think measuring the bolt for stretch after it is removed is going to be accurate.

I also don't believe it is possible to measure in an S65 without the rod removed from the block even if the rods allowed for it as they sit too far into the block unlike others which protrude below the block at BDC.
tdott wrote
Great points and very helpful tips!


Someone can correct me if I am wrong, but I believe this tool is meant to measure the stretch of the bolt when it is torqued into the rod and the rod allows for it (S65 rods do not, rod bolt holes do not go all the way through. Also I don't think measuring the bolt for stretch after it is removed is going to be accurate.

I also don't believe it is possible to measure in an S65 without the rod removed from the block even if the rods allowed for it as they sit too far into the block unlike others which protrude below the block at BDC.
For sure you can't measure the stretch after the bolt is removed, as these are not supposed to have plastic deformation. The bolts should measure the same before and after.

In my case, I am happy doing this job with a good torque wrench. The biggest question when you use torque is whether oil is on the threads, but as ARP gives you their own lube it's quite consistent.