

Several folks have asked me to post a pad replacement DIY, so here it is. Today was not the best day to do this--it was raining and I don't have a garage--but my schedule dictated it. I will only go over the front pads. The rears are very similar.
Follow this procedure at your own risk. Brakes are an important part of your M3's safety system, and if you don't feel comfortable to service them yourself, don't attempt this. This may or may not be the best way to replace pads. Also, make sure your car is jacked and supported properly and safely before removing the wheels.
What you need:
1. 7mm allen wrench (and an extender 5"-6" bar/tube that would slide over your wrench if it is short and won't give you much leverage)
2. A 8" c-clamp or a piston retraction tool
3. 2 sturdy screwdrivers
4. Something you can rest the caliper housing on (this will become clear after you read the procedure)
5. Replacement pads
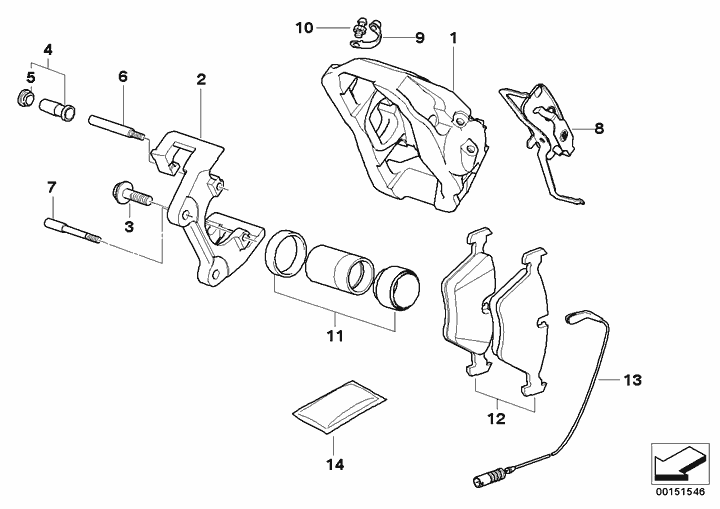
Here is the schematic for the front caliper assembly. What you will be doing is to unbolt the caliper housing (#1) so that you can remove and replace the pads. The caliper housing is bolted onto the carrier (#2) by two retaining bolts (#6 and #7).
STEP 1: Remove the pad wear sensor. It is clipped onto one of the brake pads. Just pull on it and it will come out. The chances are the tensioner clip will remain in the pad. Make sure to get it. They are not sold separately, and if you lose it, you'll need to buy a new sensor. Also, you can release the fluid line from the suspension to give yourself some more room.

STEP 2: Remove the large anti-rattle spring (#8). I use a couple of sturdy screw drivers to deflect and snap it out of place. Do not use your fingers; you'll get hurt. Also, there is a good chance the thing might come flying out, so don't be staring at it. Wear goggles if you are concerned.
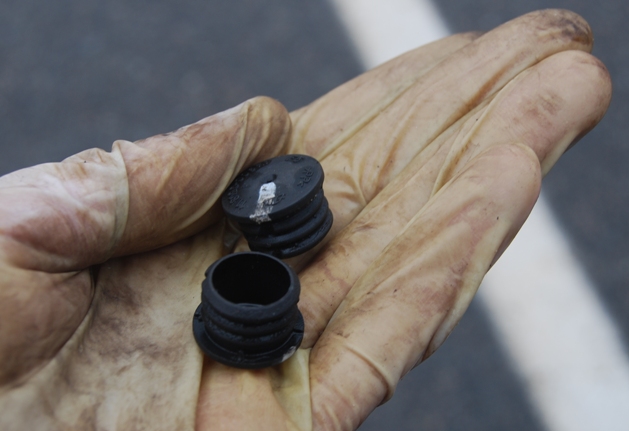
STEP 3: Remove the 2 plastic caps (#5) that are protecting the retaining bolts. You should be able to do this with your fingers. If you can't, use a screwdriver. The caps look like this:
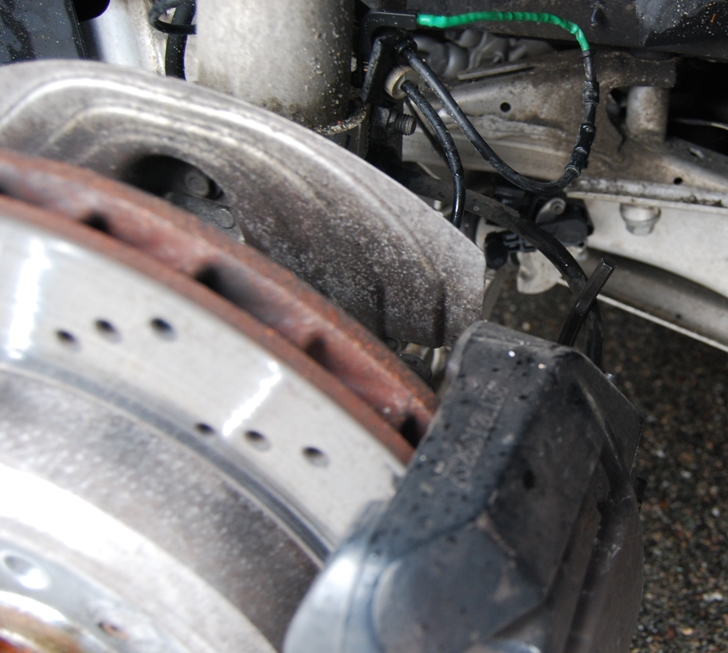
STEP 4: Now you have access to the retaining bolts. Insert the 7 mm allen wrench as seen in the pic below, and unbolt them.
A more detailed view on the wrench inserted in to the retaining bolt:
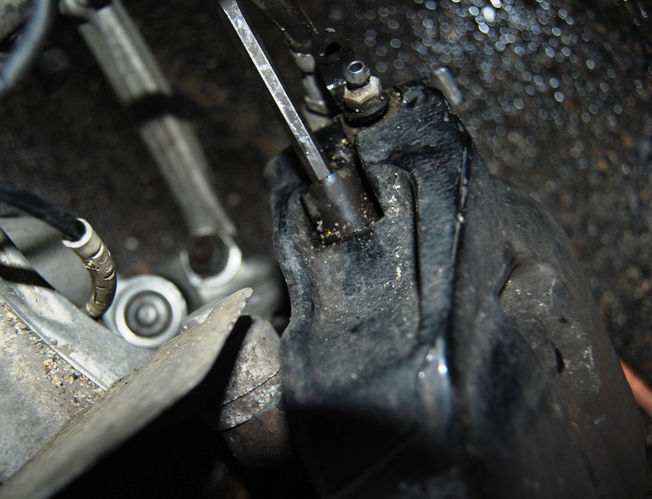
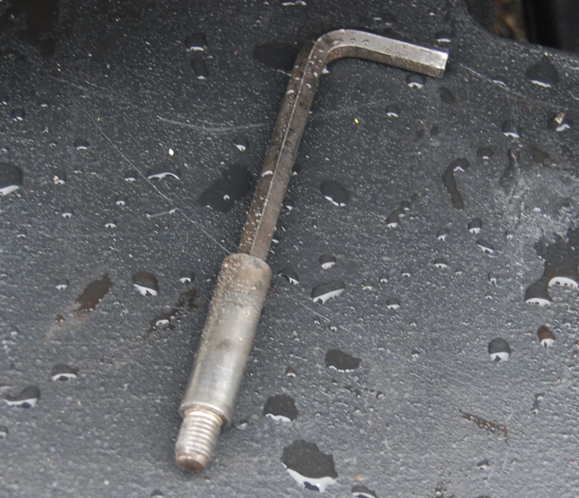
This is what the retaining bolt looks like if you were to slide it out of the caliper housing. You don't need to do that. You just need to unthread it.
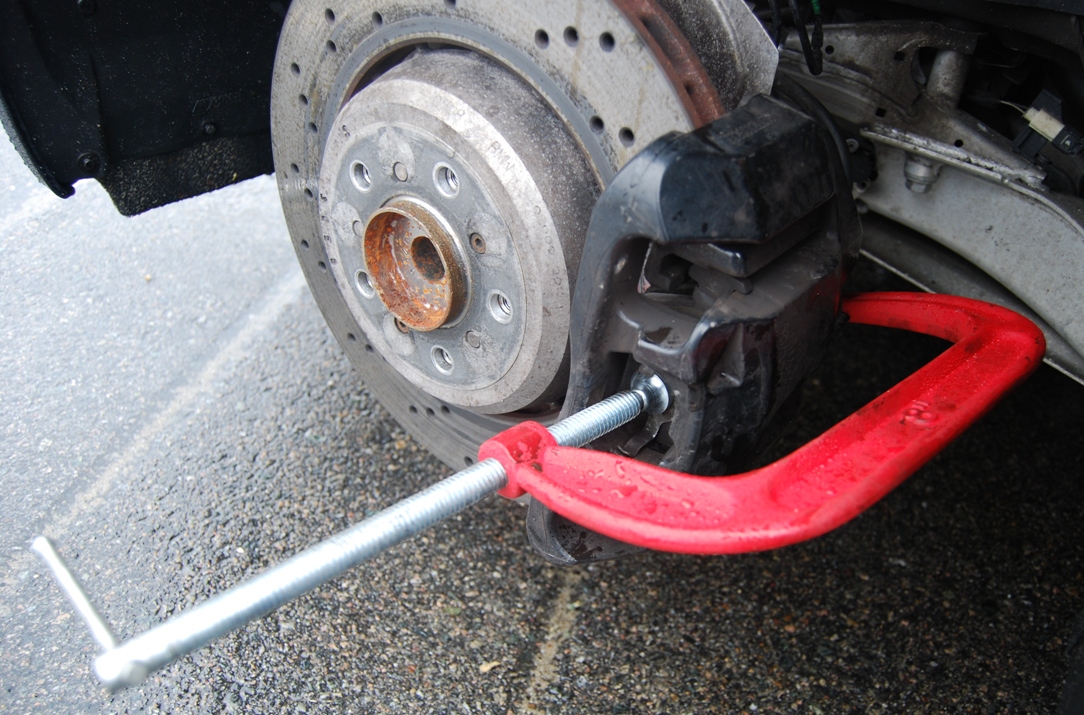
STEP 5: You now need to push the brake piston back. You can do this while the caliper is still on the rotor, or if you have a piston retractor tool, you can do it after you remove the caliper housing. I'll show you how to do it with a c-clamp while the caliper is still on the rotor. Place one end of the c-clamp onto the pad itself and the other end on the back of the caliper housing. Be careful not to place it on the bleeder valve or the fluid line or anything else that can be damaged. Find a spot on the cast housing itself as show in the pic. Slowly contract the c-clamp. You will see the caliper housing move away from the rotor and toward you as the piston goes back in. This should not require too much effort. If it does, you are doing something wrong. When the piston goes all the way back in, you'll feel a distinct change in resistance, so stop. Also, keep an eye on the brake fluid level in your reservoir. As you push the piston back, it will rise slightly and should not be allowed to overflow.
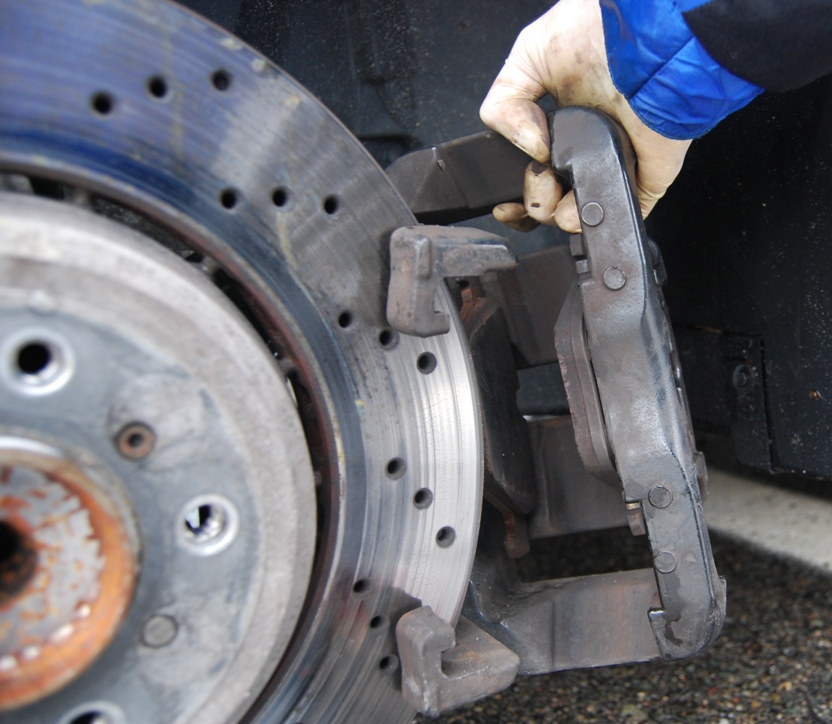
STEP 6: Grab the caliper housing and move it away from the rotor and the carrier. Be careful with the fluid line. Don't yank on it. Do not try to rest the caliper housing on the ground; you will stretch on the fluid line. You need to put something under it to support it as seen in the picture below. I was using my jack container.
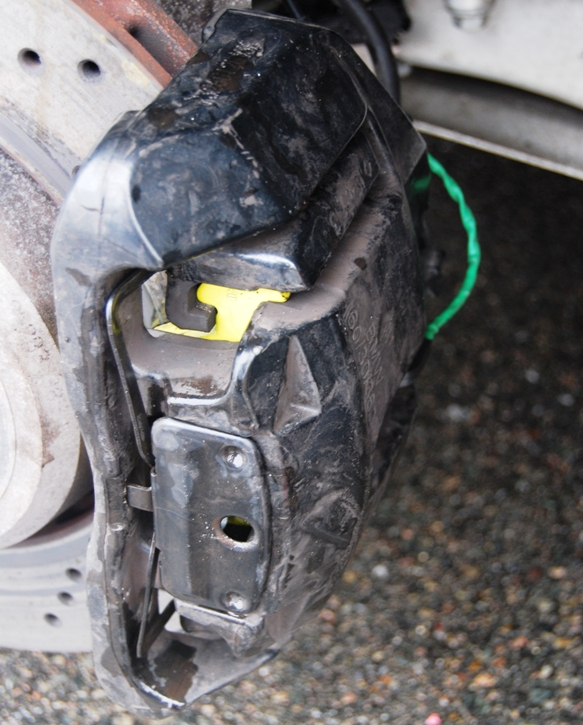
STEP 7: Remove the pads. They are held in the caliper and the piston by tensioner springs at this point and will come out when you pull on them. Here you can see the caliper housing with the piston pushed almost all the way back.

STEP 8: Clip the replacement pads into the piston and the caliper housing.

STEP 9: Place the caliper housing back on the carrier and the rotor. Insert and tighten the two retaining bolts. Do not over torque them. I don't have the exact torque spec. I just tried to remember how much of an effort it took to loosen them. It will be easier to do the bottom one first as the fluid line kind of gets in the way of the top one. You need to make sure the caliper housing is where it is supposed to be; one way to check that is to see if the pads are covering the entire swept area of the rotor. You might need to wiggle the caliper housing a little before the retainer bolts go in, but it's not hard to do.
STEP 10: Insert the anti-rattle spring back in place. Again, I use a couple of screw drivers to deform and push it in. Clip the brake wear sensor back into the inside pad.
It takes me about 15 minutes to do one corner including jacking the car and removing the wheel. If you have access to a lift, it will obviously be much faster.
Follow this procedure at your own risk. Brakes are an important part of your M3's safety system, and if you don't feel comfortable to service them yourself, don't attempt this. This may or may not be the best way to replace pads. Also, make sure your car is jacked and supported properly and safely before removing the wheels.
What you need:
1. 7mm allen wrench (and an extender 5"-6" bar/tube that would slide over your wrench if it is short and won't give you much leverage)
2. A 8" c-clamp or a piston retraction tool
3. 2 sturdy screwdrivers
4. Something you can rest the caliper housing on (this will become clear after you read the procedure)
5. Replacement pads
Here is the schematic for the front caliper assembly. What you will be doing is to unbolt the caliper housing (#1) so that you can remove and replace the pads. The caliper housing is bolted onto the carrier (#2) by two retaining bolts (#6 and #7).
STEP 1: Remove the pad wear sensor. It is clipped onto one of the brake pads. Just pull on it and it will come out. The chances are the tensioner clip will remain in the pad. Make sure to get it. They are not sold separately, and if you lose it, you'll need to buy a new sensor. Also, you can release the fluid line from the suspension to give yourself some more room.
STEP 2: Remove the large anti-rattle spring (#8). I use a couple of sturdy screw drivers to deflect and snap it out of place. Do not use your fingers; you'll get hurt. Also, there is a good chance the thing might come flying out, so don't be staring at it. Wear goggles if you are concerned.
STEP 3: Remove the 2 plastic caps (#5) that are protecting the retaining bolts. You should be able to do this with your fingers. If you can't, use a screwdriver. The caps look like this:
STEP 4: Now you have access to the retaining bolts. Insert the 7 mm allen wrench as seen in the pic below, and unbolt them.
A more detailed view on the wrench inserted in to the retaining bolt:
This is what the retaining bolt looks like if you were to slide it out of the caliper housing. You don't need to do that. You just need to unthread it.
STEP 5: You now need to push the brake piston back. You can do this while the caliper is still on the rotor, or if you have a piston retractor tool, you can do it after you remove the caliper housing. I'll show you how to do it with a c-clamp while the caliper is still on the rotor. Place one end of the c-clamp onto the pad itself and the other end on the back of the caliper housing. Be careful not to place it on the bleeder valve or the fluid line or anything else that can be damaged. Find a spot on the cast housing itself as show in the pic. Slowly contract the c-clamp. You will see the caliper housing move away from the rotor and toward you as the piston goes back in. This should not require too much effort. If it does, you are doing something wrong. When the piston goes all the way back in, you'll feel a distinct change in resistance, so stop. Also, keep an eye on the brake fluid level in your reservoir. As you push the piston back, it will rise slightly and should not be allowed to overflow.
STEP 6: Grab the caliper housing and move it away from the rotor and the carrier. Be careful with the fluid line. Don't yank on it. Do not try to rest the caliper housing on the ground; you will stretch on the fluid line. You need to put something under it to support it as seen in the picture below. I was using my jack container.
STEP 7: Remove the pads. They are held in the caliper and the piston by tensioner springs at this point and will come out when you pull on them. Here you can see the caliper housing with the piston pushed almost all the way back.
STEP 8: Clip the replacement pads into the piston and the caliper housing.
STEP 9: Place the caliper housing back on the carrier and the rotor. Insert and tighten the two retaining bolts. Do not over torque them. I don't have the exact torque spec. I just tried to remember how much of an effort it took to loosen them. It will be easier to do the bottom one first as the fluid line kind of gets in the way of the top one. You need to make sure the caliper housing is where it is supposed to be; one way to check that is to see if the pads are covering the entire swept area of the rotor. You might need to wiggle the caliper housing a little before the retainer bolts go in, but it's not hard to do.
STEP 10: Insert the anti-rattle spring back in place. Again, I use a couple of screw drivers to deform and push it in. Clip the brake wear sensor back into the inside pad.
It takes me about 15 minutes to do one corner including jacking the car and removing the wheel. If you have access to a lift, it will obviously be much faster.
 . Again, I don't care because will never track my car, and brakes feel fantastic to me, but BMW needs to up the ante with the calipers, especially on an M car. Even the 135 has sexy 6-piston calipers in front (2-piston in the back). Good day gang.
