

This was relatively easy job...but just takes time. Setup, tools, removing parts, etc.
*Jack up the vehicle and remove both front wheels
*Remove tie rods from steering knuckles
*Remove air box assembly, radiator fan
*Gain access to power steering cooler -- remove and drain into suitable drain-pan (might as well get as most old fluid out)
*Take cap off of power steering reservoir -- find a way to "suck out" all fluid in reservoir (mine was completely dark)
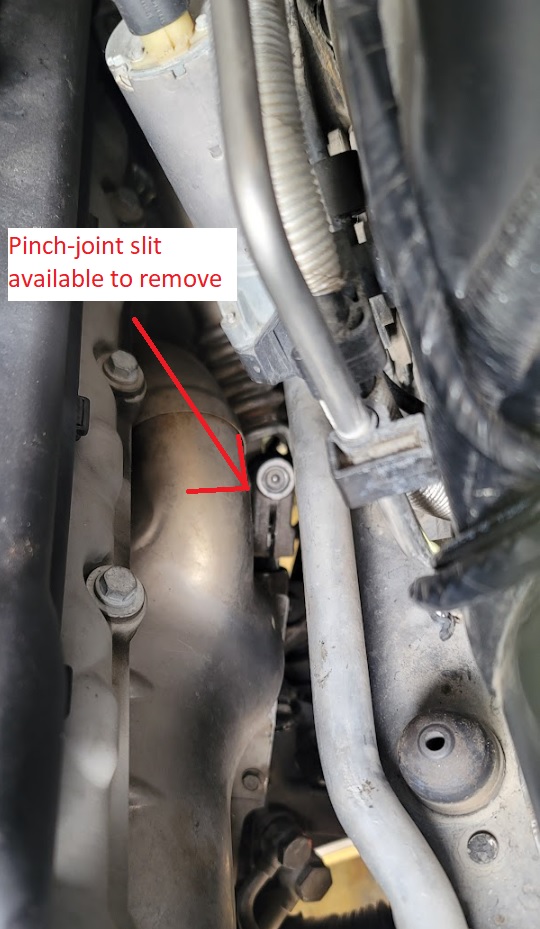
*Find the location of the upper pinch bolt for the steering shaft -- attempt to mark accordingly with paint pen
*Move the steering shaft around to gain access to the E10 bolt so that the "slit" is towards the top -- use screwdriver to help "pry" open the pinch bolt
*Go inside car and wrap seatbelt around steering wheel as to NOT MOVE CLOCKSPRING OUT OF LOCATION
*Note the orientation of the rack (wheels slightly left or right...whichever)
*Release hard-lines on the rack itself -- note the aluminum sealing washers on both ends of banjo bolt -- get drain pan
*Release two E12 bolts with 16mm nut on lower subframe
*Try and move rack around and get joint removed by steering shaft shifting "upward"
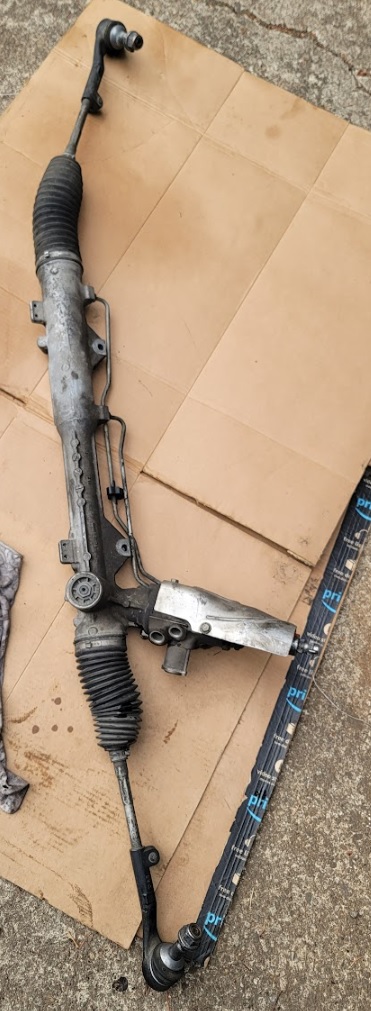
*Get rack out
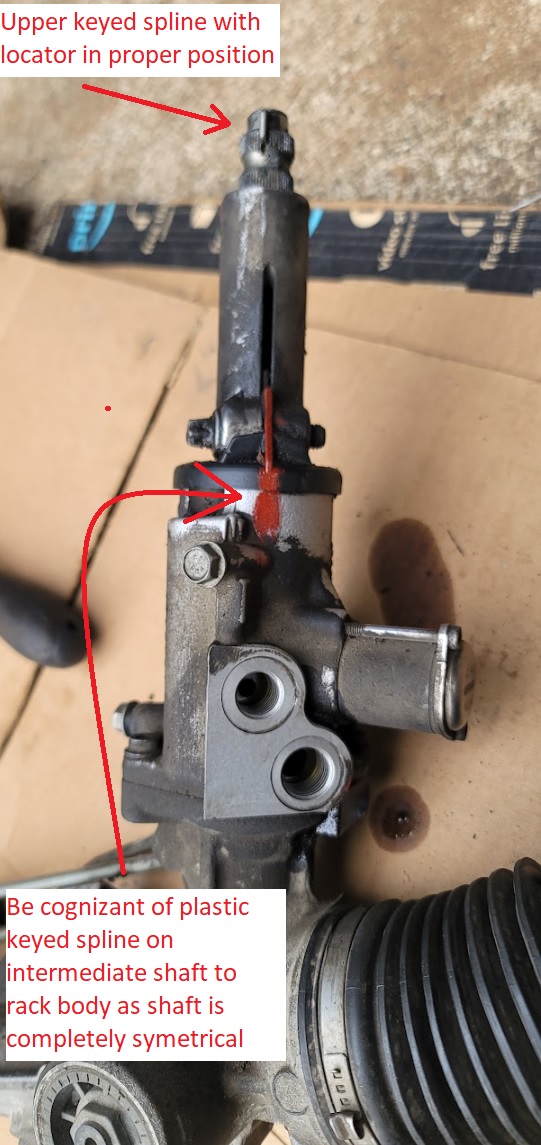
Now you can operate on the rack. Do take care of the position the pinion is in relative to the body! I paint pen this. It's imperative to have the rack go back into the relatively same position. Being off a spline-tooth of two isn't TOO big of a deal, BUT the joint is supposed to be keyed.
*Clean rack as best as you can externally
*Remove two 10mm bolts that hold on heat-shield
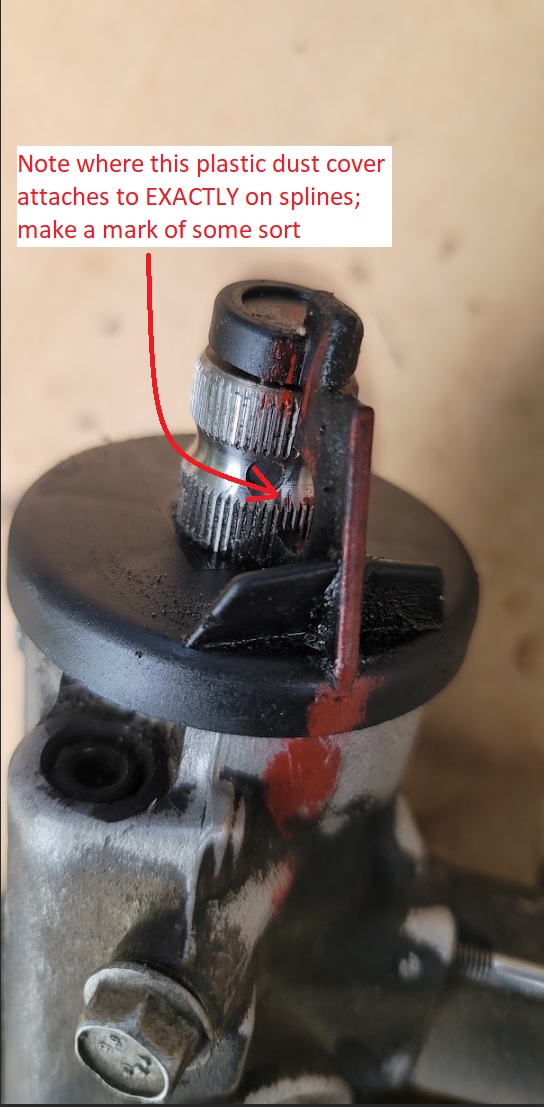
*Remove the intermediate shaft -- DO NOTE the orientation of the intermediate shaft to the splines on the rack pinion--this is NOT keyed except by the plastic cover
*Loosen the TORX that holds on the hard-lines to the rack body -- move them out of the way
*Loosen the Allen bolts that hold on the main body
*CAREFULLY remove the pinion body upwards taking care of the *PLASTIC* keyed dust cover -- make sure to note this orientation on the splines!
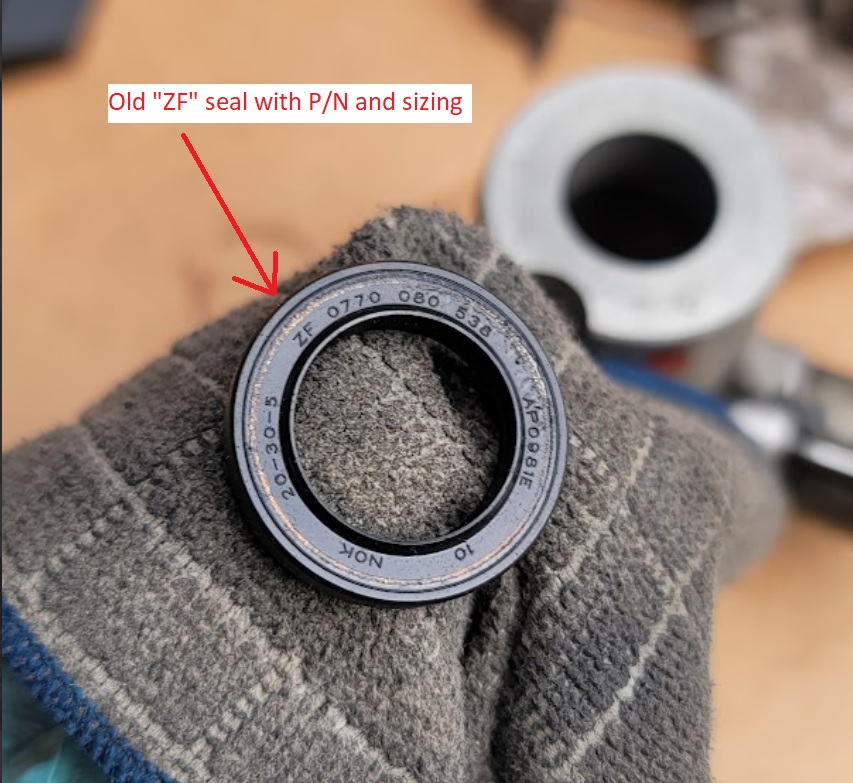
*Slide out of the body and note the offending, leaking seal
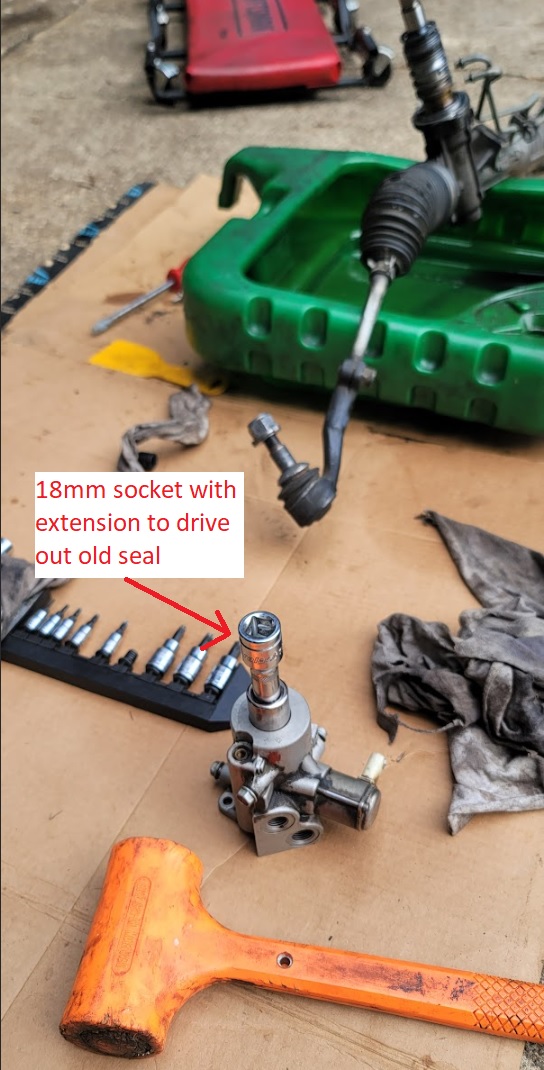
*Get a 18mm socket with extension and place the rack body on something soft -- use a deadblow and lightly tap out old seal
*Get a beer and crack open -- hum&haw about how this seal caused so much grief
*Clean the rack body internal (wipe down) and inspect the sealing surface on the input pinion
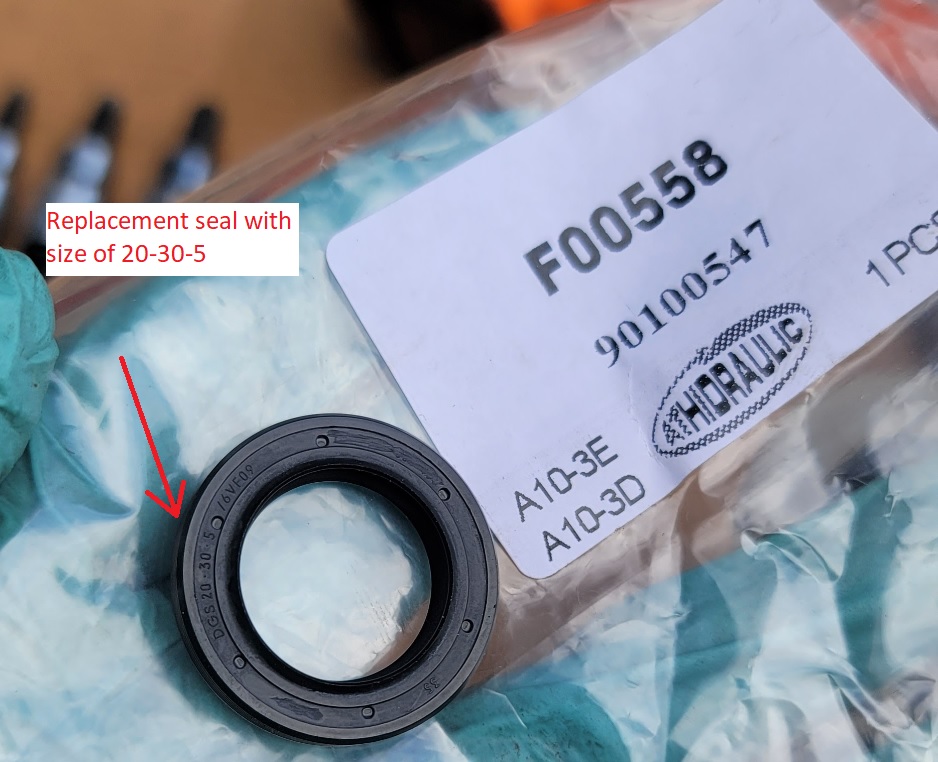
*Get a 7/8 socket and turn around with an extension opposite to use as a driving force for new seal -- PERHAPS lube the seal with grease to help aid with installation of pinion
*CAREFULLY place the body back on the input pinion -- tighten the two Allen fasteners along with TORX for the hard-lines
*THEN take the plastic keyed spline dust-cover and place in same exact position on pinion splines
*Then take intermediate shaft and place back on rack with tightening the pinion E10
*Reinstall heatshield
*Installation is about the same as the reverse of removal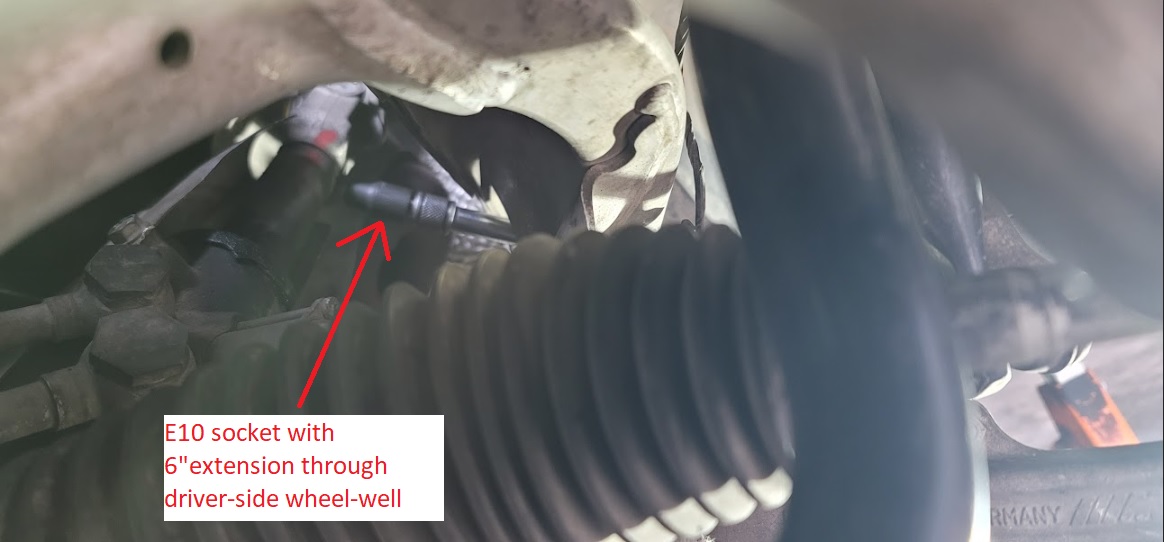
*Jack up the vehicle and remove both front wheels
*Remove tie rods from steering knuckles
*Remove air box assembly, radiator fan
*Gain access to power steering cooler -- remove and drain into suitable drain-pan (might as well get as most old fluid out)
*Take cap off of power steering reservoir -- find a way to "suck out" all fluid in reservoir (mine was completely dark)
*Find the location of the upper pinch bolt for the steering shaft -- attempt to mark accordingly with paint pen
*Move the steering shaft around to gain access to the E10 bolt so that the "slit" is towards the top -- use screwdriver to help "pry" open the pinch bolt
*Go inside car and wrap seatbelt around steering wheel as to NOT MOVE CLOCKSPRING OUT OF LOCATION
*Note the orientation of the rack (wheels slightly left or right...whichever)
*Release hard-lines on the rack itself -- note the aluminum sealing washers on both ends of banjo bolt -- get drain pan
*Release two E12 bolts with 16mm nut on lower subframe
*Try and move rack around and get joint removed by steering shaft shifting "upward"
*Get rack out
Now you can operate on the rack. Do take care of the position the pinion is in relative to the body! I paint pen this. It's imperative to have the rack go back into the relatively same position. Being off a spline-tooth of two isn't TOO big of a deal, BUT the joint is supposed to be keyed.
*Clean rack as best as you can externally
*Remove two 10mm bolts that hold on heat-shield
*Remove the intermediate shaft -- DO NOTE the orientation of the intermediate shaft to the splines on the rack pinion--this is NOT keyed except by the plastic cover
*Loosen the TORX that holds on the hard-lines to the rack body -- move them out of the way
*Loosen the Allen bolts that hold on the main body
*CAREFULLY remove the pinion body upwards taking care of the *PLASTIC* keyed dust cover -- make sure to note this orientation on the splines!
*Slide out of the body and note the offending, leaking seal
*Get a 18mm socket with extension and place the rack body on something soft -- use a deadblow and lightly tap out old seal
*Get a beer and crack open -- hum&haw about how this seal caused so much grief
*Clean the rack body internal (wipe down) and inspect the sealing surface on the input pinion
*Get a 7/8 socket and turn around with an extension opposite to use as a driving force for new seal -- PERHAPS lube the seal with grease to help aid with installation of pinion
*CAREFULLY place the body back on the input pinion -- tighten the two Allen fasteners along with TORX for the hard-lines
*THEN take the plastic keyed spline dust-cover and place in same exact position on pinion splines
*Then take intermediate shaft and place back on rack with tightening the pinion E10
*Reinstall heatshield
*Installation is about the same as the reverse of removal

