
5KVIEWS
10REPLIES
1APPRECIATES
07-18-2026LAST POST
Hey folks,

I have to remove my front bumper in order to get up my ramps to do oil changes. Well the fender guides for the (2) screws that hold front bumper to fender are a lil worn and stripped. These two left and right guides are part #'s 51117900761 & 51117900762. It appears they just slide in and click but I am having a hard time removing them. Must I remove the fenders to replace? Picture attached of passenger guide, drivers is a an exact same 180 degrees from other.

PS:I hope it doesn't have to slide towards the middle of car to come out because that means I have to remove fender.
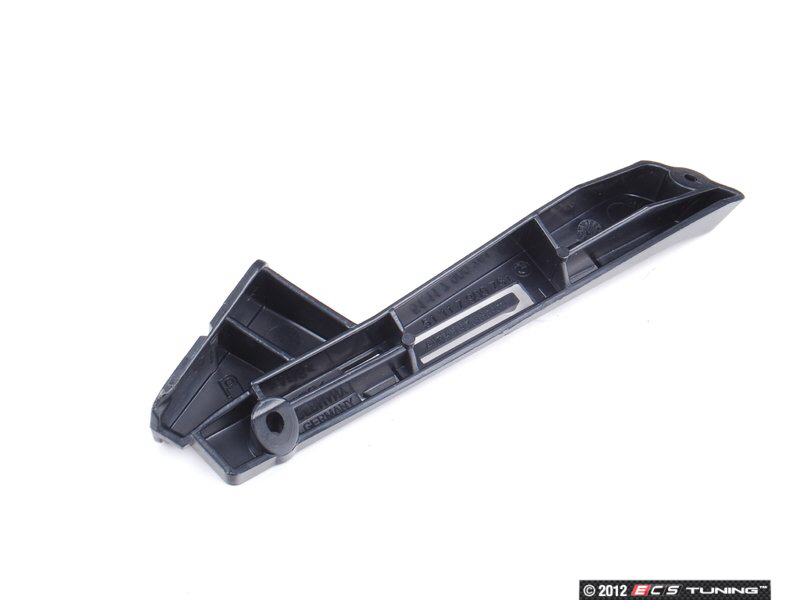

Attached image
bump im having the same issue. help anyone>
You don't have to remove the fenders. They slide into place. I've replaced these on both sides. Just take your time. Get a flashlight and play with it.
Angr2387 wrote
bump im having the same issue. help anyone>
Yeah this is an old thread. Like the person above said......they slide out. Remove the inner wheel arch and the two screws joining the bumper to fender. It slides two ways....once front to back on the chassis and again outside to inside on fender if that makes sense. No other screws. There is a little plastic catch to push up during second (out to in) push.
Hey Scrippy,
this makes me think of a slight missalignment between my RR bumber/fender (bumber stick out a tad). Always thought I had to take bumper off so nah, do you believe its doable same as on the front?

Cheers
Thanks i figure it out on my own just like u said .
Helmsman wrote
Hey Scrippy,
this makes me think of a slight missalignment between my RR bumber/fender (bumber stick out a tad). Always thought I had to take bumper off so nah, do you believe its doable same as on the front?

Cheers
The back bumper has clips and a few screws. You can remove the screw at the end close to wheel and re align. I had my bumper repainted a bunch of times. One of the times they left a crappy gap and I adjusted it myself. Loosen that screw that joins them....move fender to the perfect gap and re tighten screw.
Scrippy wrote
The back bumper has clips and a few screws. You can remove the screw at the end close to wheel and re align. I had my bumper repainted a bunch of times. One of the times they left a crappy gap and I adjusted it myself. Loosen that screw that joins them....move fender to the perfect gap and re tighten screw.
That easy?? Thanks mate!
Ps. Yeah I know, very easy to find reasons to be lazy, but you just sorted me out...
Ps. Ps. No flying bottles and new resprays lately I hope..?
Helmsman wrote
Scrippy wrote
The back bumper has clips and a few screws. You can remove the screw at the end close to wheel and re align. I had my bumper repainted a bunch of times. One of the times they left a crappy gap and I adjusted it myself. Loosen that screw that joins them....move fender to the perfect gap and re tighten screw.
That easy?? Thanks mate!
Ps. Yeah I know, very easy to find reasons to be lazy, but you just sorted me out...
Ps. Ps. No flying bottles and new resprays lately I hope..?
Lol, no I stopped using my car at work. SF is a steaming pile of shit and that isn't changing for at least 5 years of reform. LA is nipping at the heals of SF there too. I only drive my M on Fridays and personal time now. Honestly taking the body panels off isn't hard. A few screws and a bunch of snaps. I usually do a gap check yearly on everything. I purchased all the clips for the bumper and side running boards, so I can replace one if I break one. Realoem.com is your friend for diagrams of EVERYTHING on our cars. Then take the part number to your favorite vendor. Hit me up for anything, if I know I'll help.
Hey guys sorry to revive this old thread, which part do i need for the passenger side?
interlagosbluee92 wrote
Hey guys sorry to revive this old thread, which part do i need for the passenger side?
I’d rather teach you to fish rather than give you a fish. Go to realoem.com and search by your last 7 of your VIN. Click “browse parts” and then select “vehicle trim” and then “M Trim Front”. Part numbers are 51117900761 & 51117900762 for #3 in the diagram. I’m pretty sure it’s the one ending in 2 (right)