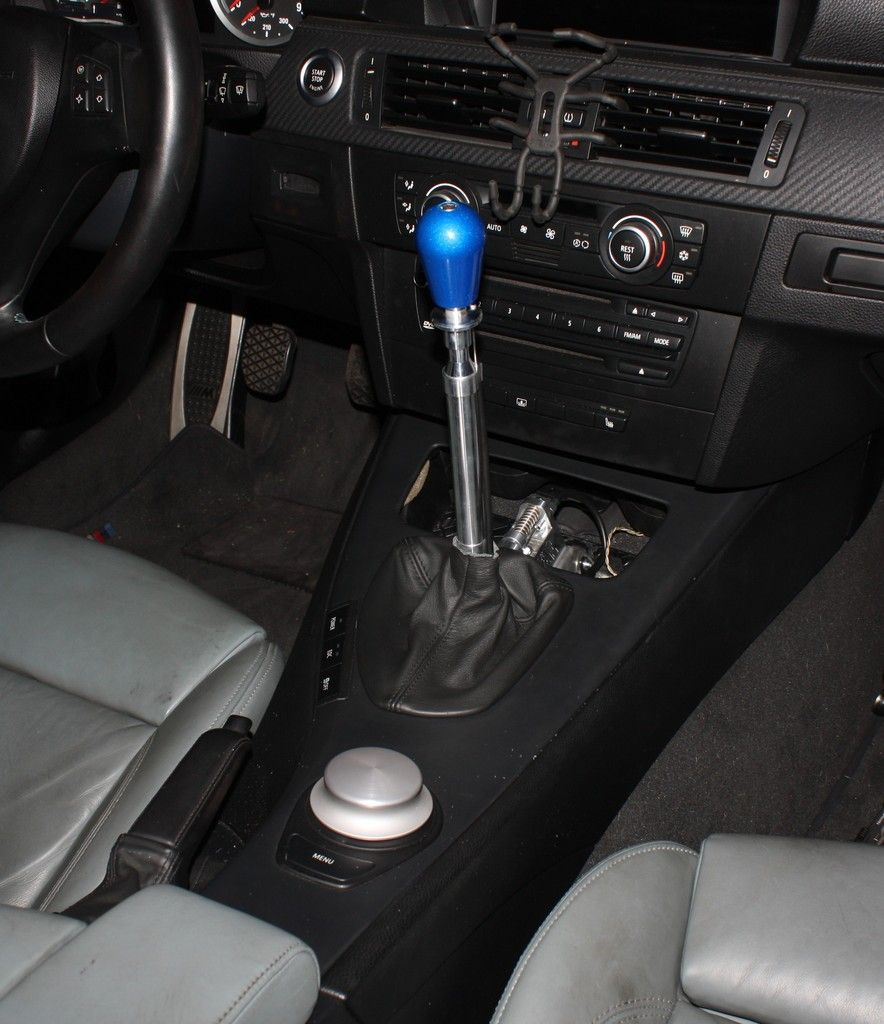
So I want to start off by saying that it was easier to install my ESS supercharger kit than this beautifully built shifter, mostly because I had to do everything by myself. I am by no means an expert or certified in any way. DO THIS AT YOUR OWN RISK. I AM NOT RESPONSIBLE FOR EXTRA PARTS, BROKEN PARTS, OR BROKEN FEELINGS.
I love learning so I decided to knock this out solo, and share my experience with you guys. The lack of DIYs for this install was what stopped me from purchasing one of these a long time ago. I finally took the plunge and I couldn't be happier. I am also installing a DSSR instead of the OEM linkage, I didn't test it but I'm positive the OEM linkage will fit.
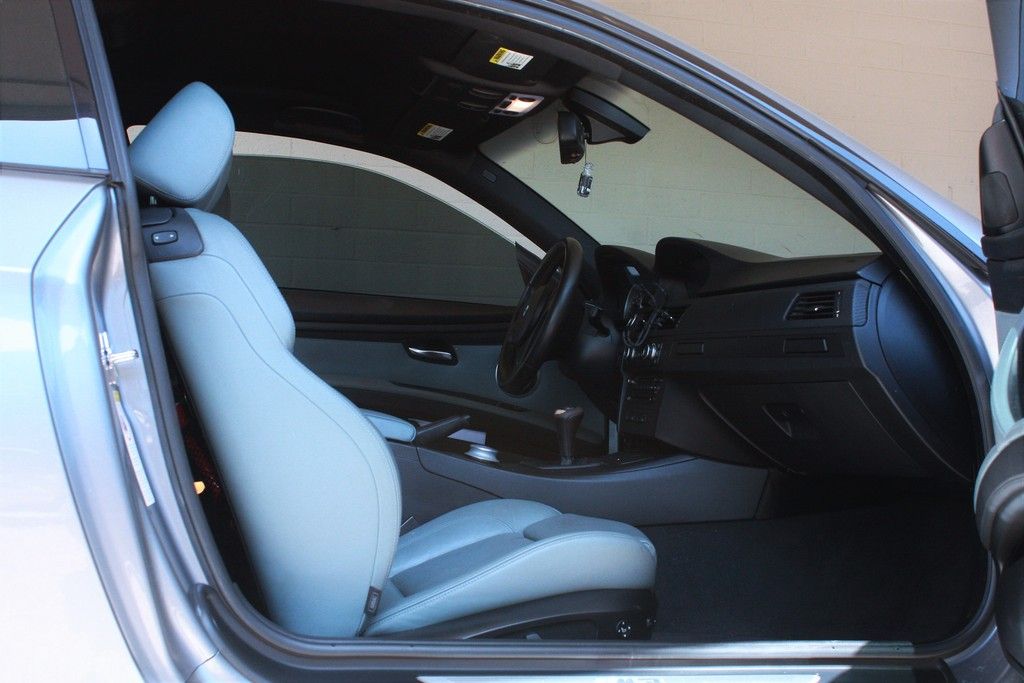
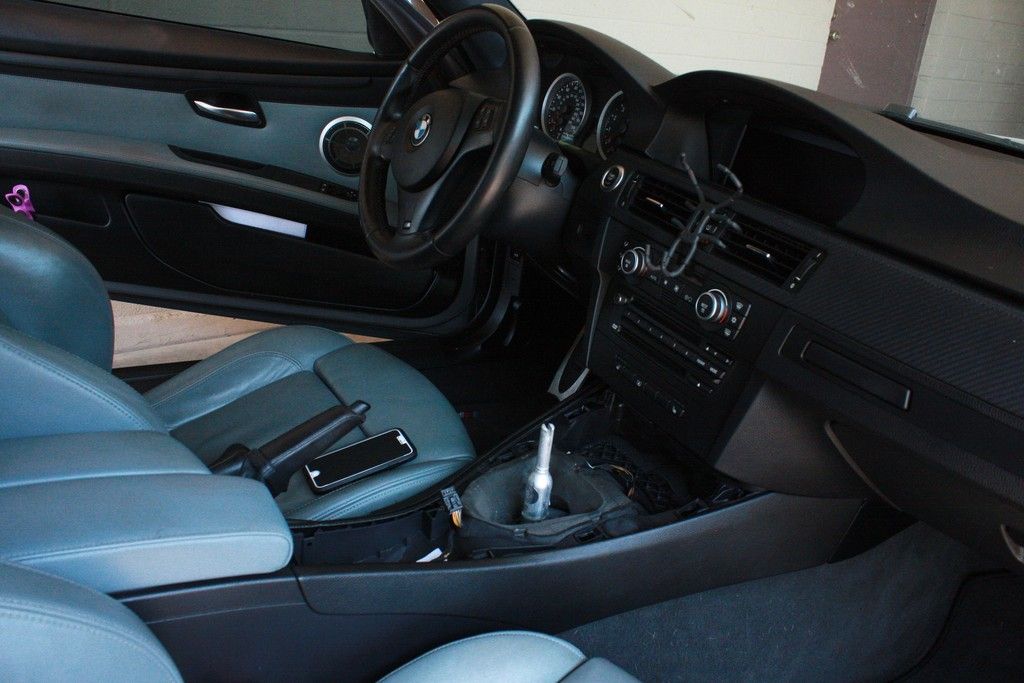
The "Before"
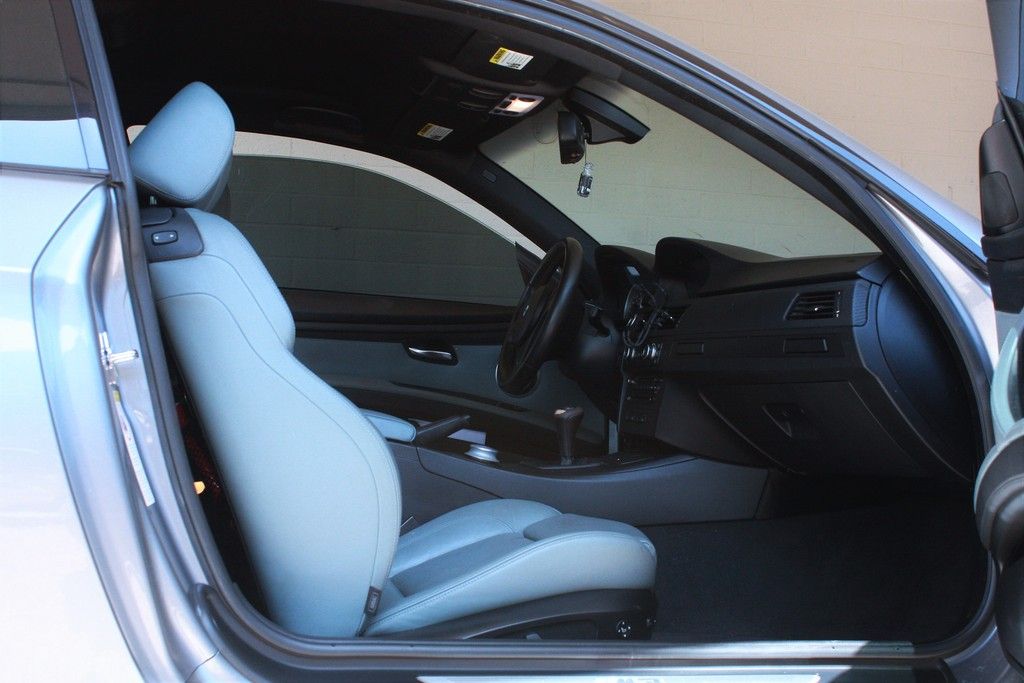
HERE WE GO
Big BIG thanks to: wrh3 his DIY for a UUC SSK helped me a lot to get down to the shifter carrier. Link to his DIY http://www.billswebspace.com/M3UUCEvo3DIY.htm
You can follow majority of his steps all the way until he takes apart the shifter from the shifter carrier. He used two screwdrivers, spinning the locking mechanism clockwise. BUTTT remove your exhaust and heat shields, you are going to want all the space to do this.
All the foam and rubber shift boots will be discarded. You will also need to trim the foam that is in the car, and cut some of the plastic off. I used a cordless dremel to do the cutting and sanding. I'll show what I did in later posts.
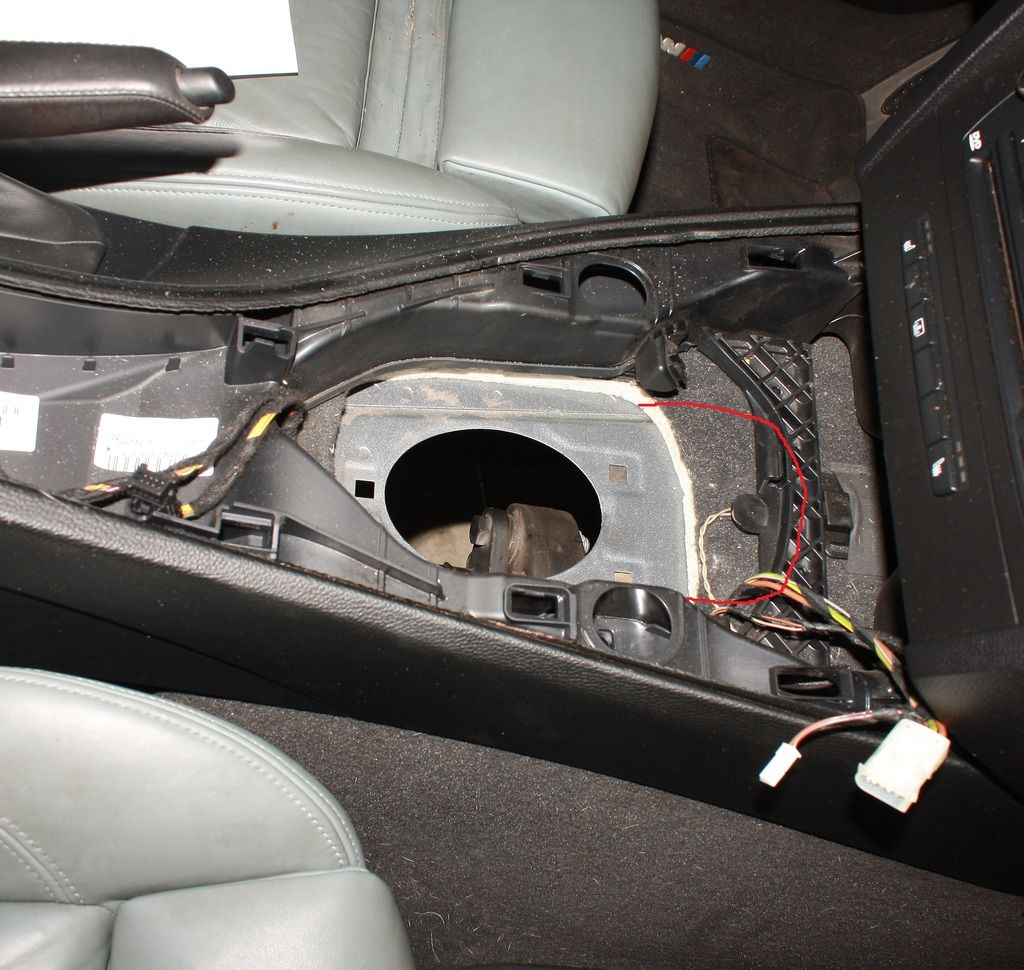
For this install you will have to remove the center console cover (the instructions call for the removal of the whole center console but I couldn't find a DIY, and couldn't figure it out, so I left it on. Which to me it turned out for the better because it eliminated the guessing when it came to the cutting and trimming.
The cover is held on by a few pressure clips so it just pulls straight up with some pressure. I started from the front and moved back.
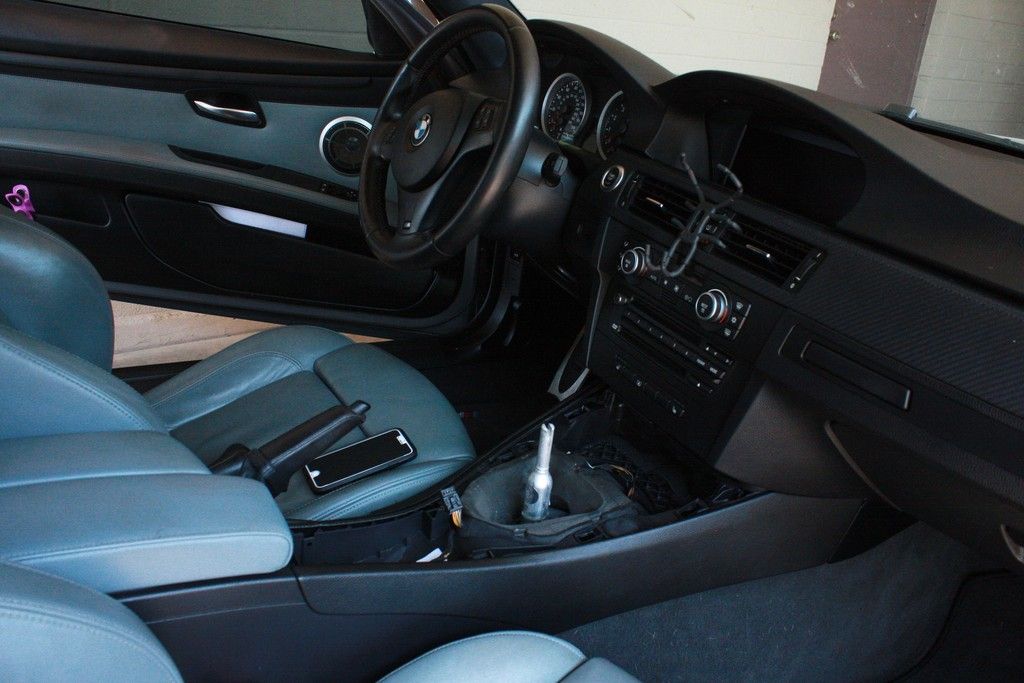
There's also two bolts I decided to remove that holds the center console down. it gives a little bit of extra "leg room" to work with.
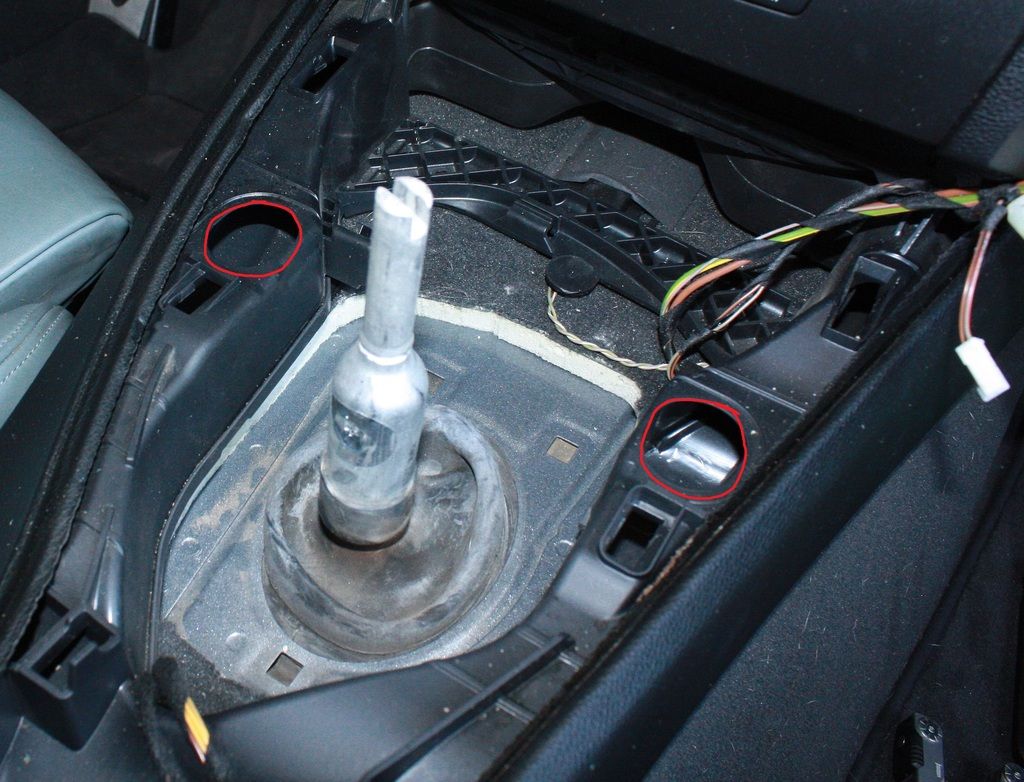
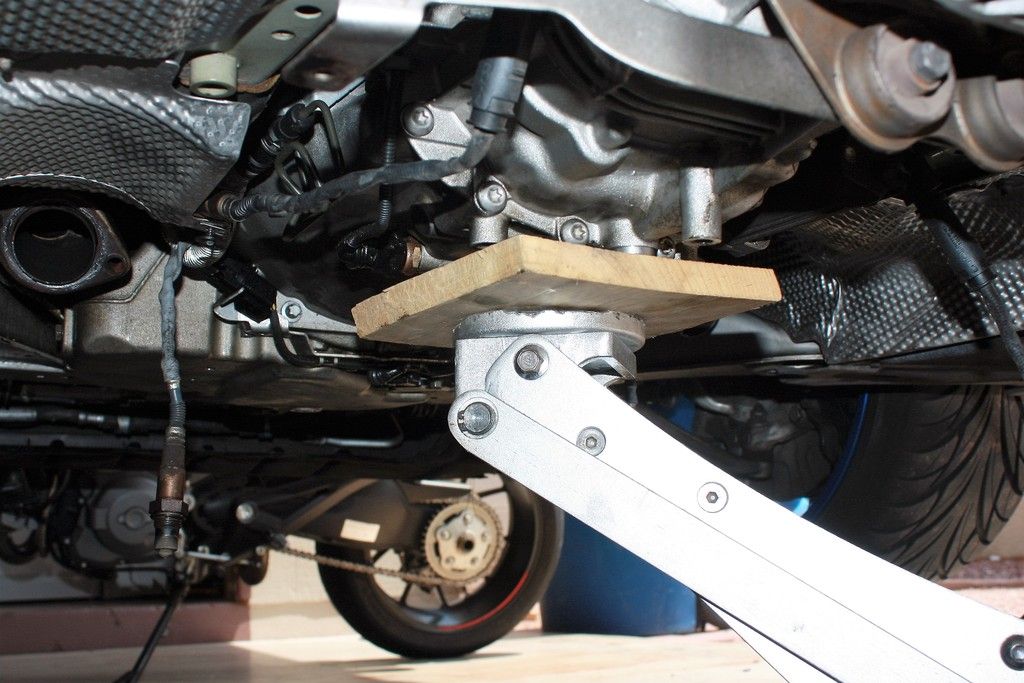
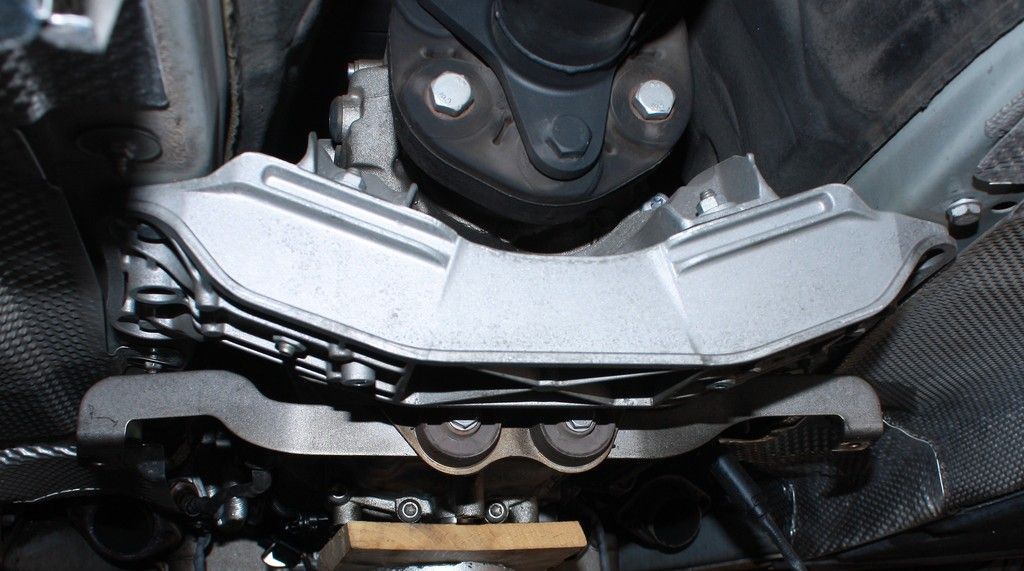
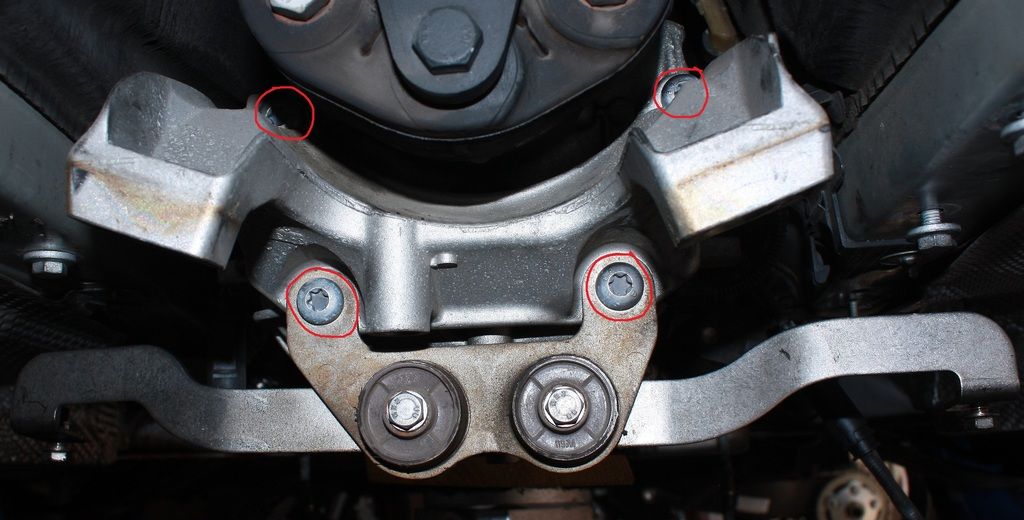
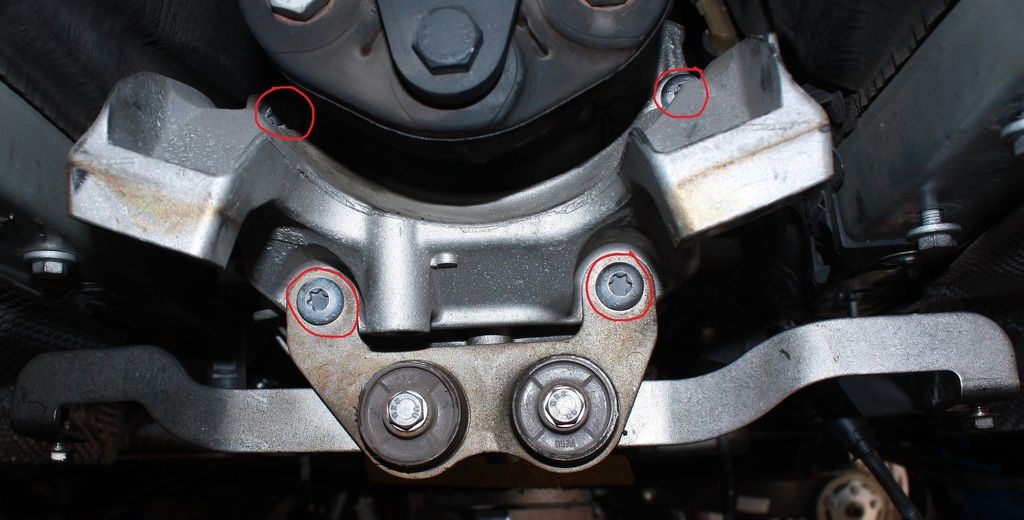
Back to the bottom of the car; first you have to support the transmission with a transmission jack if you have one. I didn't, so I used a piece of wood with my regular jack. Once supported you will need to remove the transmission cross member and exhaust hanger that is bolted to the transmission with torx bolts.

Transmission cross member
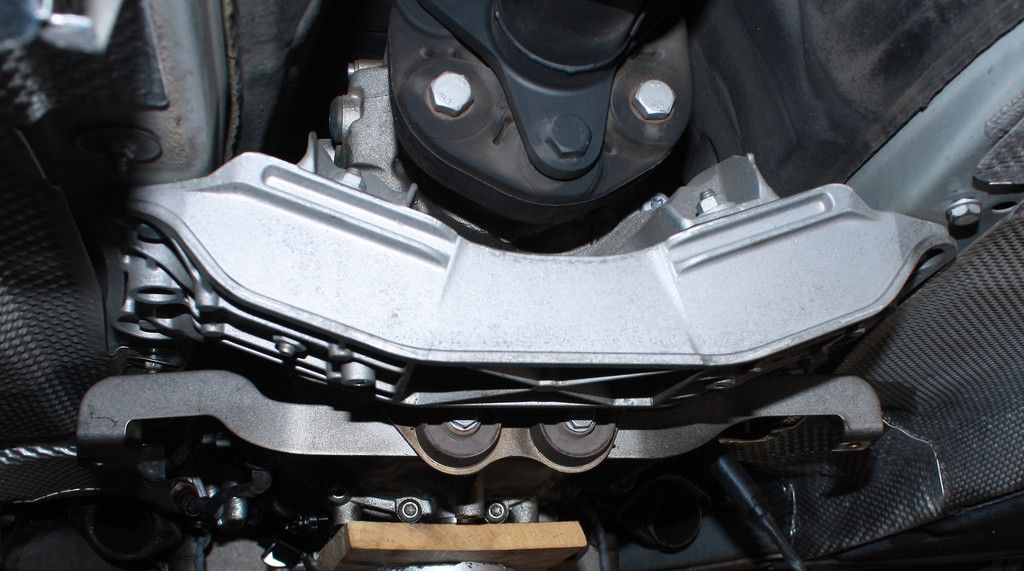
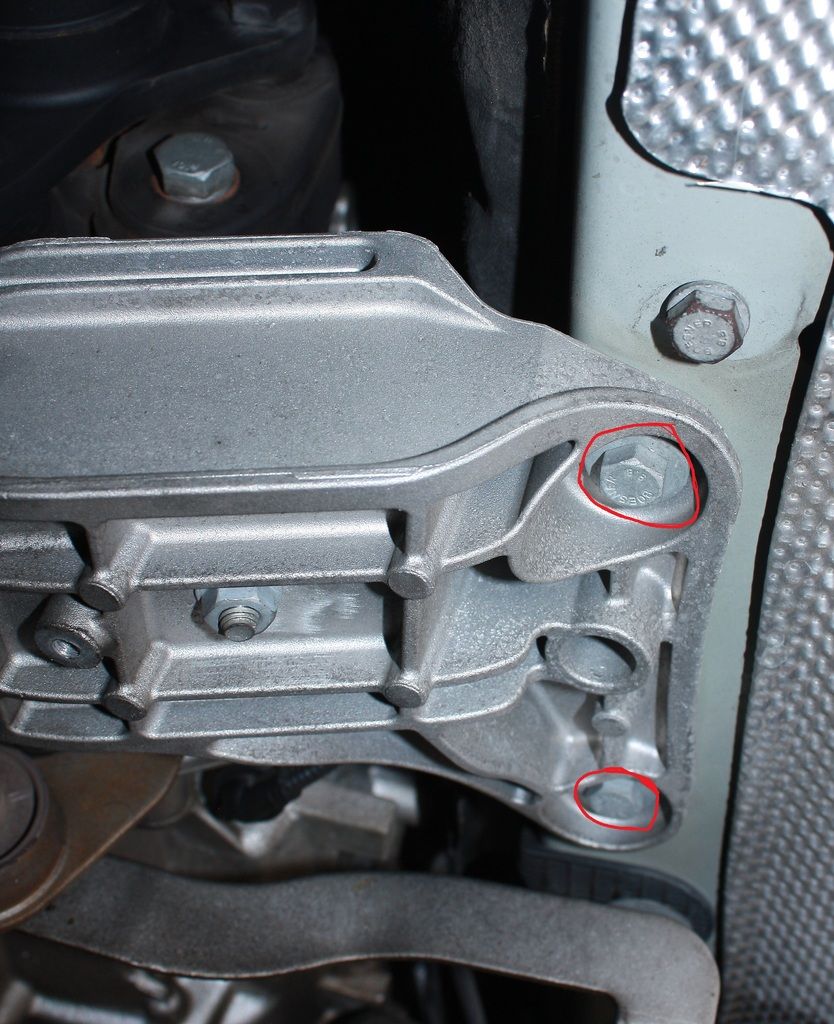
Two bolts on the right bolted to the frame
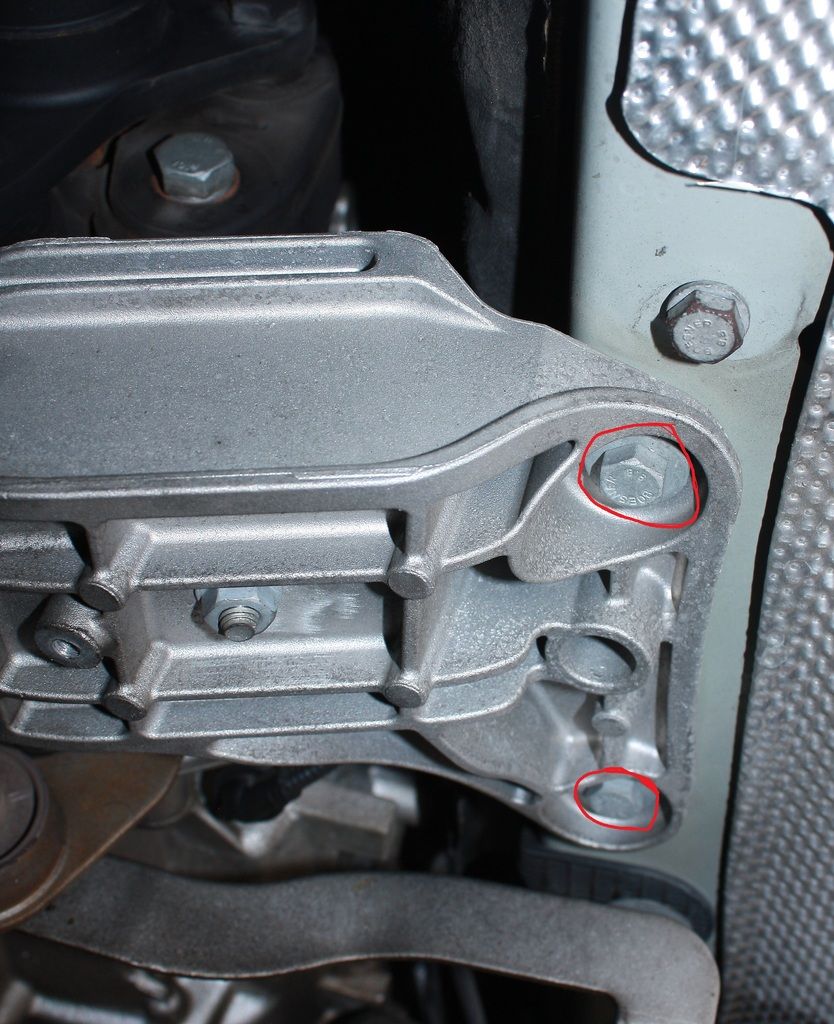
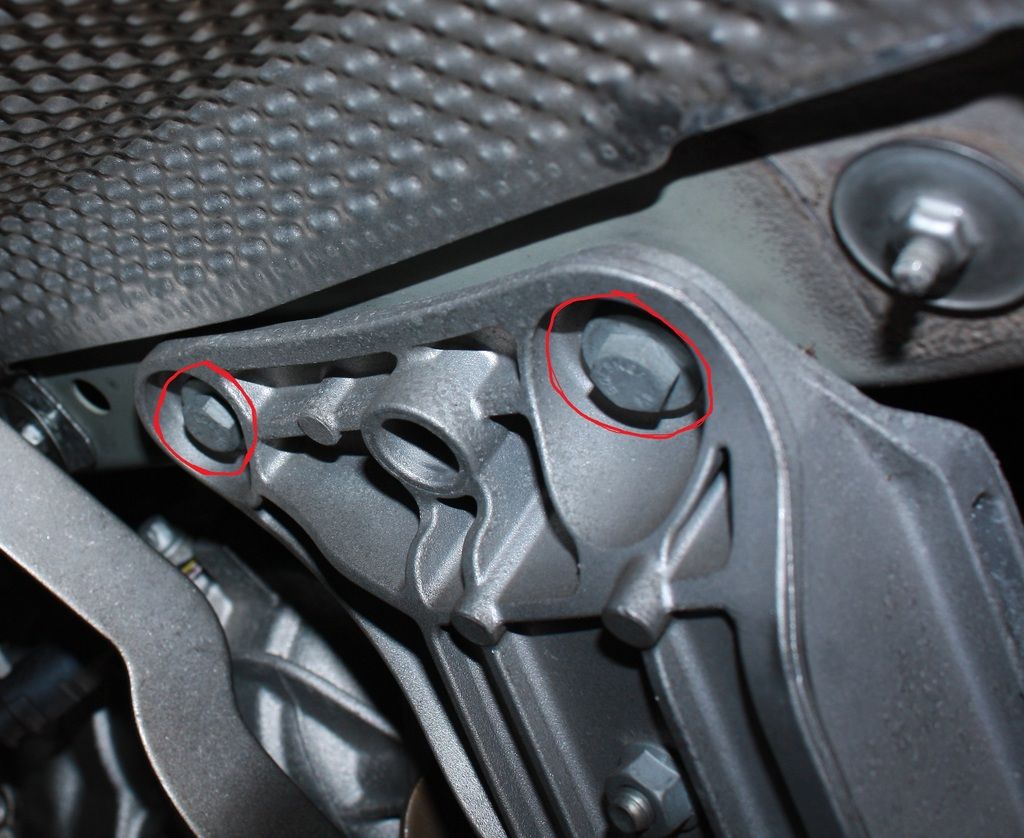
Two bolts on the left bolted to the frame
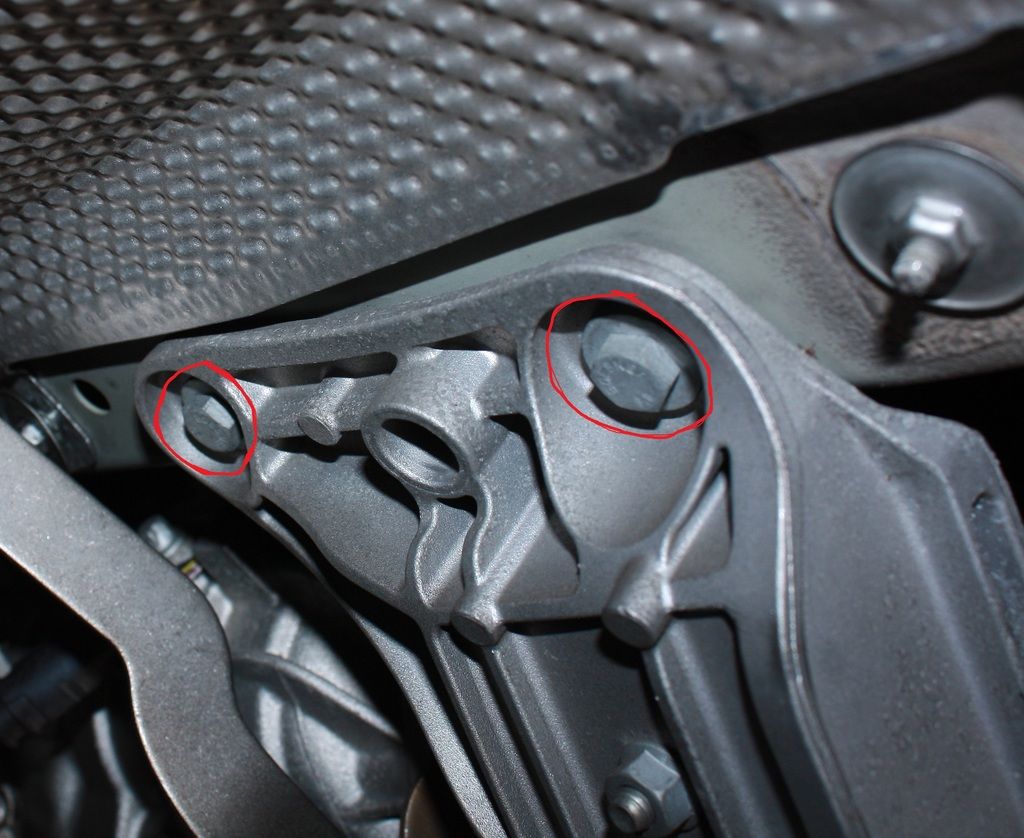
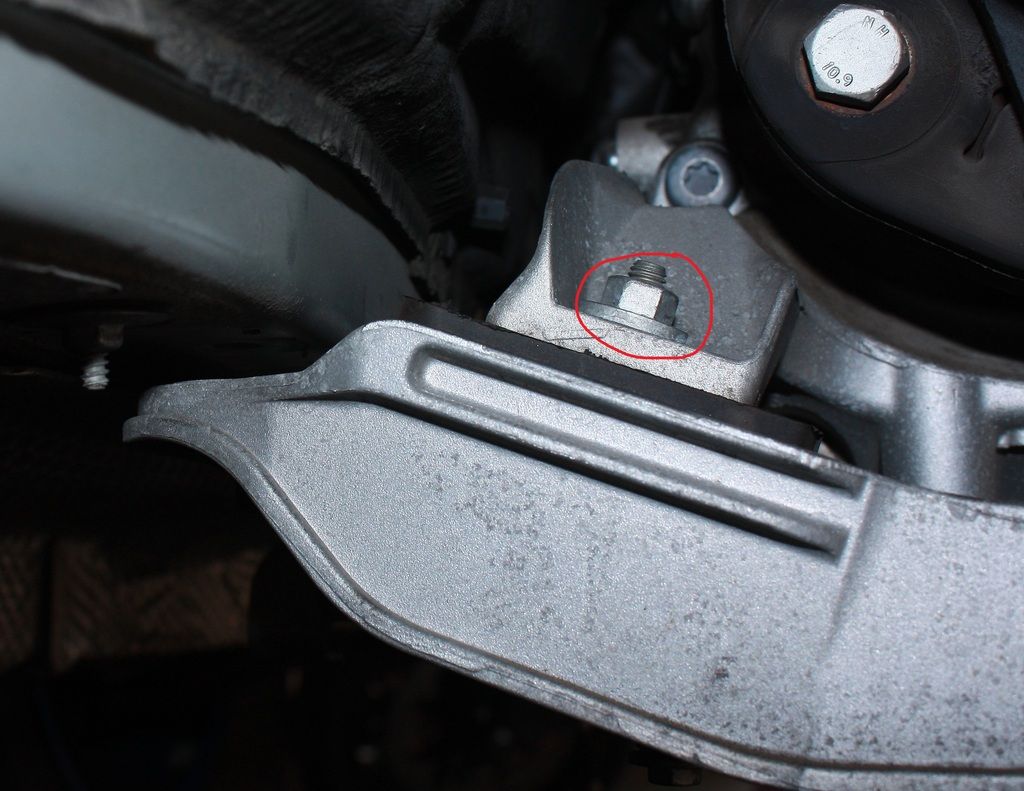
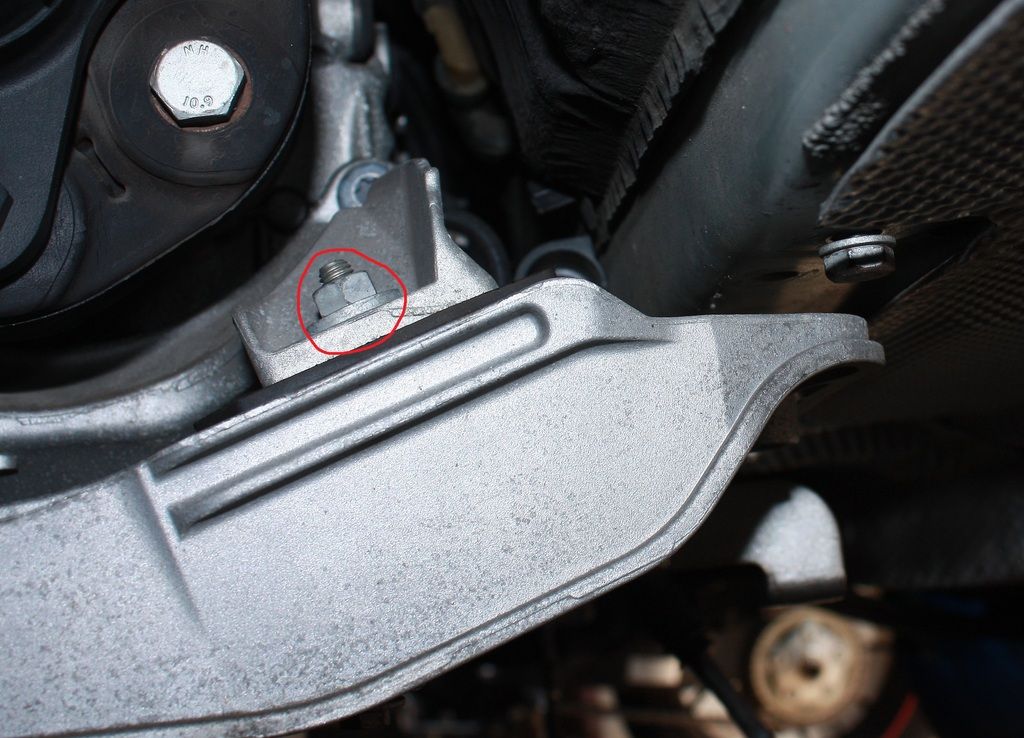
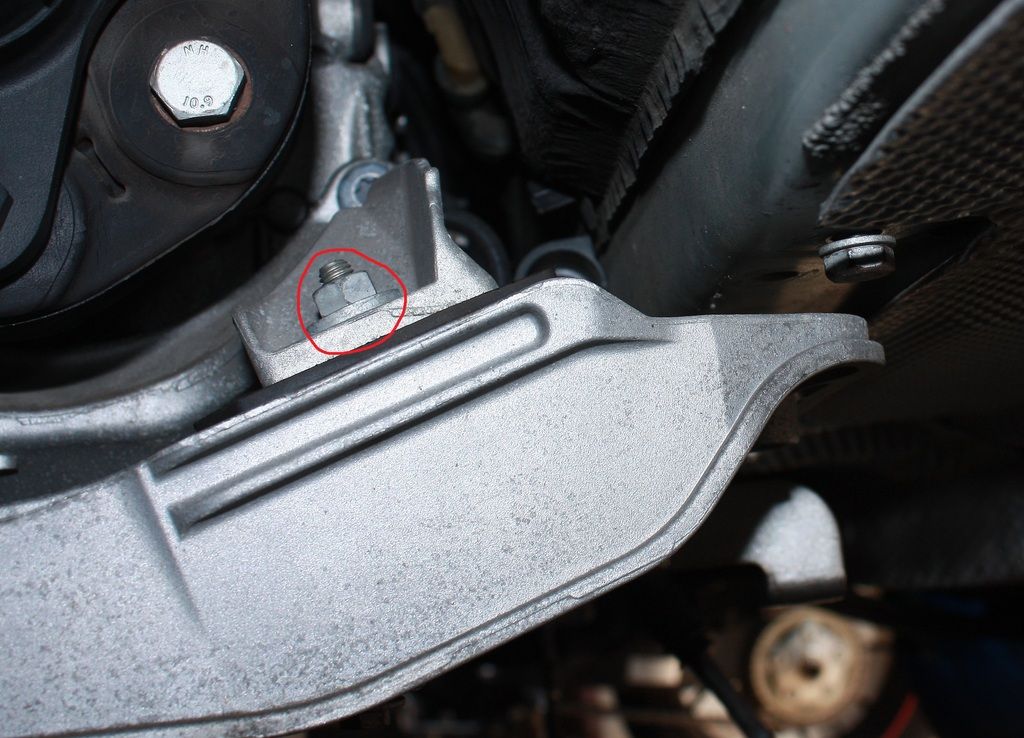
One nut on each side bolted to the transmission itself. At this point I recommended replacing your transmission mounts, the cross member is out and it's the easiest at this point to replace them. I did not know I was going to be in this deep and it didn't cross my mind... and again there is no DIYs for it... NOT perfect but I'll be the guinea pig for us all.
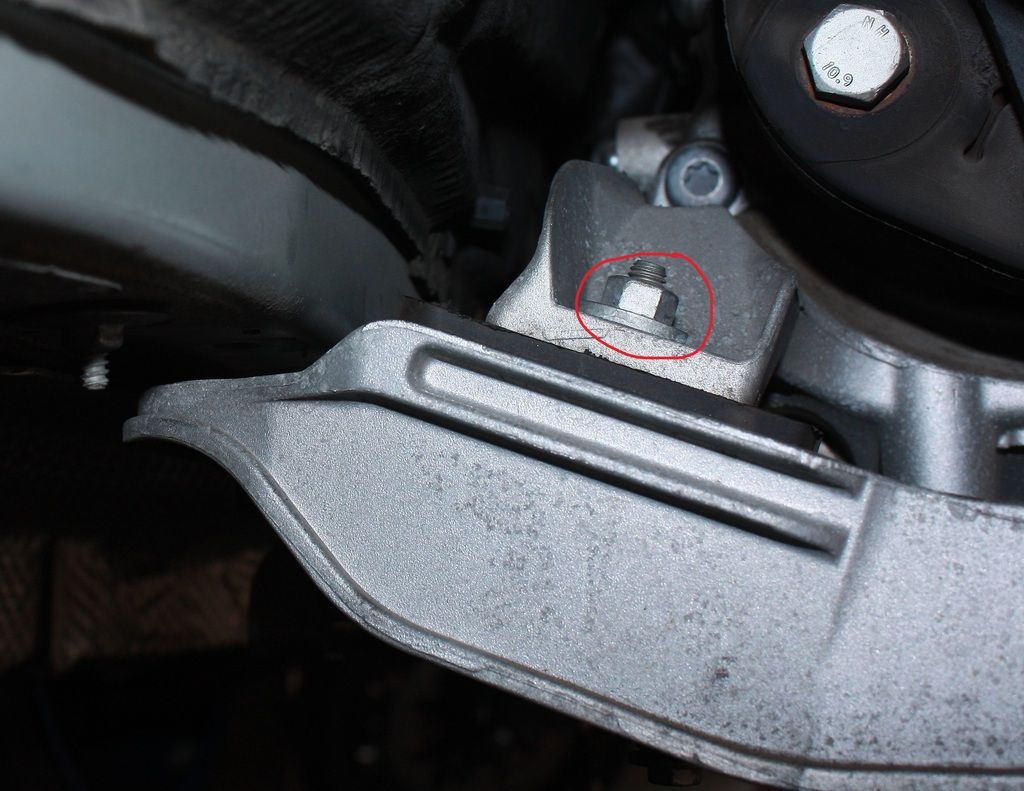
Once the cross member has been taken out, next you want to remove the exhaust hanger that is bolted to the transmission, you want to do this purely to have more space to work with.
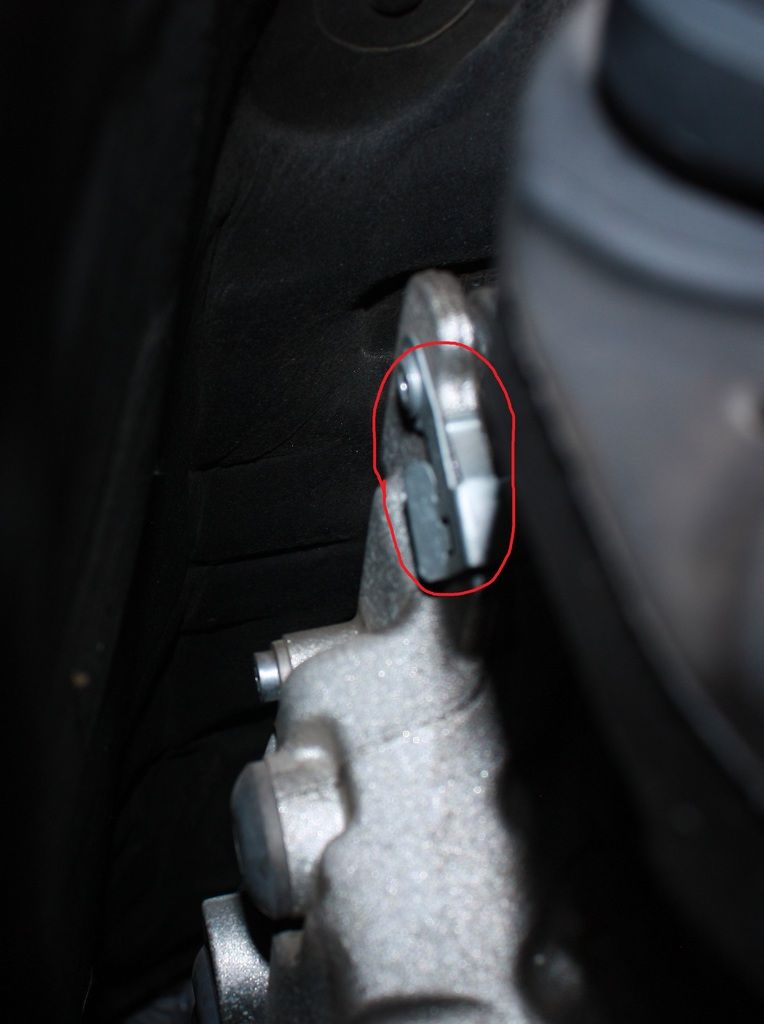
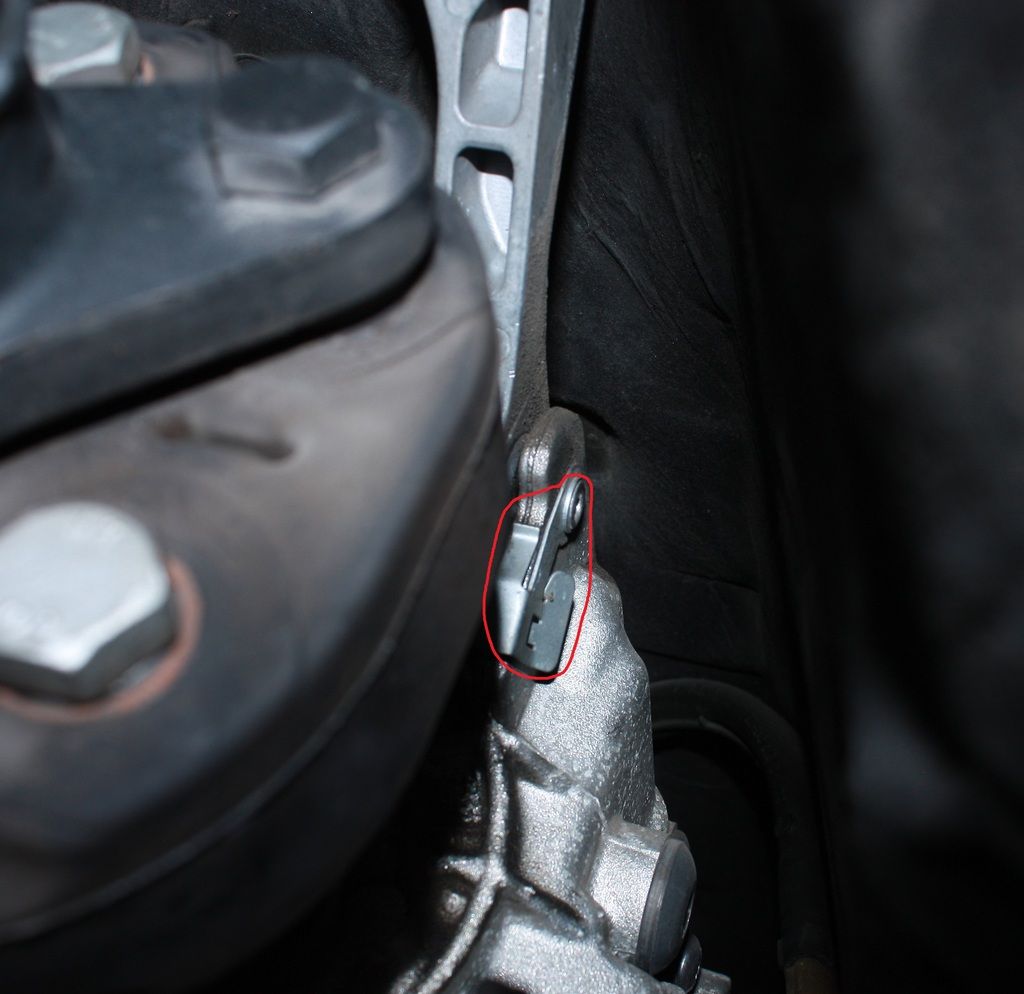
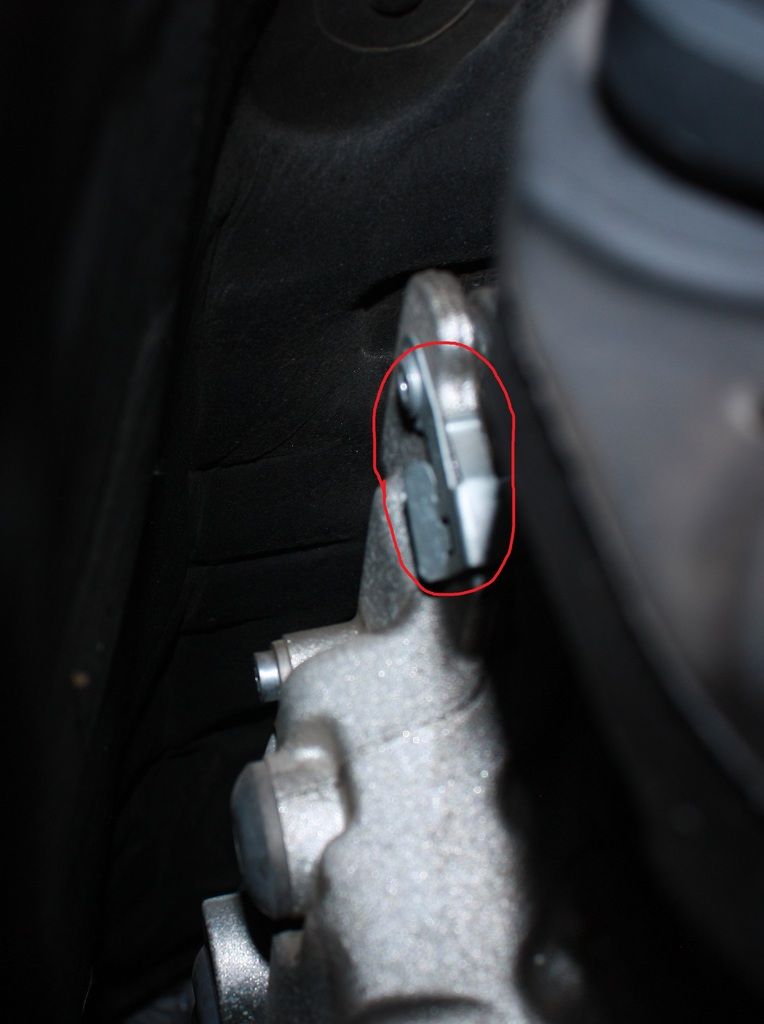
Removing the two clips there's a locking mechanism. I slid a small flat tip screw driver in the flat spot on the side of them and then they swing up once unlocked.
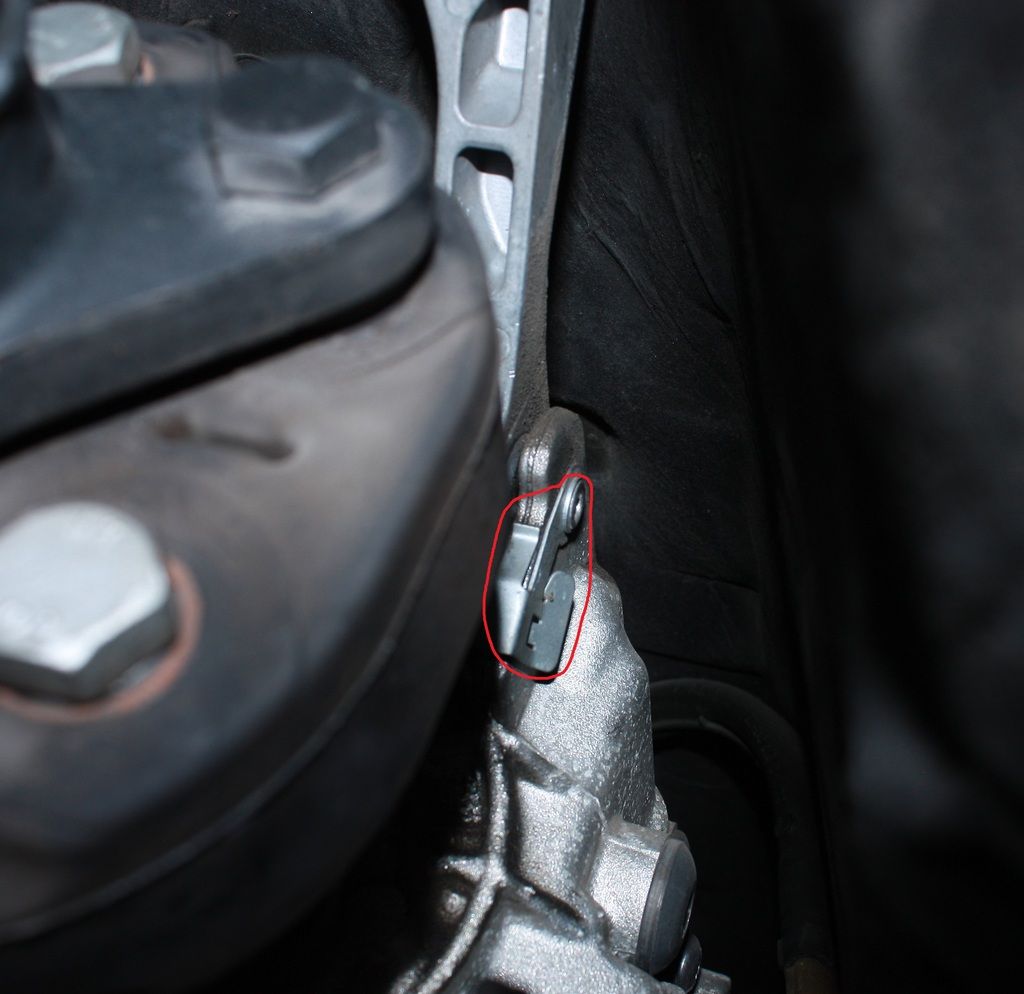
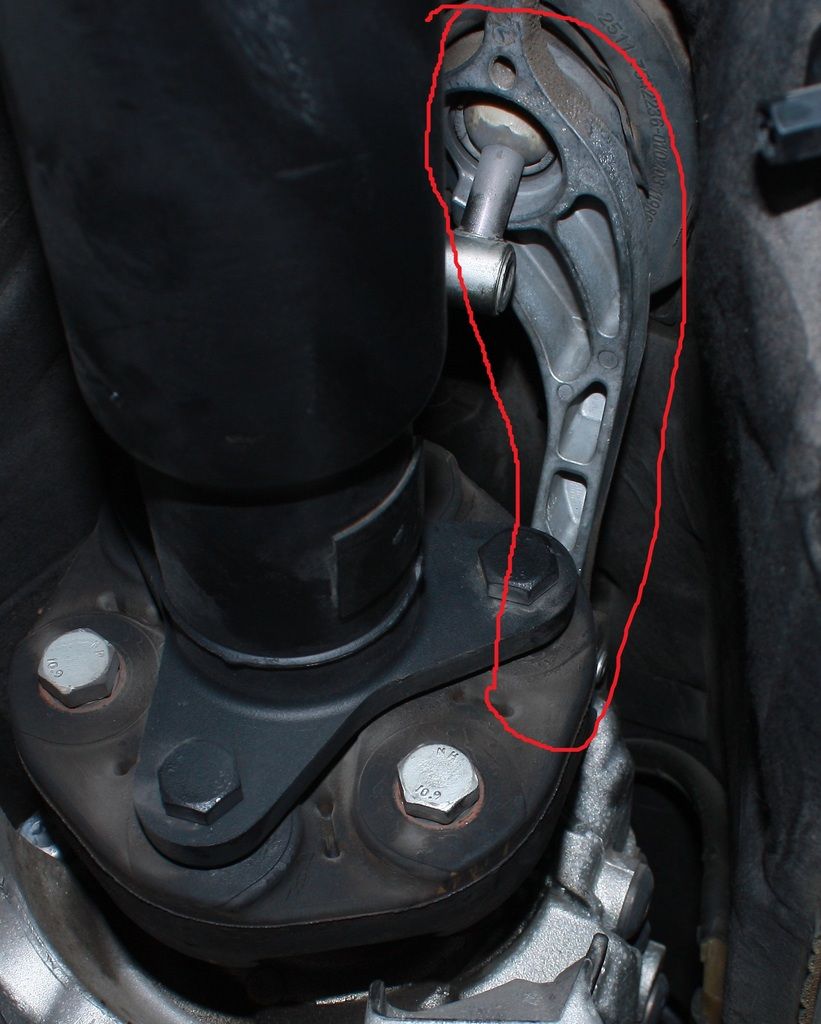
Next removing the carrier from rubber grommet (back) and two pins (front). once you remove the two pins you have to release pressure on the jack, and let the transmission go down. The carrier can only go up over the transmission and then slide down on either side of it. you will have to push up on the carrier and pull down a bit on the transmission at the same time to make it slide out, it didn't take much.
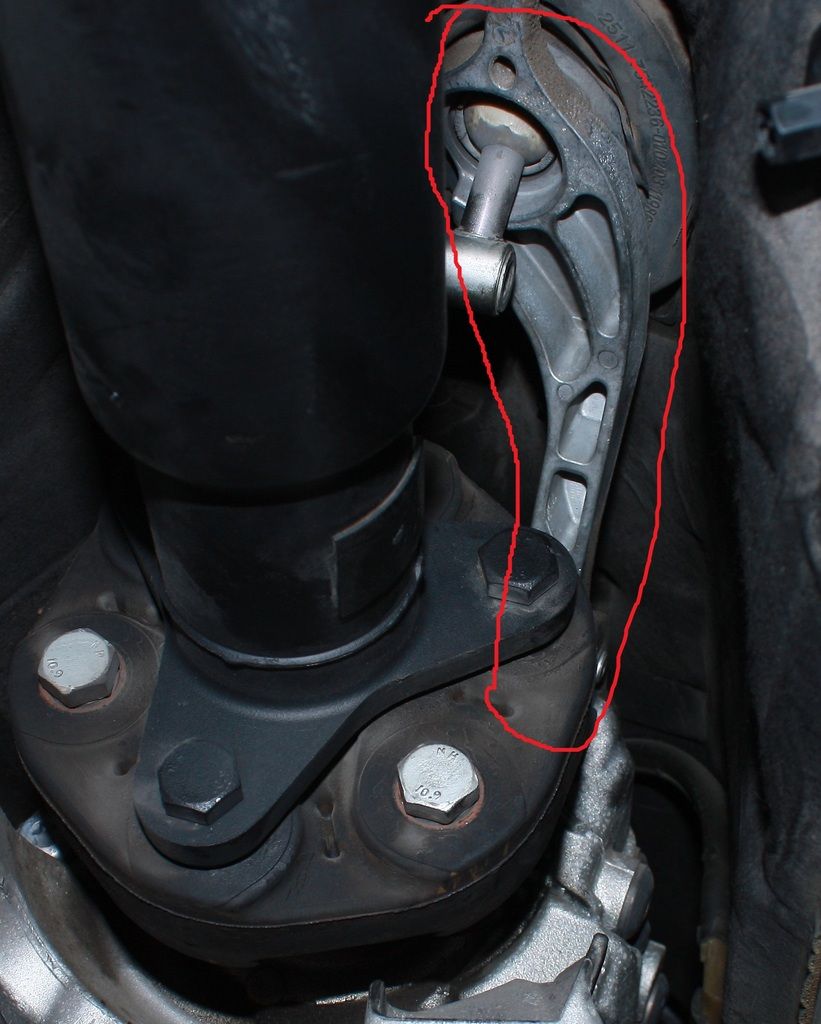
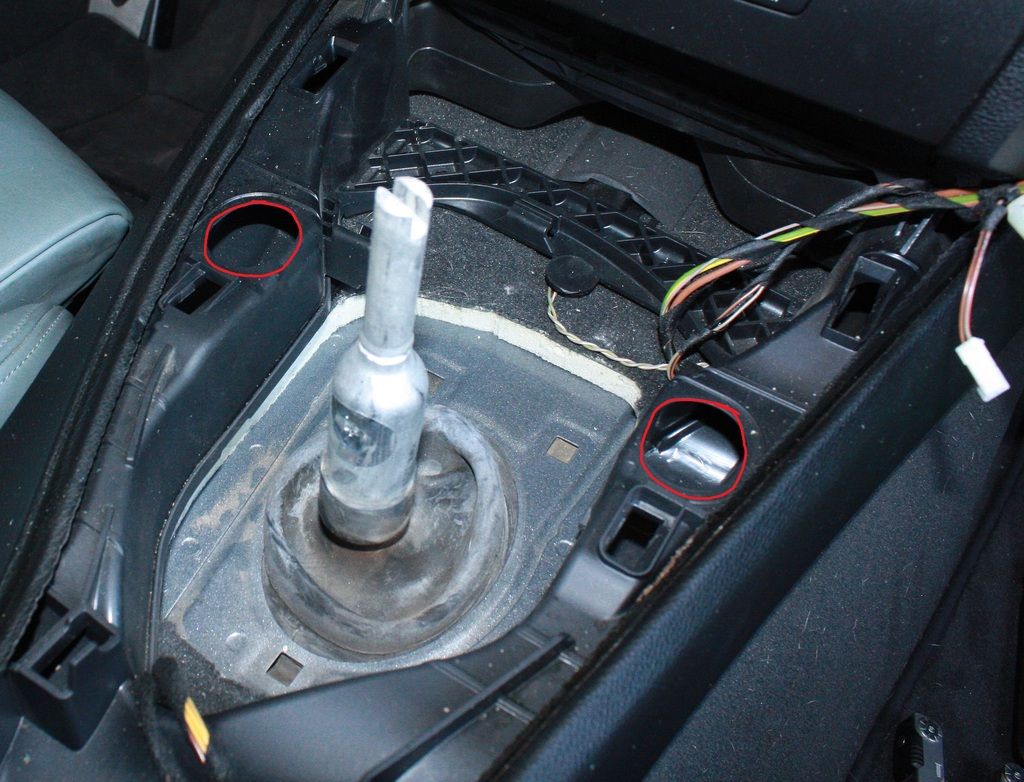
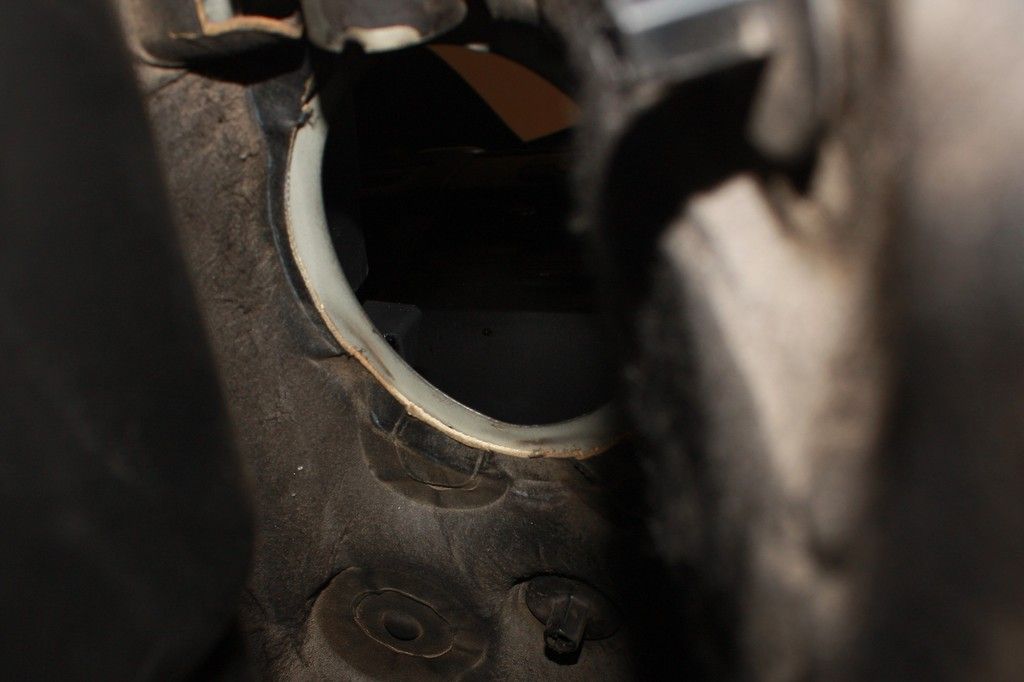
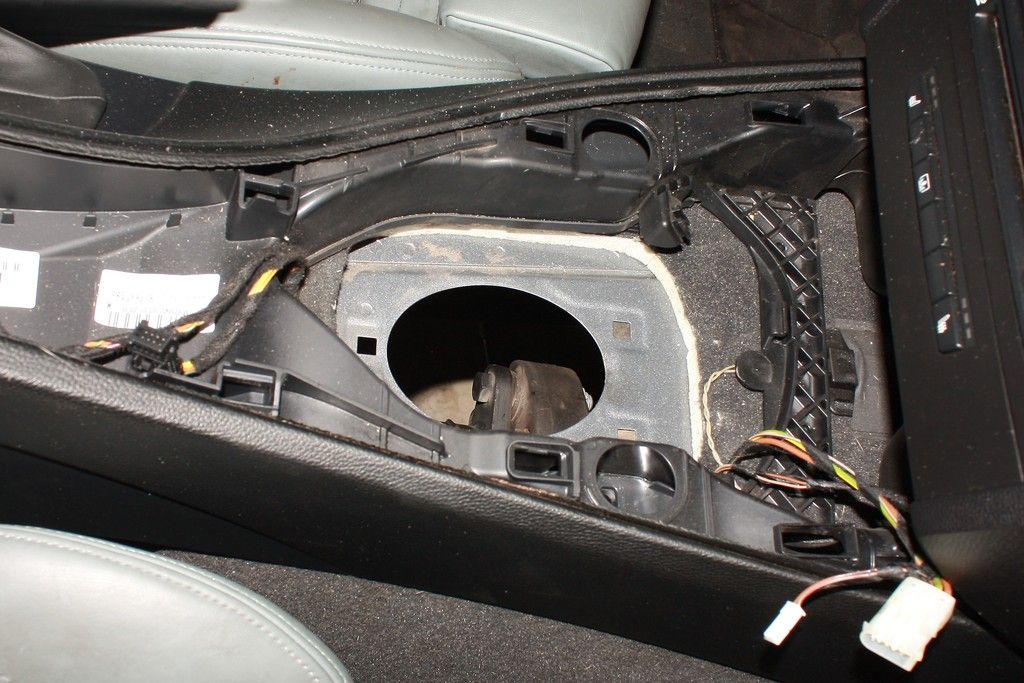
How it will look like from the bottom and top with the carrier removed.
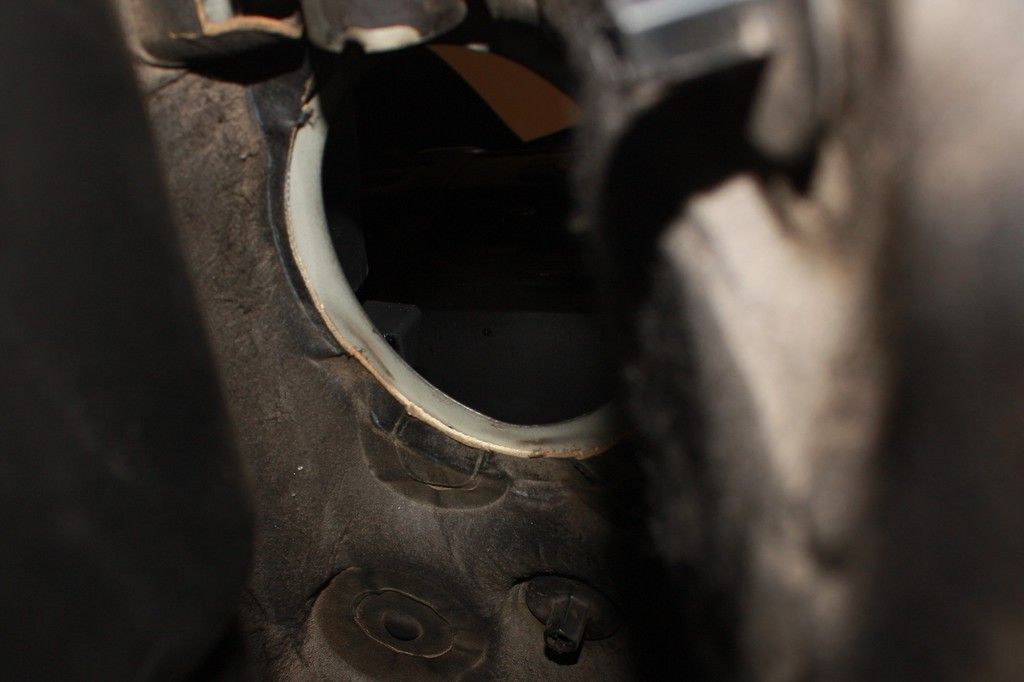
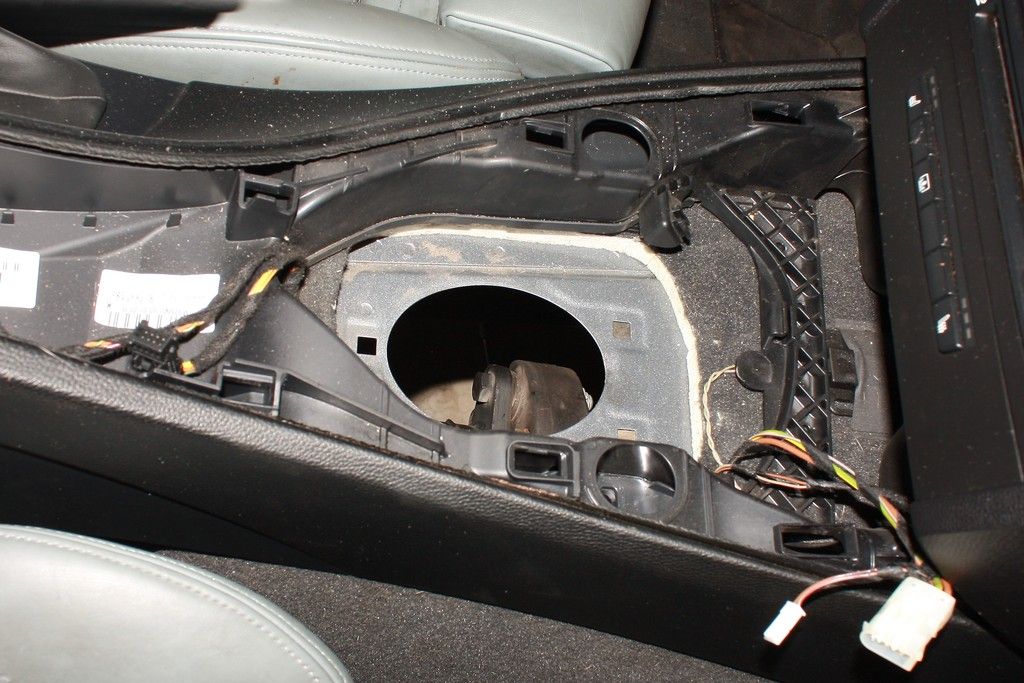
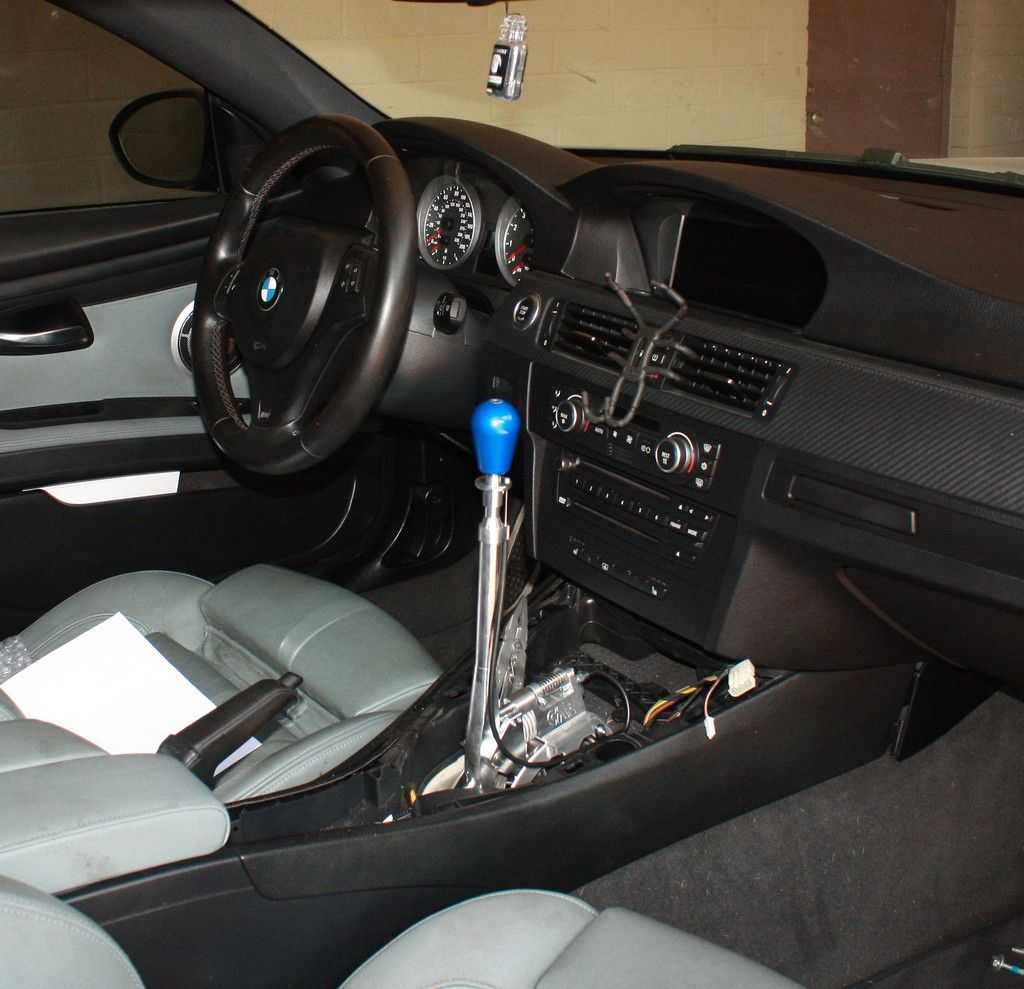
Initial mock up of how it will look.... still more to go after this point.
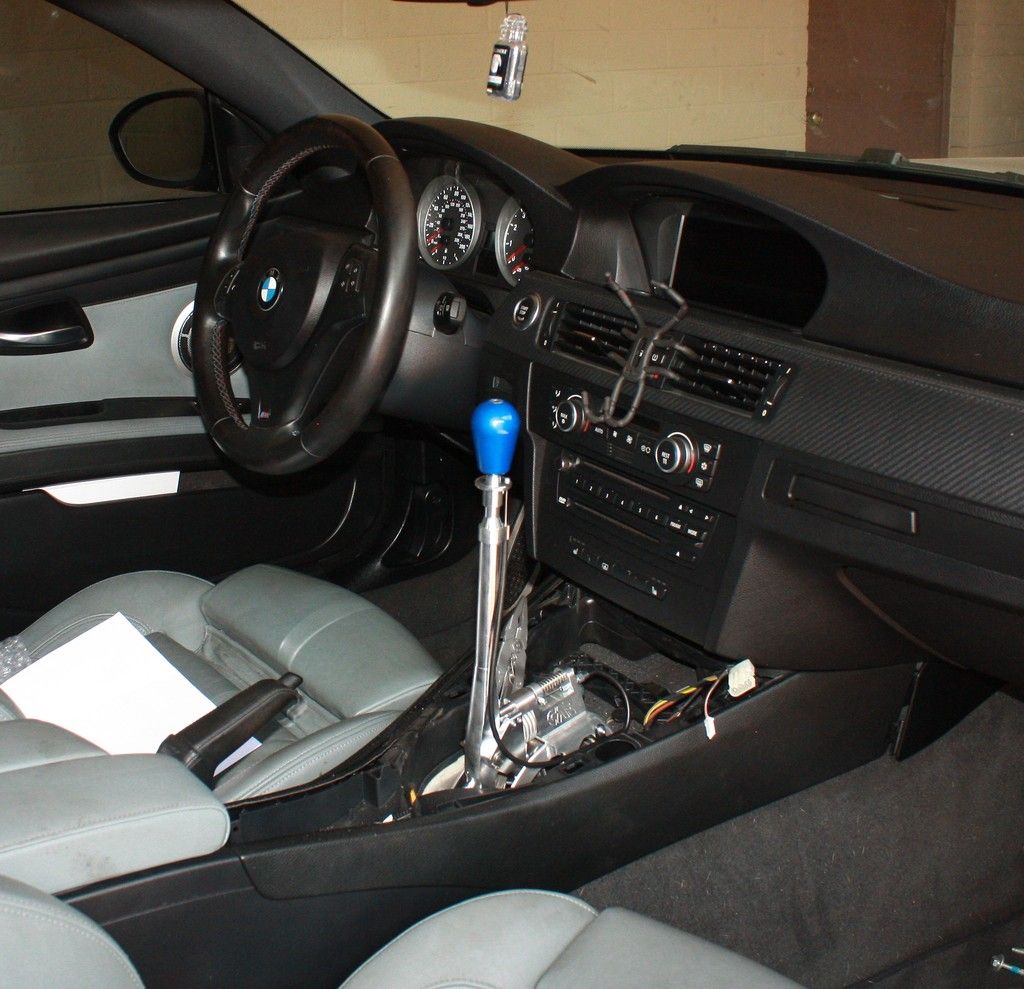
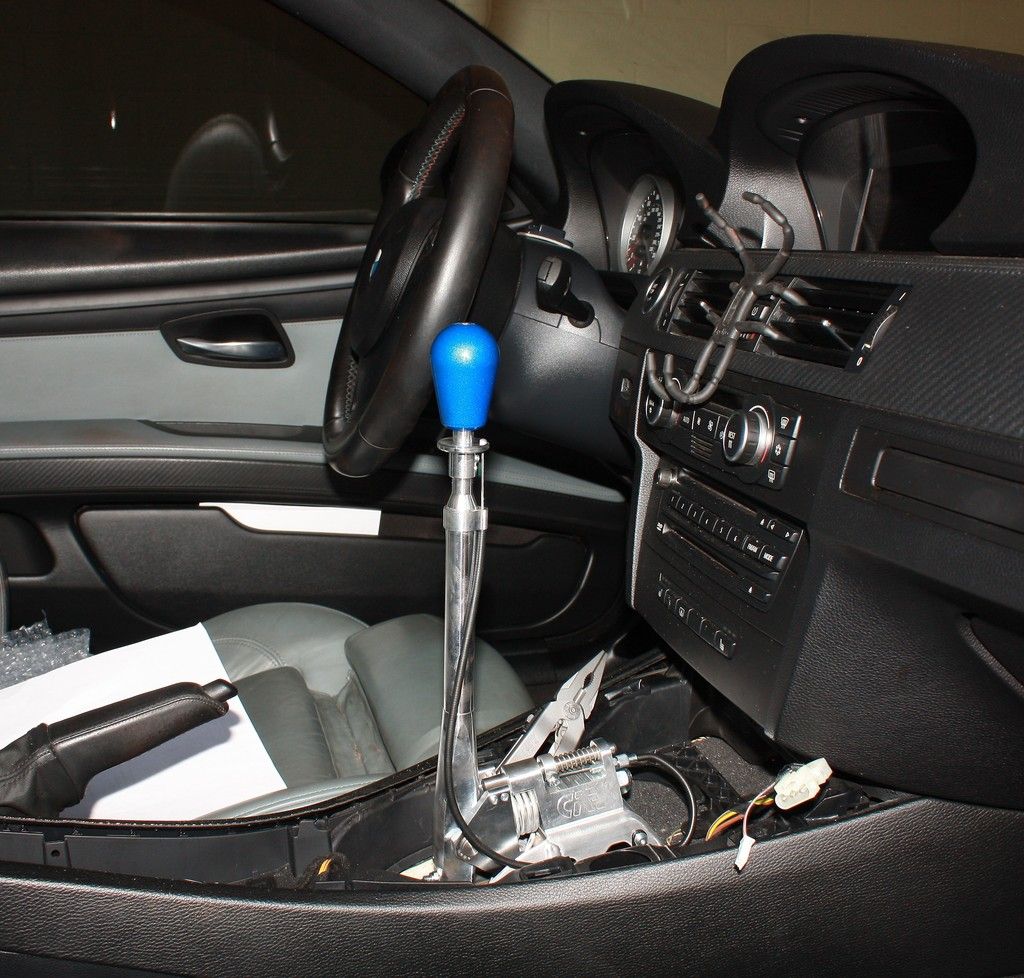
Now it's time for the part where most people start second guessing this purchase. I for one plan on keeping this car till it can't drive anymore, and even then I'll rebuild. So cutting and drilling wasn't an issue for me.
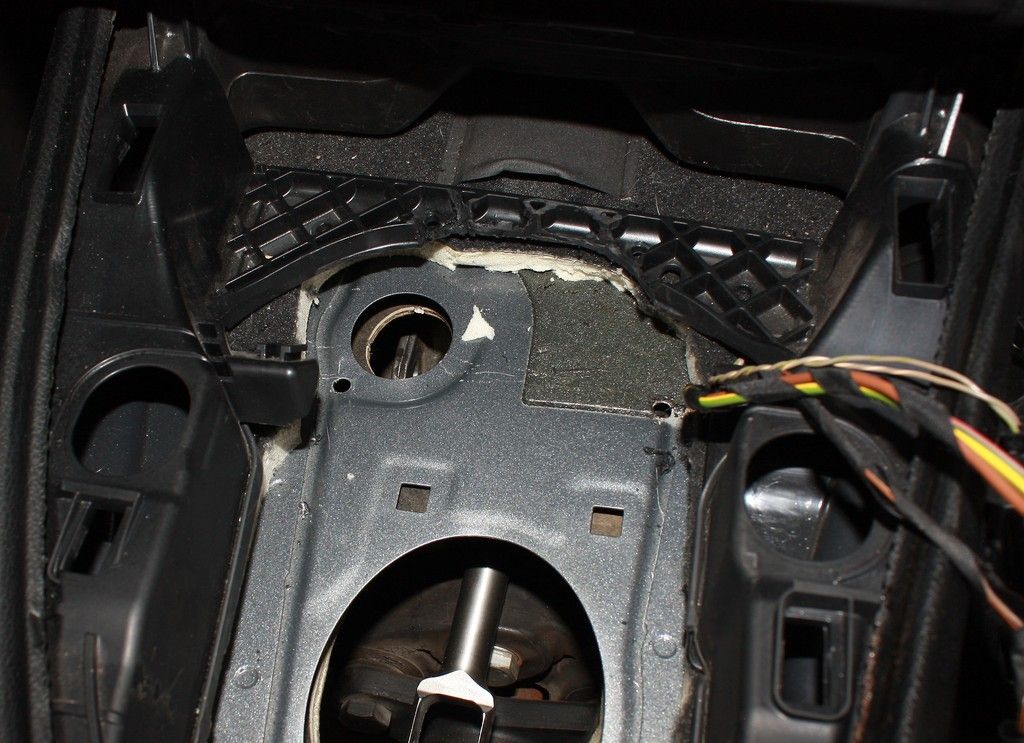
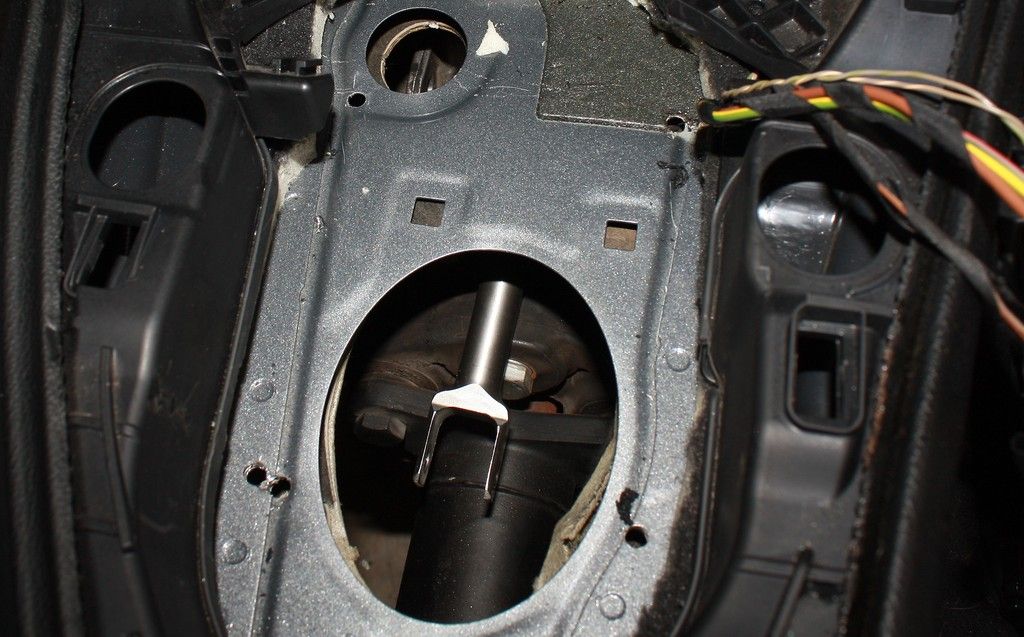
This pic is so you guys can get a basic idea of the cutting and trimming that needs to be done.
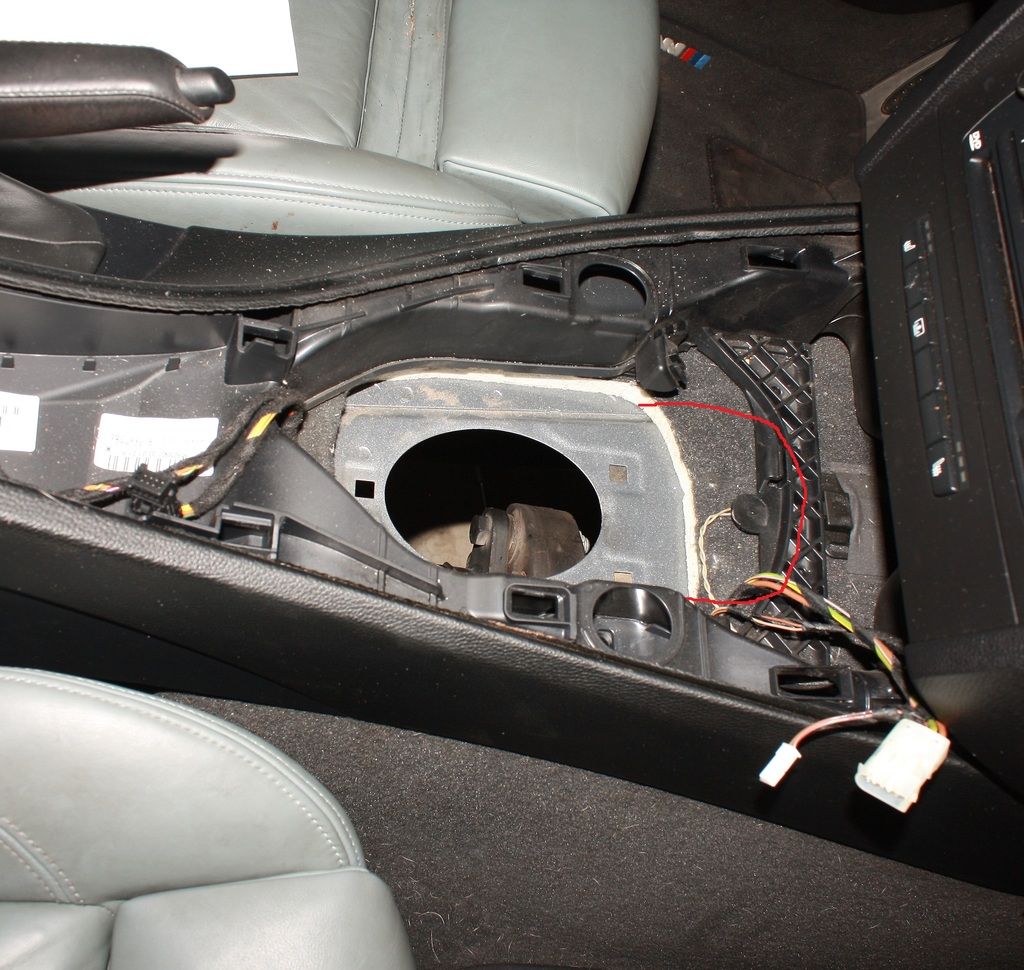
This is what it looked like after it was all said in done. I had to cut and mock it up a few times till I found a perfect position for the shifter. It doesn't look pretty but that is fine there is a plate provided by CAE that will cover this all up.
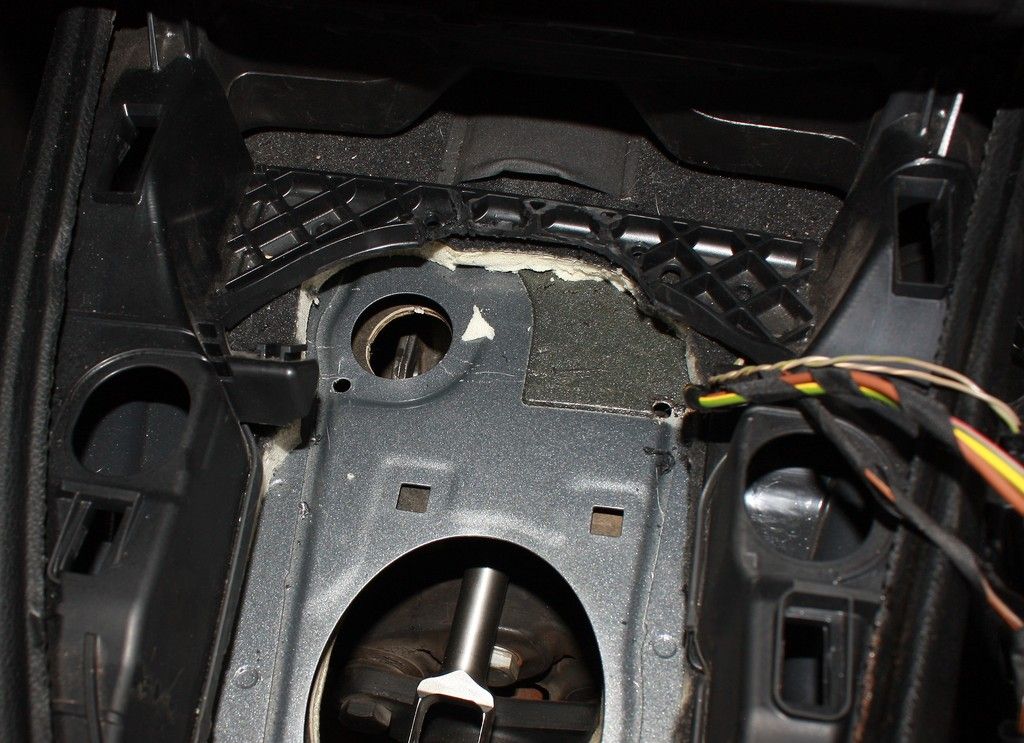
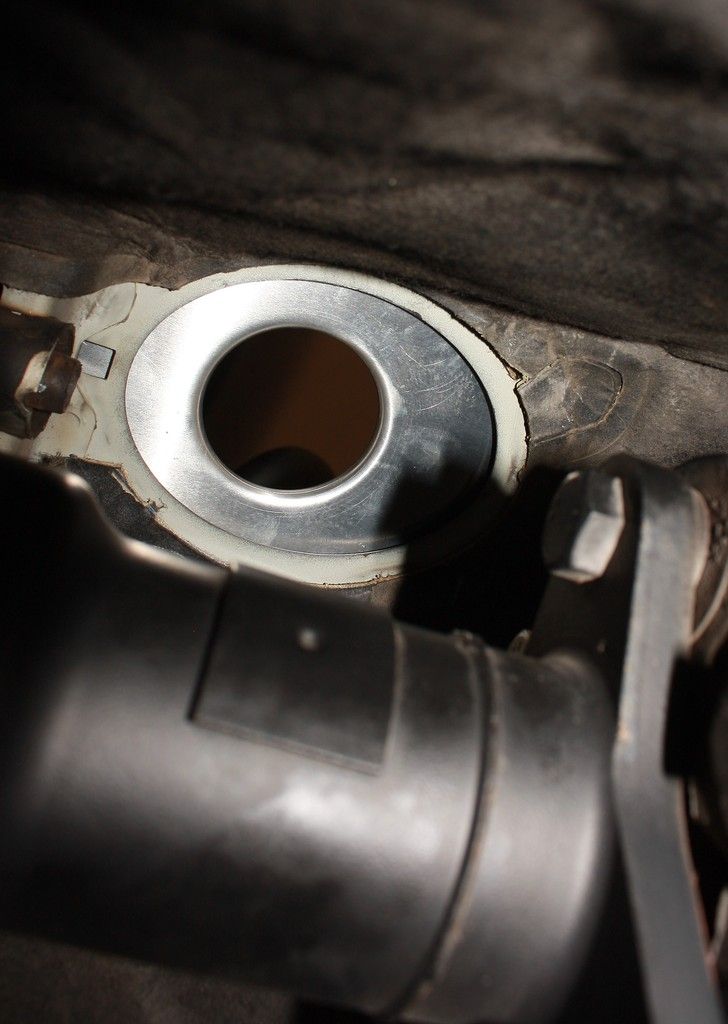
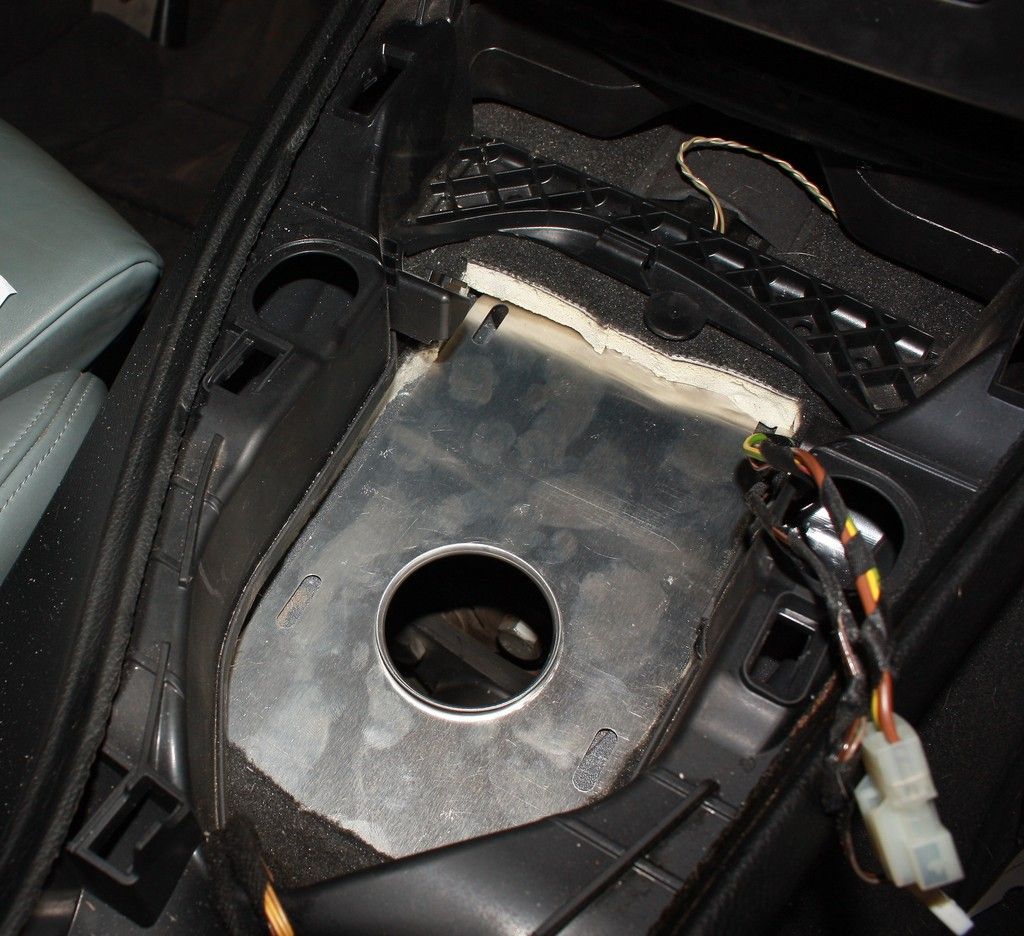
The plate mentioned above.
Bottom
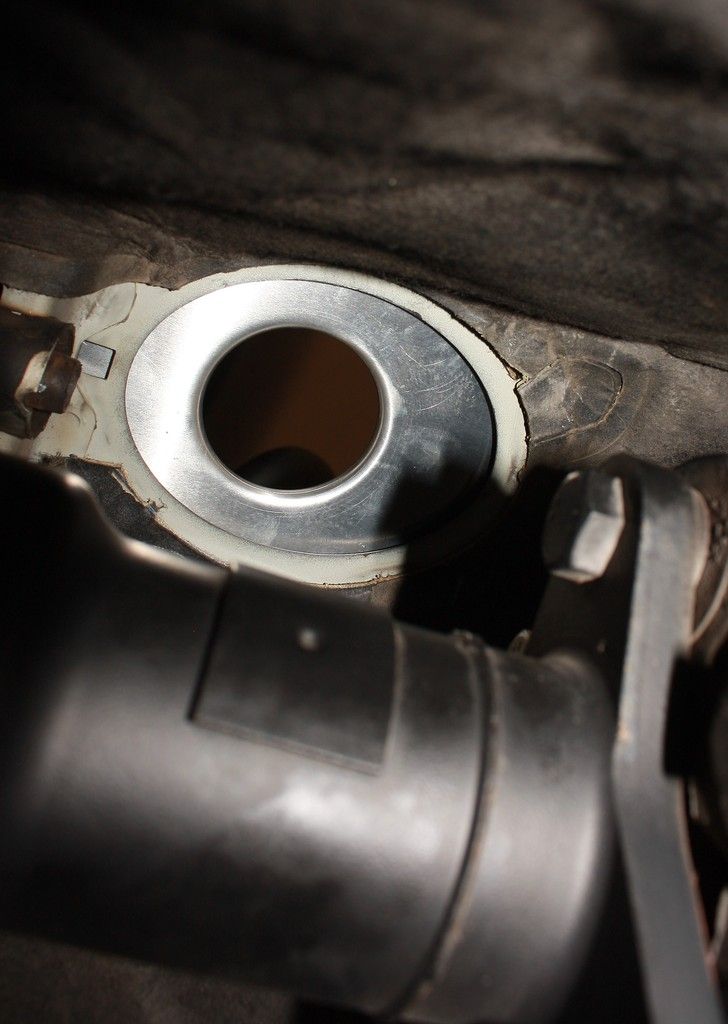
Top
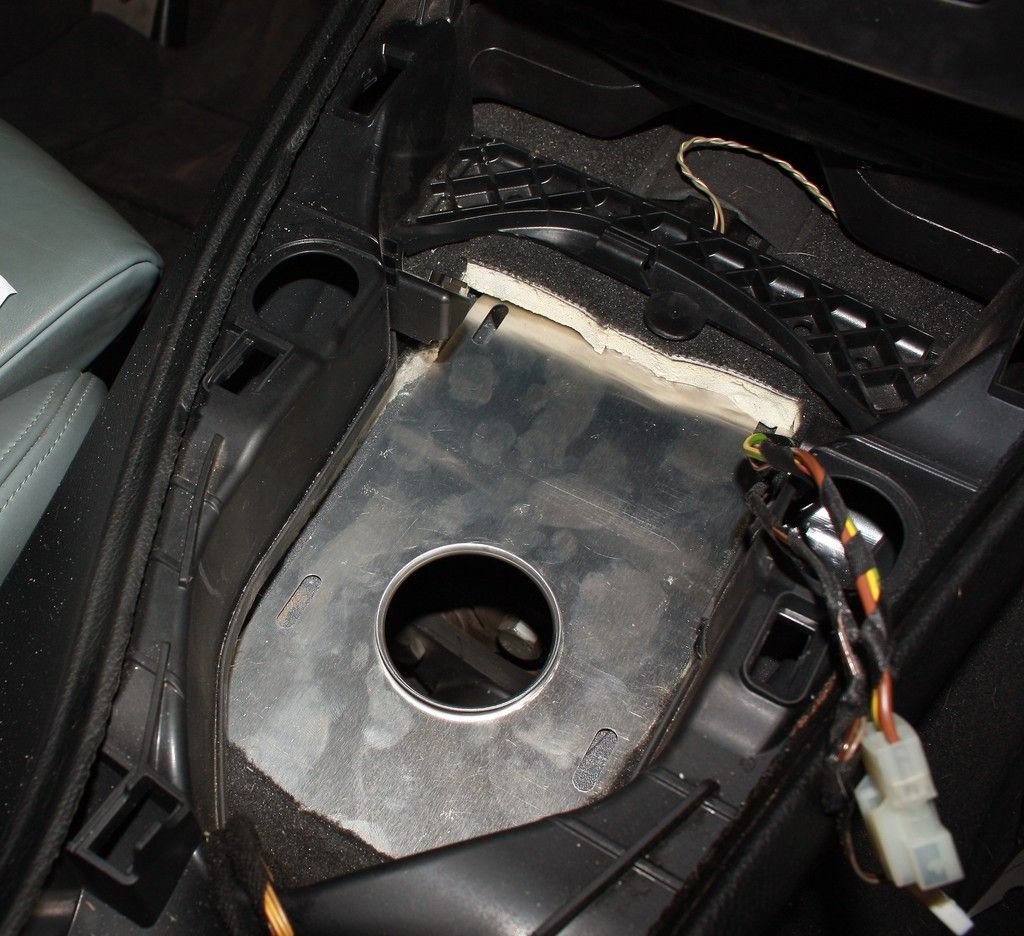
Almost done... Next it's the drilling of four holes to bolt the shifter down. Like I said its not pretty... I messed up the first set of holes. Again the plate covers this all up. Exhibit A
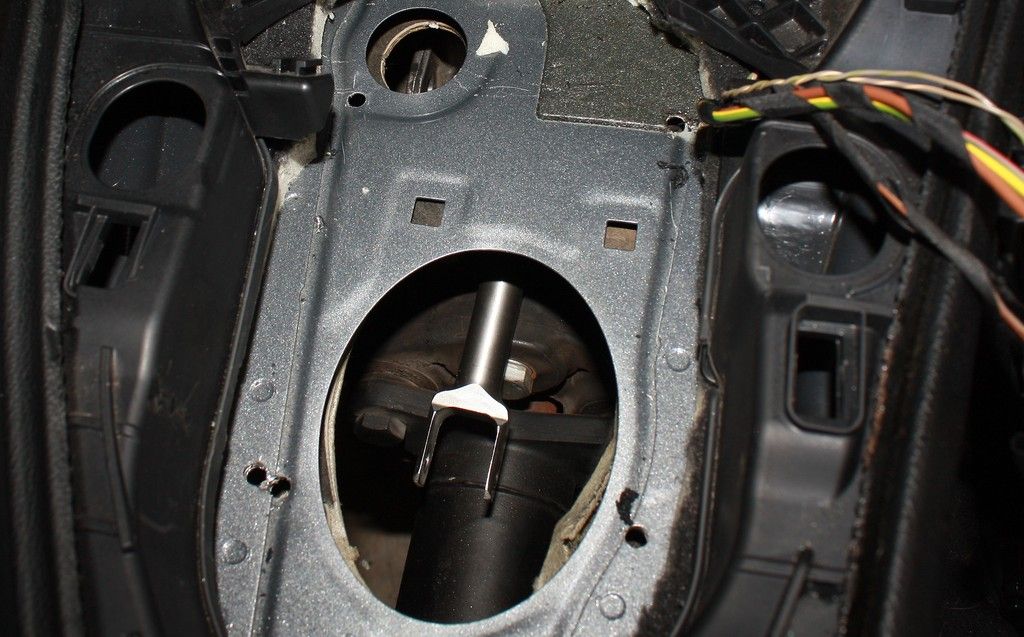
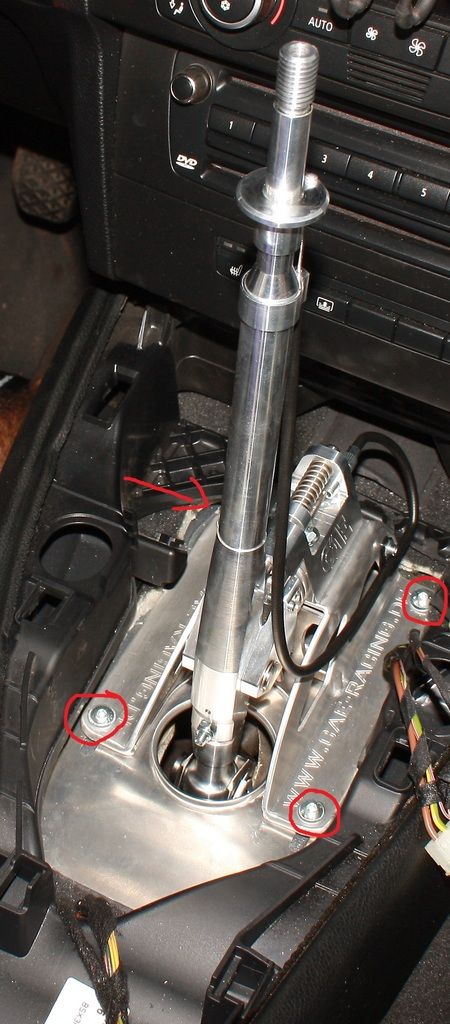
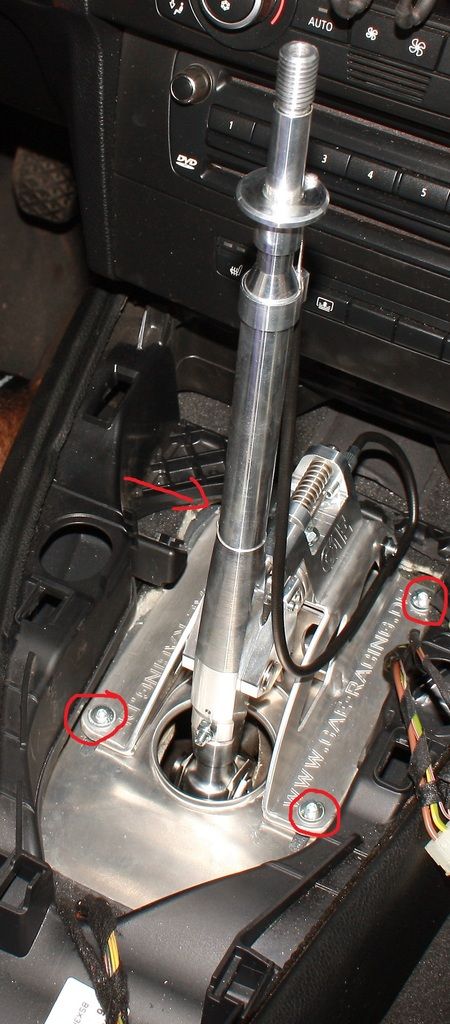
So once you drilled the four holes IN THE RIGHT PLACE Bolt the shifter down. Hardware is provided you can use either nuts and washers, or a bar the comes with threads welded on. I used the bar on one side and nuts on the other. At this point you have to do a few things; connect the DSSR to the transmission and then shifter, or OEM rod if you didn't upgrade, then bolt the transmission cross member back on (There's other steps you have to follow provided by CAE)
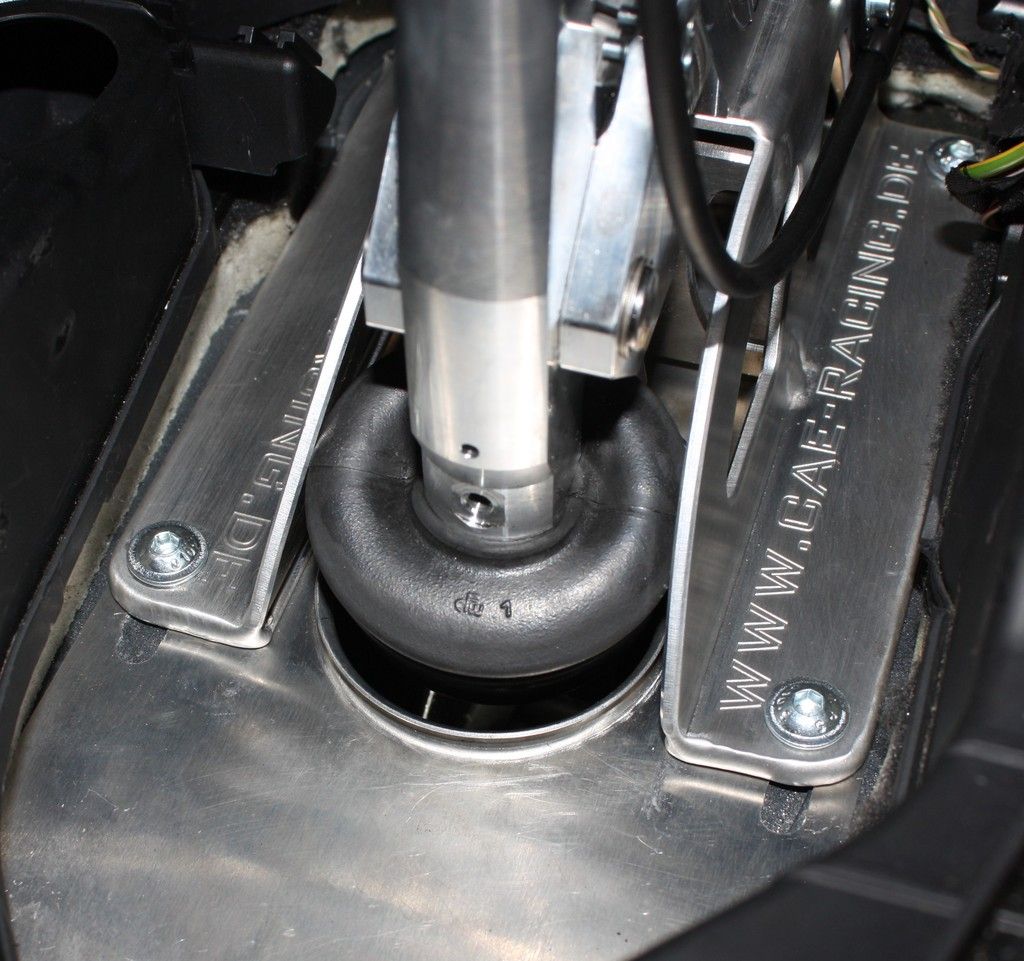
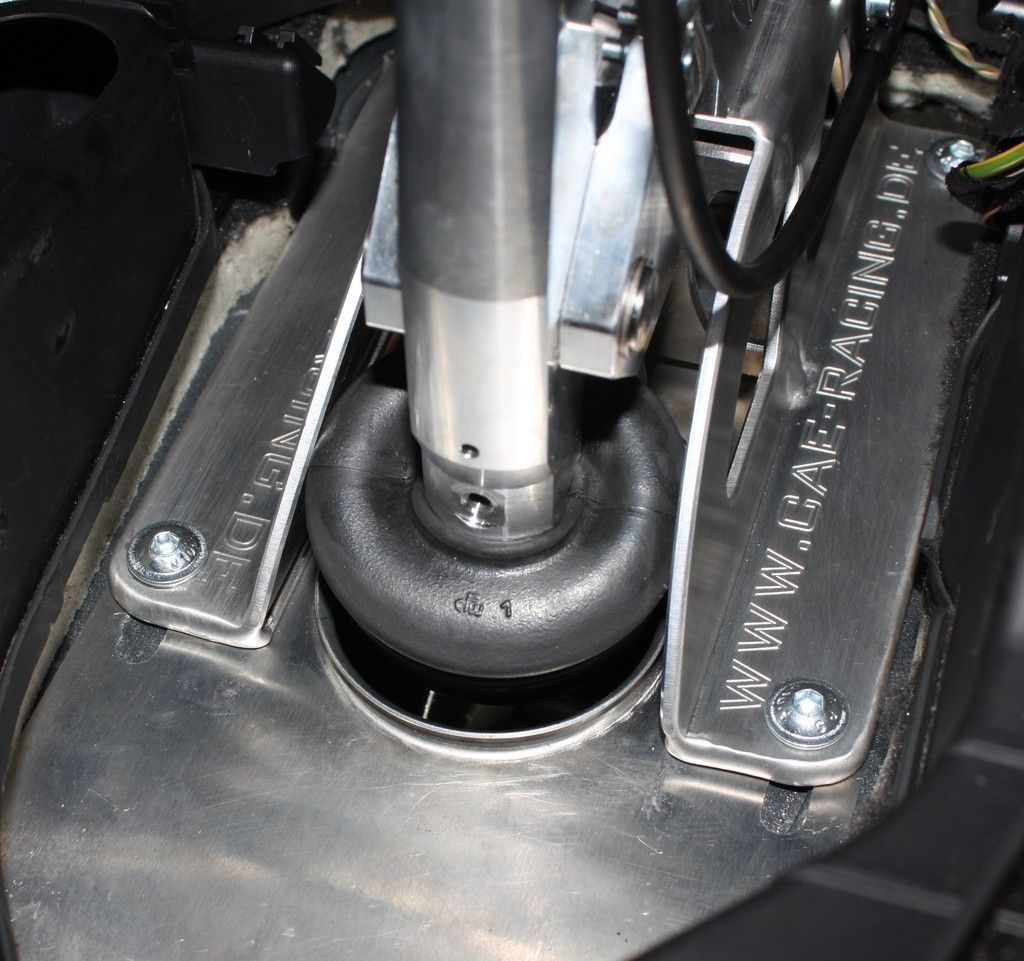
One of those steps is attaching the little dust boot provided by them.. which actually is a lot harder than it seems... I have big hands so it took me a while to figure it out. I used a small pry bar to hold one side down while I pulled as much as I could on the other side, working it little by little all the way around.
Once that lil F!@#!# is done you're on the home stretch!!!!!
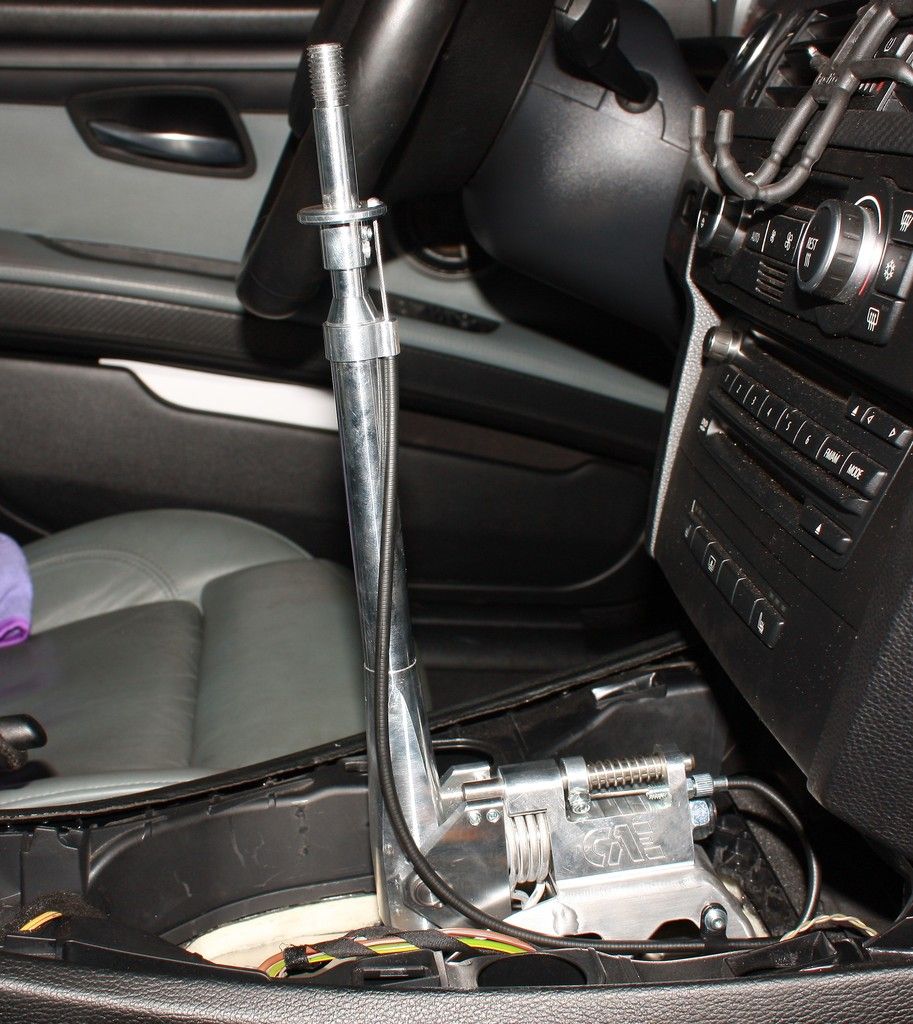
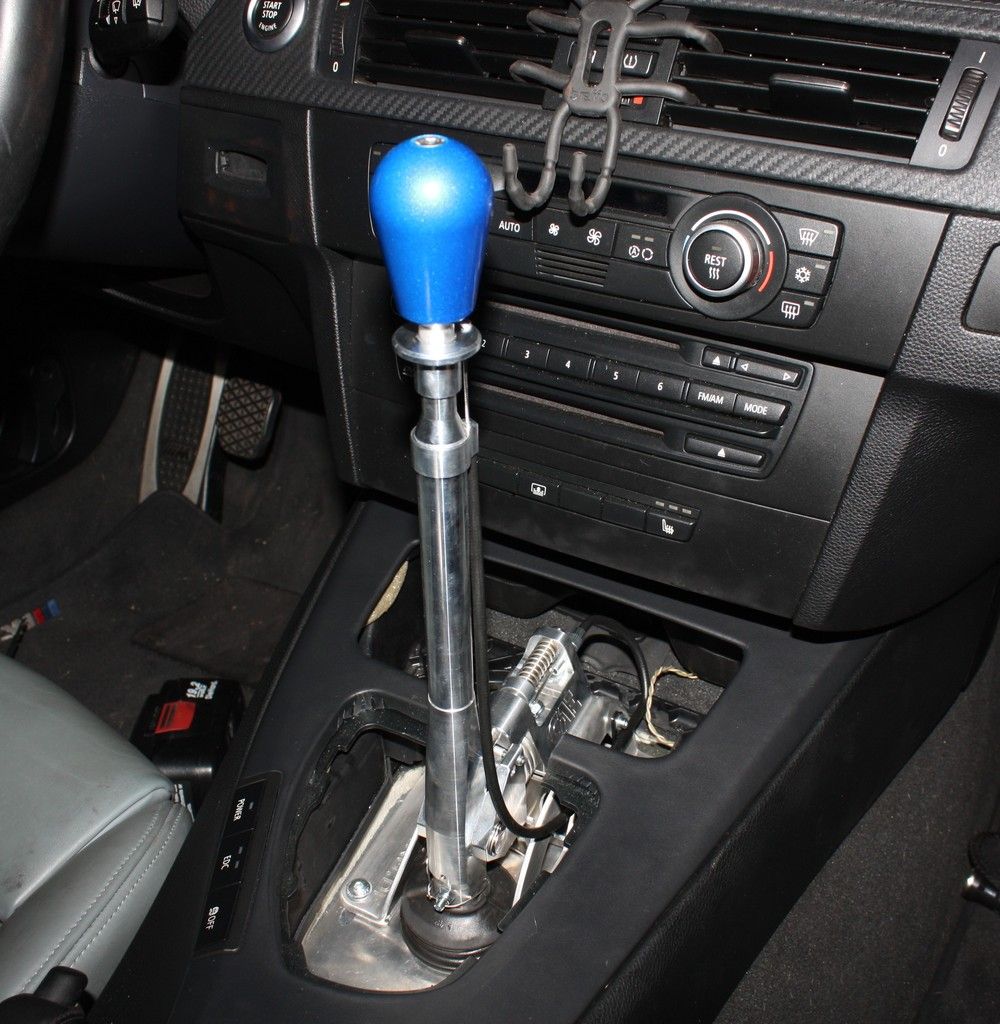
 Here it is all bolted down where it's supposed to be.
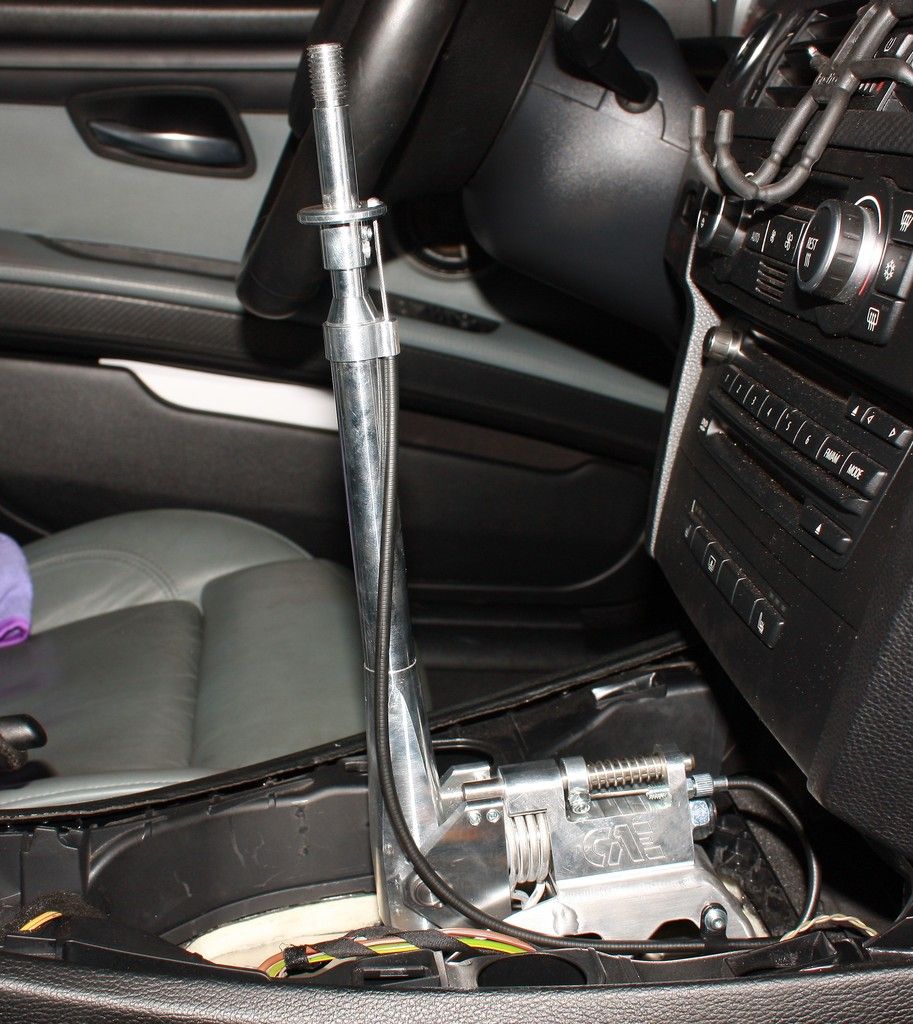
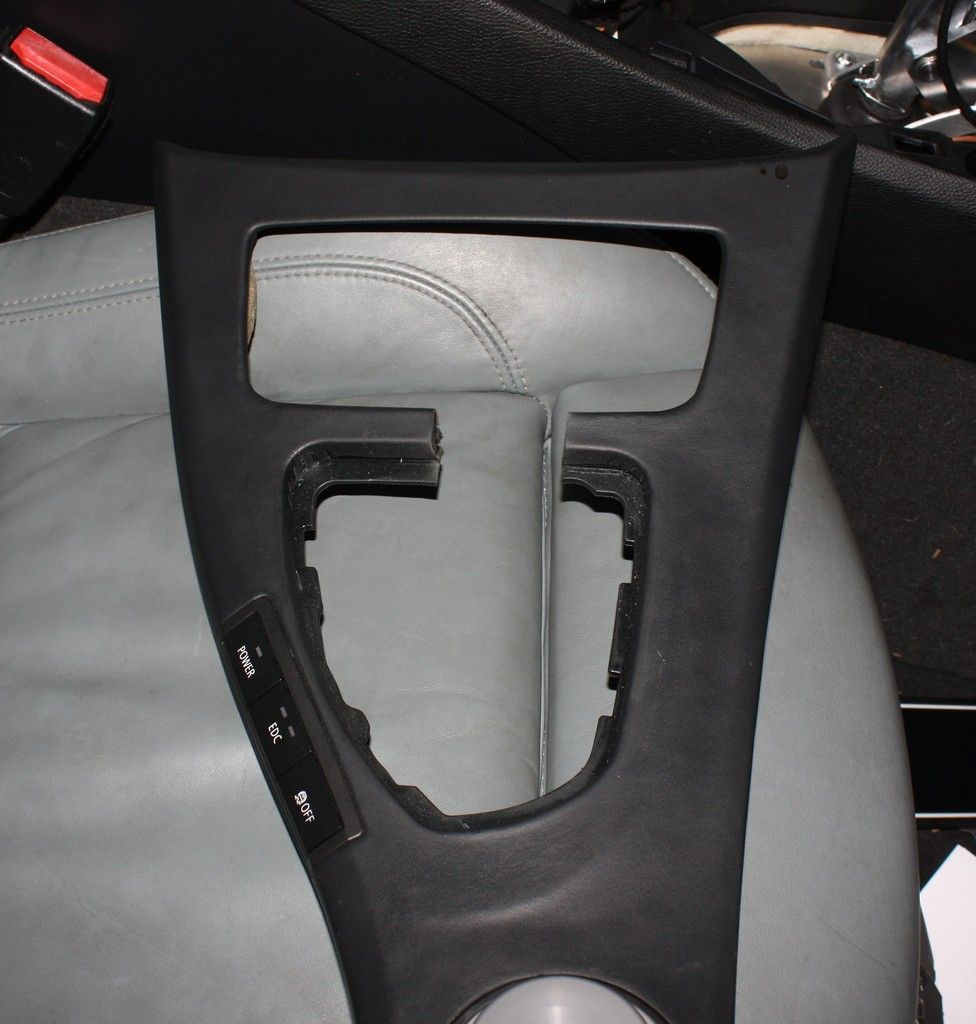
Next and third to final step, trimming of the center console cover... you will have to remove your ash tray (mine) or any other accessory you may have in that upper spot. To mark it: place it where it supposed to be see where it hits the shifter and cut that piece... All done in this picture.
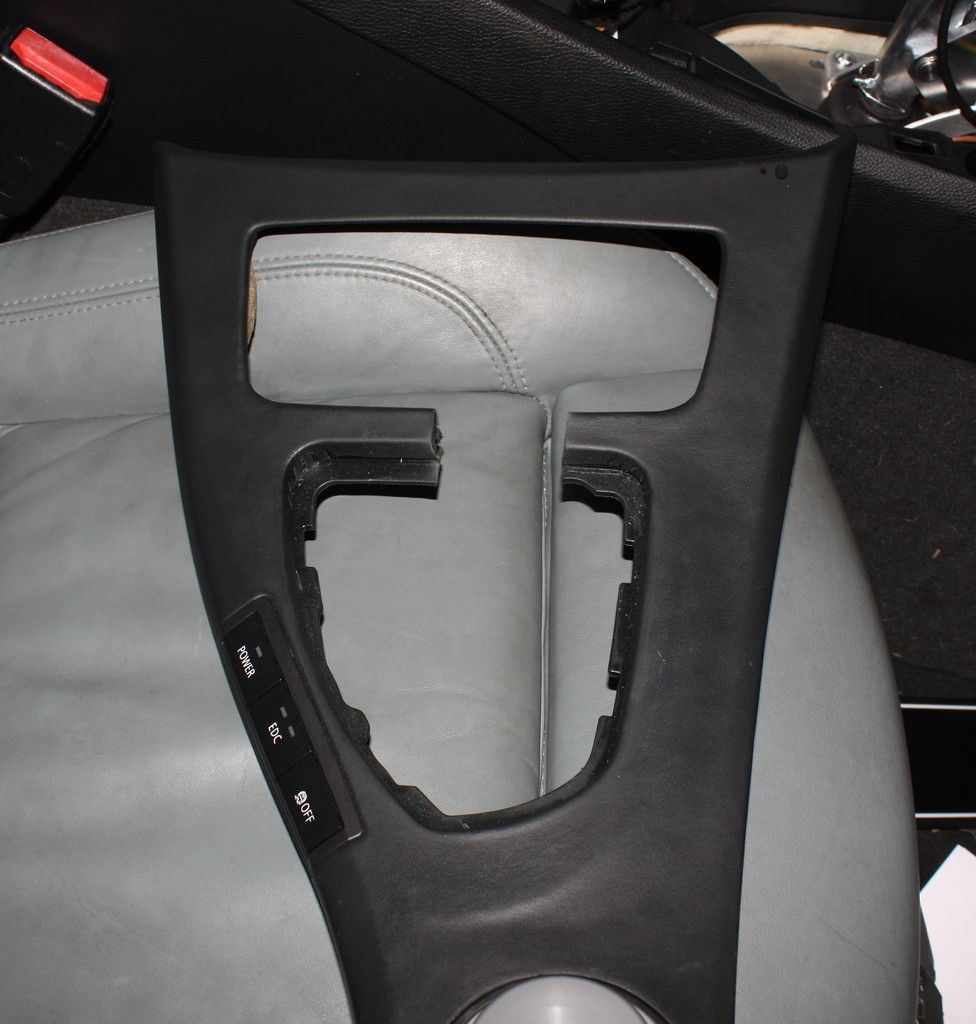
And cover reinstalled
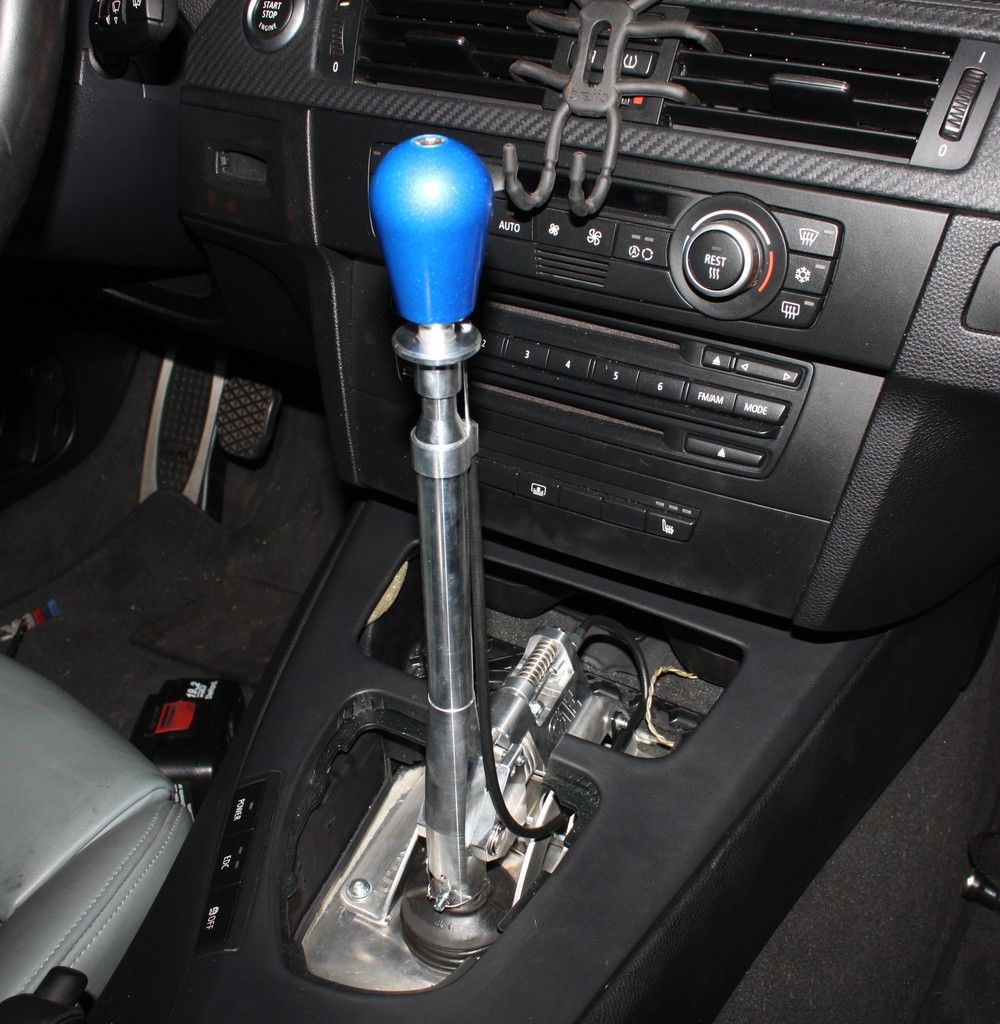
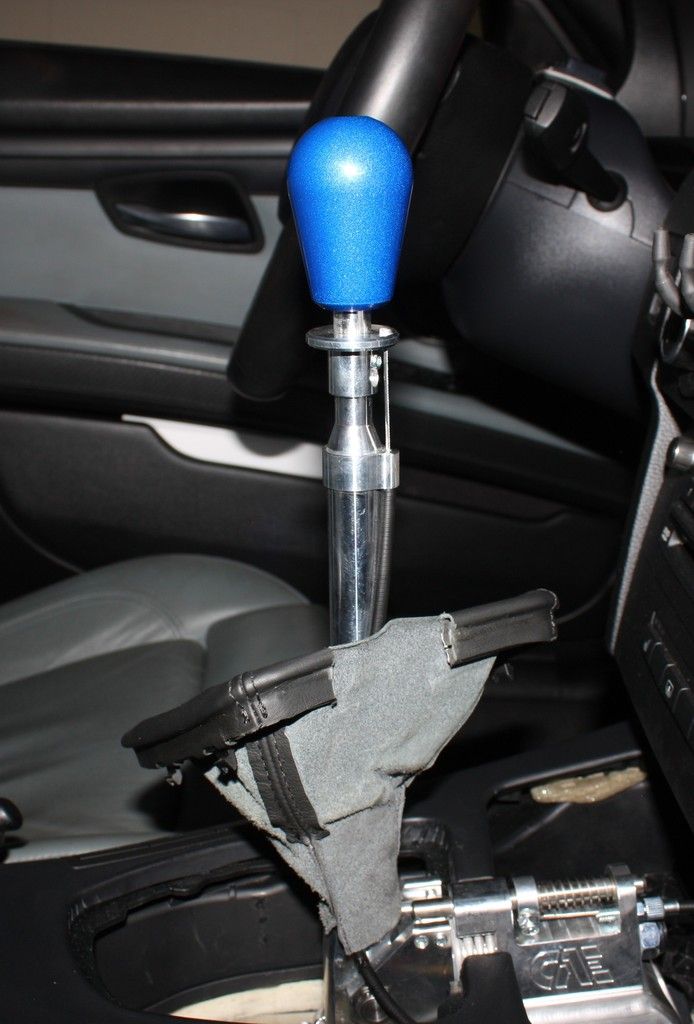
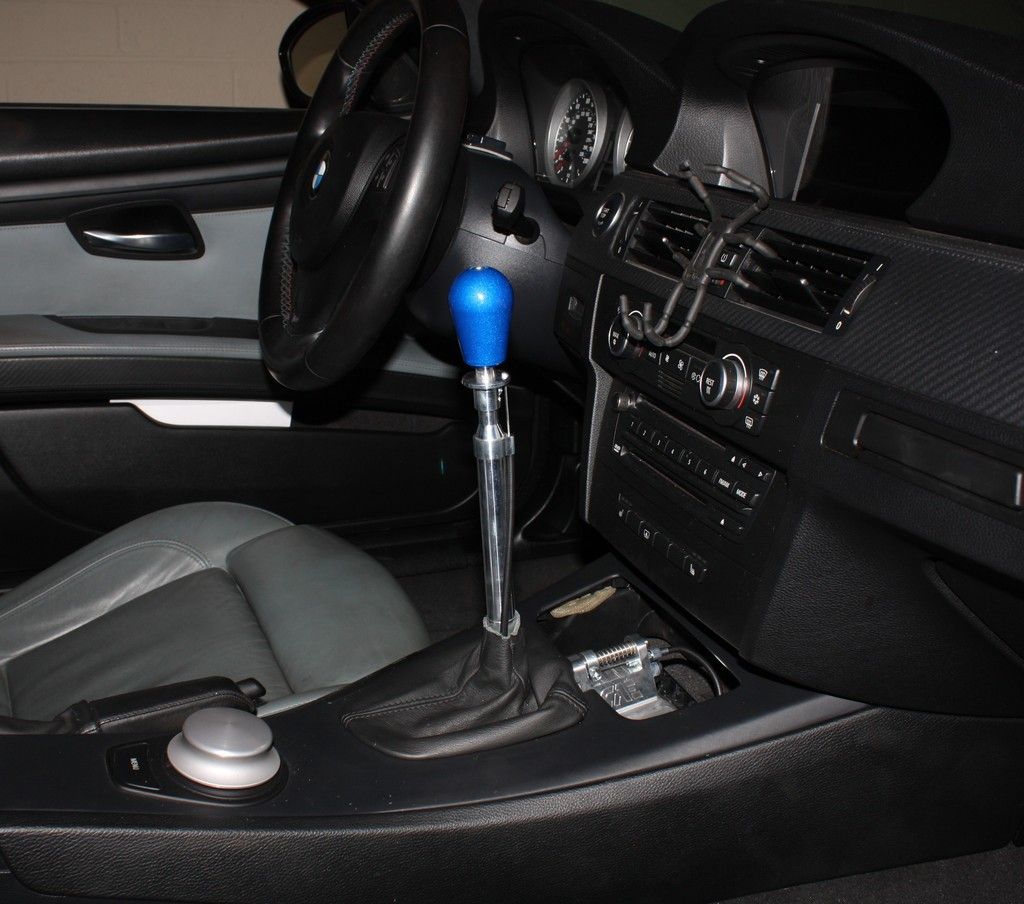
Second to final step: is trimming the shift boot, I'm using the OEM one for now till I can have something custom made for the boot and the front part where the accessory was.
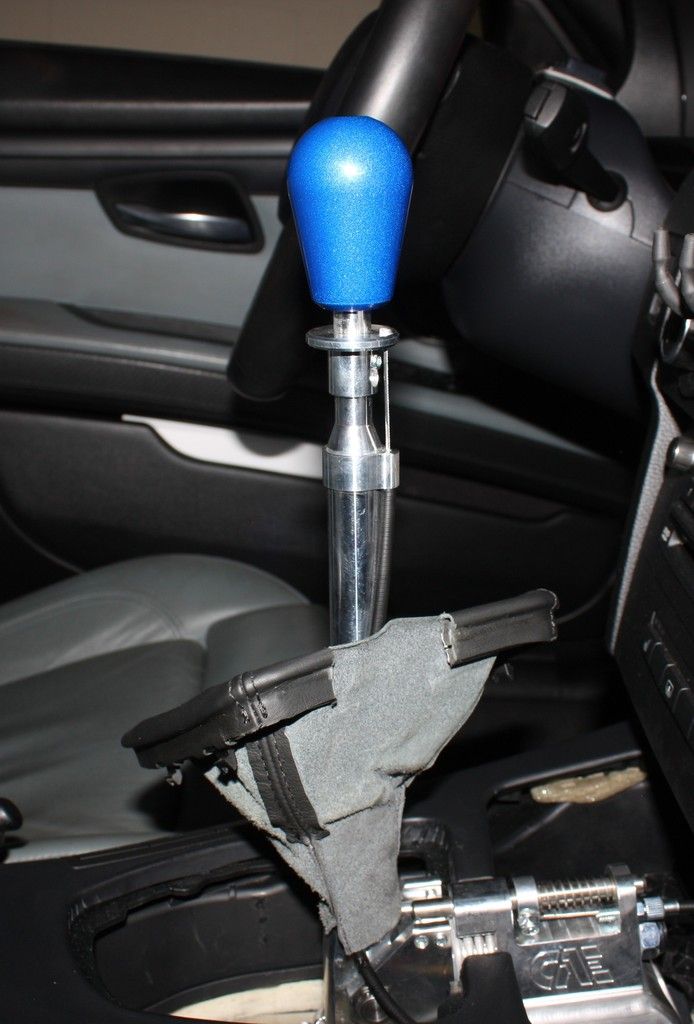
FINAL STEP!!!! is fine tuning the shifter. Step by step on how to tune the shifter are provided.


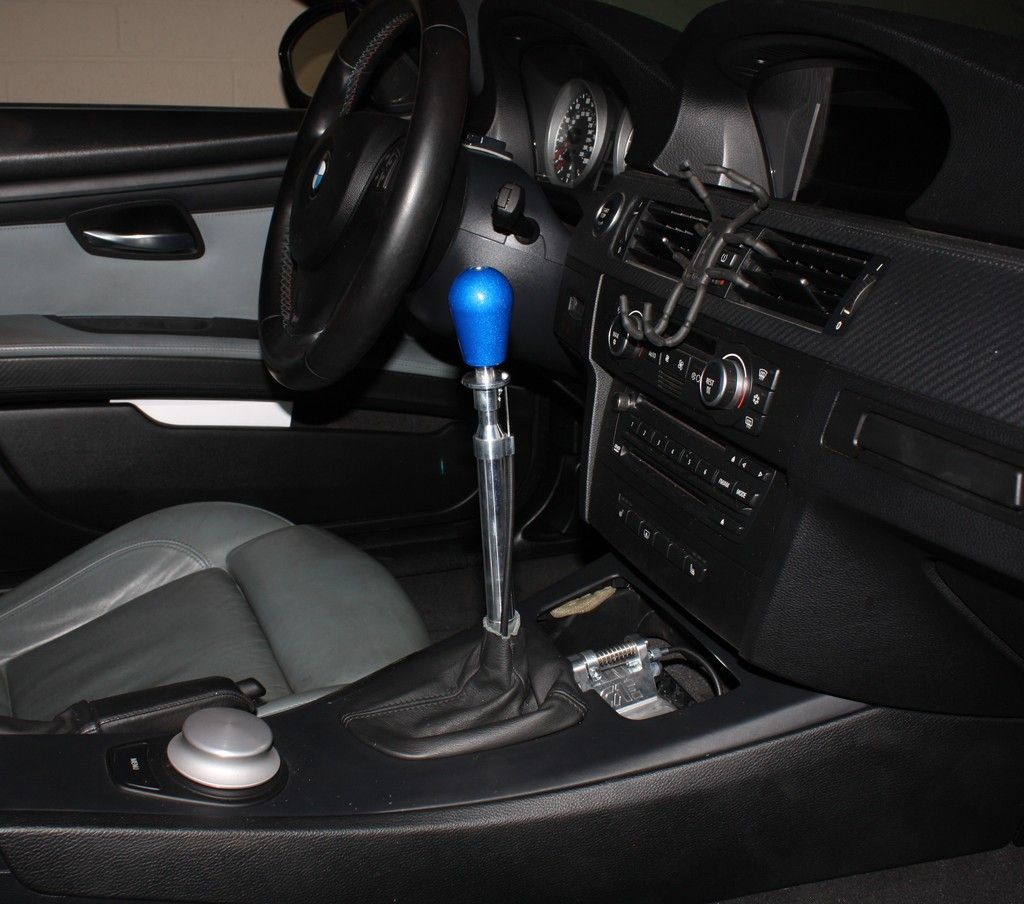
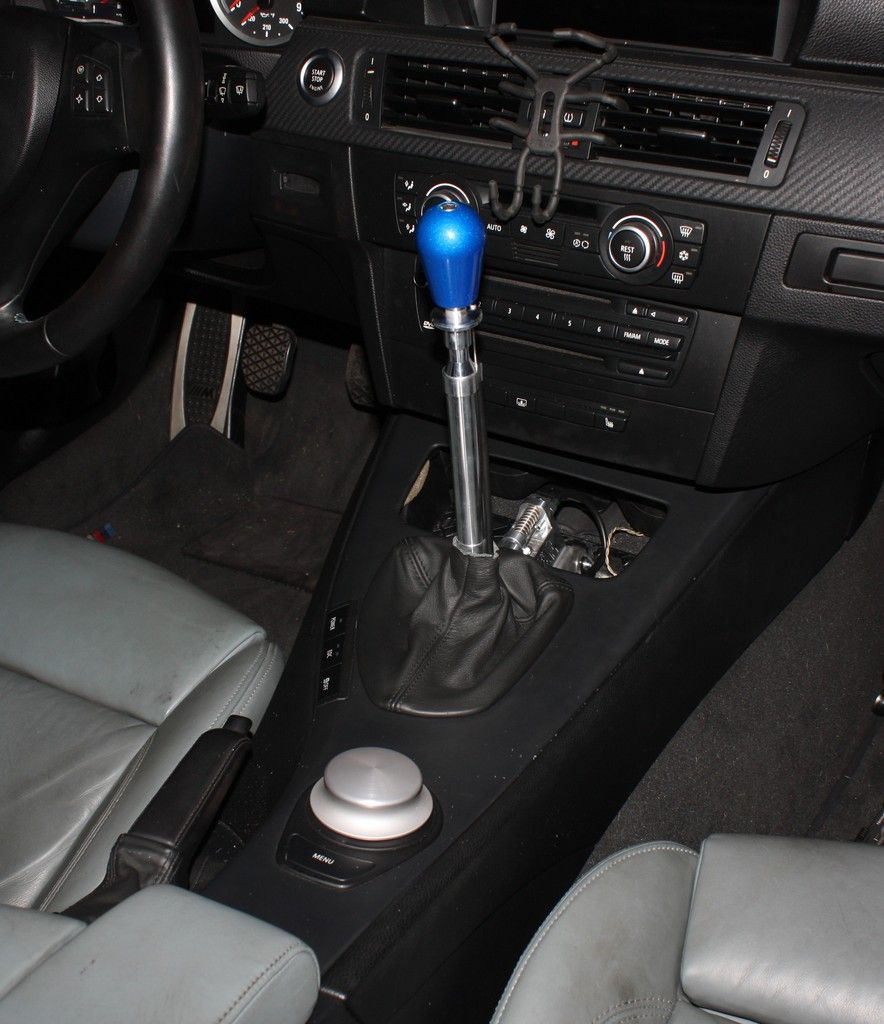
BBBUUTTT BEFORE YOU GO DRIVING heat shields need to be bolted back on, exhaust mounted back on with its hangers, do one more check everything is tight! and finally lower the car and then go drive it like you stole it!
Thanks for looking. If anybody has any questions I'll answer them at the best of my ability!
I made a few short video clips for Instagram check them out @luis.1sl0m3
I love learning so I decided to knock this out solo, and share my experience with you guys. The lack of DIYs for this install was what stopped me from purchasing one of these a long time ago. I finally took the plunge and I couldn't be happier. I am also installing a DSSR instead of the OEM linkage, I didn't test it but I'm positive the OEM linkage will fit.
The "Before"
HERE WE GO
Big BIG thanks to:
wrh3 his DIY for a UUC SSK helped me a lot to get down to the shifter carrier. Link to his DIY http://www.billswebspace.com/M3UUCEvo3DIY.htmYou can follow majority of his steps all the way until he takes apart the shifter from the shifter carrier. He used two screwdrivers, spinning the locking mechanism clockwise. BUTTT remove your exhaust and heat shields, you are going to want all the space to do this.
All the foam and rubber shift boots will be discarded. You will also need to trim the foam that is in the car, and cut some of the plastic off. I used a cordless dremel to do the cutting and sanding. I'll show what I did in later posts.
For this install you will have to remove the center console cover (the instructions call for the removal of the whole center console but I couldn't find a DIY, and couldn't figure it out, so I left it on. Which to me it turned out for the better because it eliminated the guessing when it came to the cutting and trimming.
The cover is held on by a few pressure clips so it just pulls straight up with some pressure. I started from the front and moved back.
There's also two bolts I decided to remove that holds the center console down. it gives a little bit of extra "leg room" to work with.
Back to the bottom of the car; first you have to support the transmission with a transmission jack if you have one. I didn't, so I used a piece of wood with my regular jack. Once supported you will need to remove the transmission cross member and exhaust hanger that is bolted to the transmission with torx bolts.
Transmission cross member
Two bolts on the right bolted to the frame
Two bolts on the left bolted to the frame
One nut on each side bolted to the transmission itself. At this point I recommended replacing your transmission mounts, the cross member is out and it's the easiest at this point to replace them. I did not know I was going to be in this deep and it didn't cross my mind... and again there is no DIYs for it... NOT perfect but I'll be the guinea pig for us all.
Once the cross member has been taken out, next you want to remove the exhaust hanger that is bolted to the transmission, you want to do this purely to have more space to work with.
Removing the two clips there's a locking mechanism. I slid a small flat tip screw driver in the flat spot on the side of them and then they swing up once unlocked.
Next removing the carrier from rubber grommet (back) and two pins (front). once you remove the two pins you have to release pressure on the jack, and let the transmission go down. The carrier can only go up over the transmission and then slide down on either side of it. you will have to push up on the carrier and pull down a bit on the transmission at the same time to make it slide out, it didn't take much.
How it will look like from the bottom and top with the carrier removed.
Initial mock up of how it will look.... still more to go after this point.
Now it's time for the part where most people start second guessing this purchase. I for one plan on keeping this car till it can't drive anymore, and even then I'll rebuild. So cutting and drilling wasn't an issue for me.
This pic is so you guys can get a basic idea of the cutting and trimming that needs to be done.
This is what it looked like after it was all said in done. I had to cut and mock it up a few times till I found a perfect position for the shifter. It doesn't look pretty but that is fine there is a plate provided by CAE that will cover this all up.
The plate mentioned above.
Bottom
Top
Almost done... Next it's the drilling of four holes to bolt the shifter down. Like I said its not pretty... I messed up the first set of holes. Again the plate covers this all up. Exhibit A
So once you drilled the four holes IN THE RIGHT PLACE Bolt the shifter down. Hardware is provided you can use either nuts and washers, or a bar the comes with threads welded on. I used the bar on one side and nuts on the other. At this point you have to do a few things; connect the DSSR to the transmission and then shifter, or OEM rod if you didn't upgrade, then bolt the transmission cross member back on (There's other steps you have to follow provided by CAE)
One of those steps is attaching the little dust boot provided by them.. which actually is a lot harder than it seems... I have big hands so it took me a while to figure it out. I used a small pry bar to hold one side down while I pulled as much as I could on the other side, working it little by little all the way around.
Once that lil F!@#!# is done you're on the home stretch!!!!!
Here it is all bolted down where it's supposed to be.Next and third to final step, trimming of the center console cover... you will have to remove your ash tray (mine) or any other accessory you may have in that upper spot. To mark it: place it where it supposed to be see where it hits the shifter and cut that piece... All done in this picture.
And cover reinstalled
Second to final step: is trimming the shift boot, I'm using the OEM one for now till I can have something custom made for the boot and the front part where the accessory was.
FINAL STEP!!!! is fine tuning the shifter. Step by step on how to tune the shifter are provided.
BBBUUTTT BEFORE YOU GO DRIVING heat shields need to be bolted back on, exhaust mounted back on with its hangers, do one more check everything is tight! and finally lower the car and then go drive it like you stole it!
Thanks for looking. If anybody has any questions I'll answer them at the best of my ability!
I made a few short video clips for Instagram check them out @luis.1sl0m3