

Couldn't find a DIY for this specific item so I figured I'd put one up for the archives. It should be noted that this is entirely wrong and due to its halfarsedness should not be attempted by anyone.  Take it to an alignment shop if you're afraid of breaking something, just make sure they aren't slaves to "the specs" and they'll do this the right way for you. I'm accustomed to, and comfortable with, perpetrating monumental acts of stupidity and paying for the consequences. If you're like me then read on...
Time needed: 45 minutes + 5 minutes per beer
Tools:
Ratchets with 13mm and 8mm sockets
13mm combo or ratcheting wrench
Large flathead screwdriver
3mm allen key
Channel Locks or Vise-grips
Blue Loctite
Floor jack
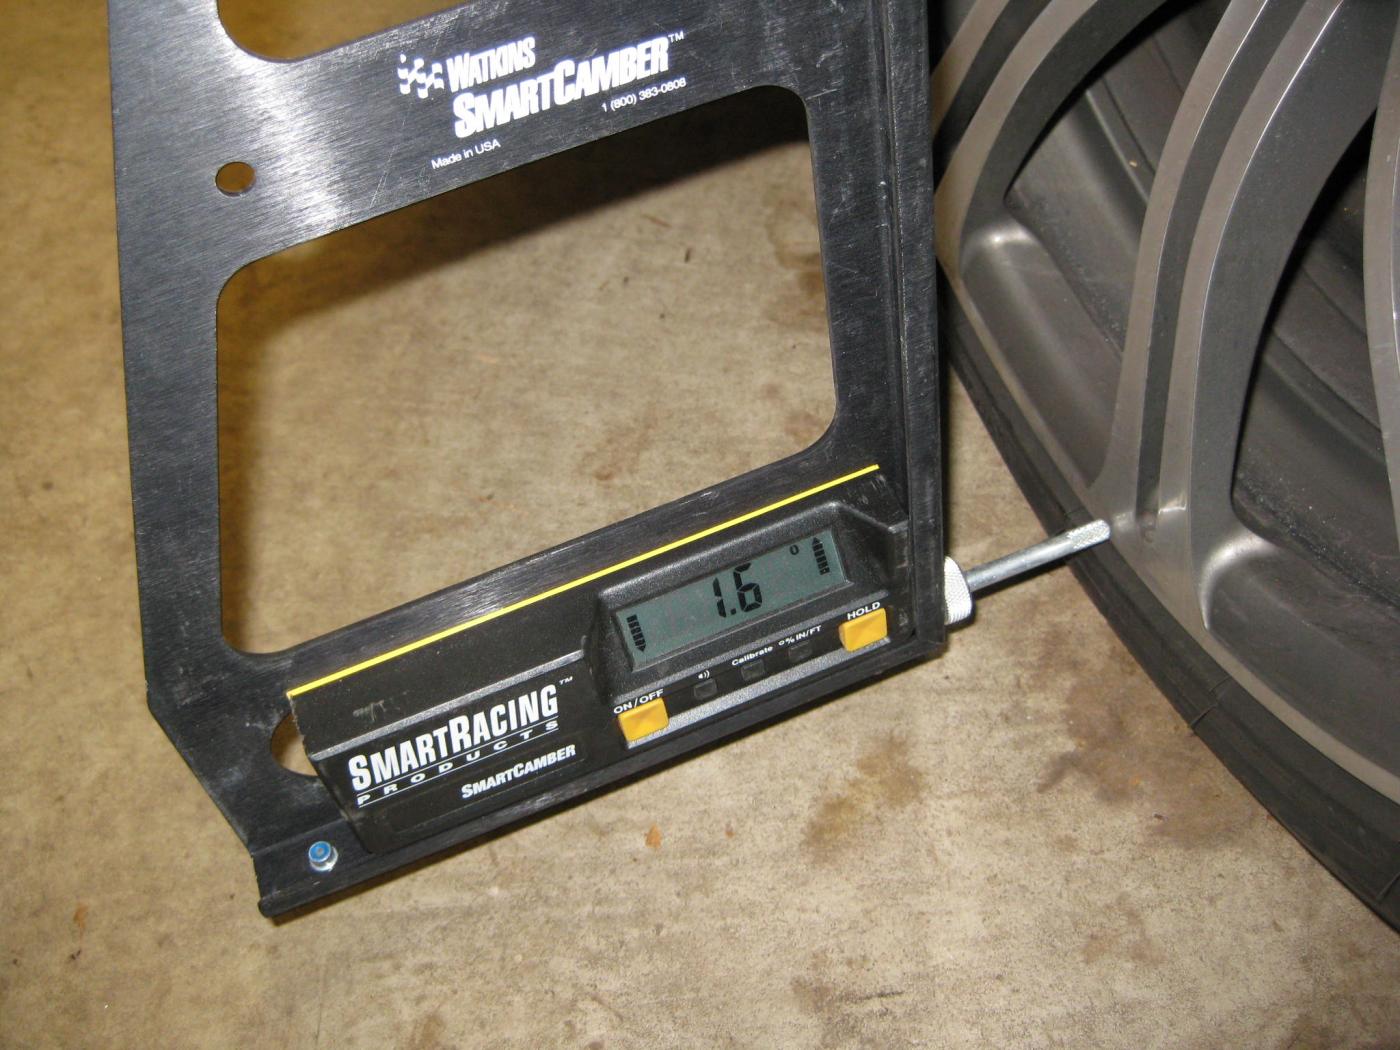
An alignment at a shop or your own alignment tools are great for before/after comparison. There's not much moving here so not much is going to change except camber, but it's a good idea to do this on a level floor and mark the wheel centerlines so you can find your reference point again. I used my low-tech Smartcamber gauge and longacre toe plates to make sure I didn't throw anything out of whack. Personally I'm comfortable using my track alignment tools, but if you aren't familiar with how they behave it's probably better to get an alignment afterwards to make sure. Toe did not change, and negative camber increased by about 0.4 to 0.7 degrees using this method. I checked beforehand and had 0.8-1.0 degrees on each side. Zero toe on the front, and I checked the rear for sh!ts and giggles and found 3/32" toe in and 1.6-1.8 of camber.
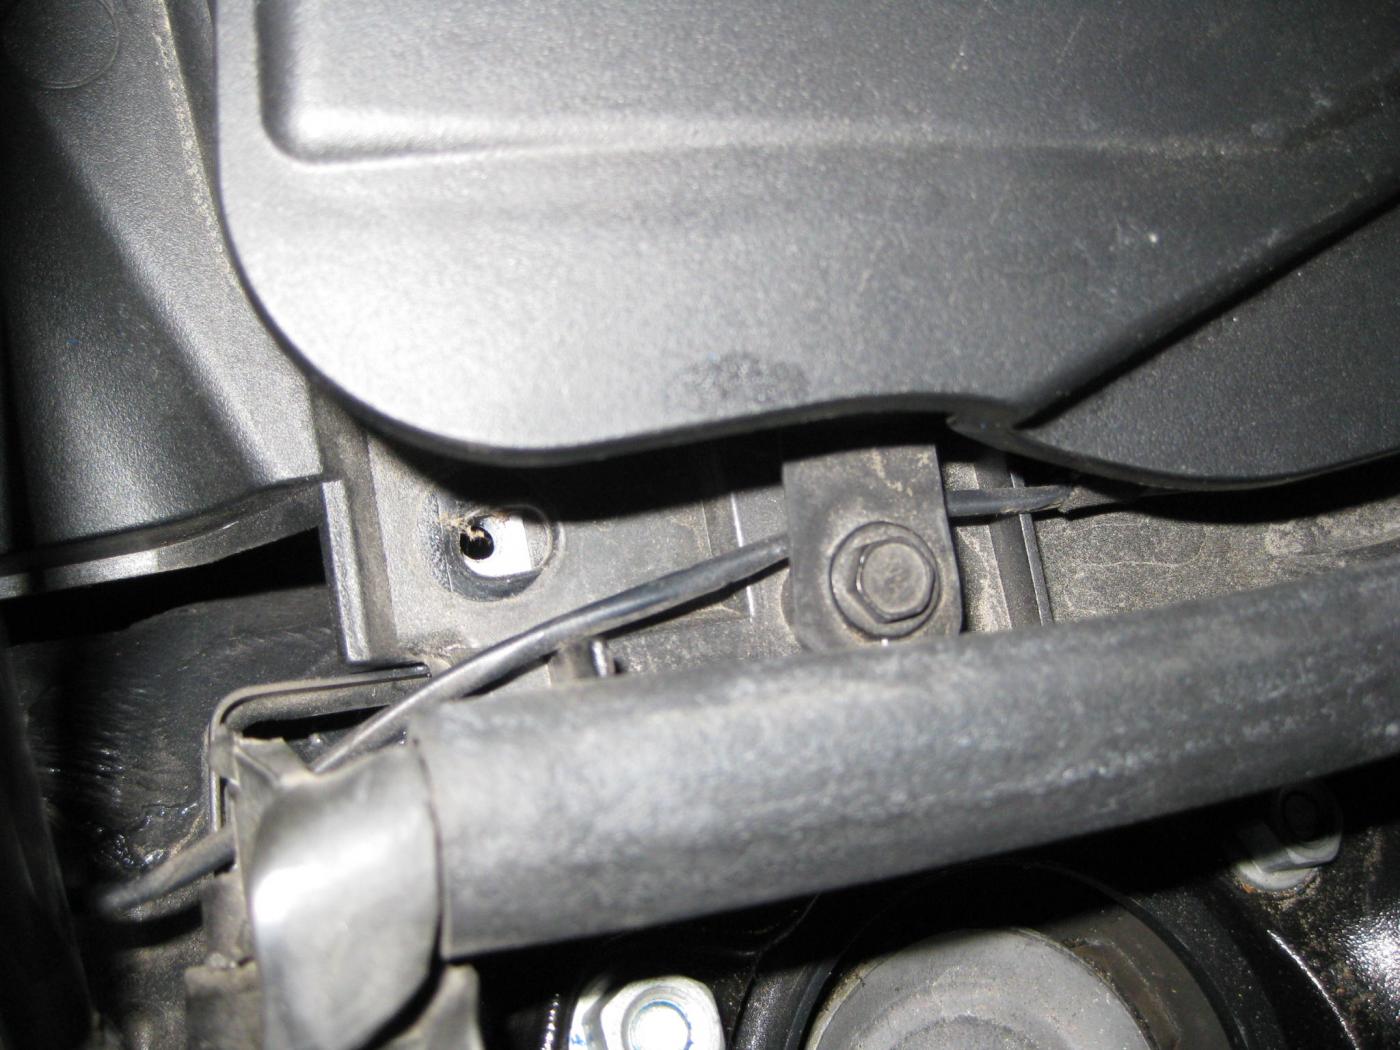
Pop off the ///Marketing plastic shock tower cover with the flathead screwdriver and start loosening the 13mm nuts. Let the weight of the car hold everything in place. Remove the 8mm bolt holding the plastic cowl in place to give you enough wiggle room to remove the tower brace.
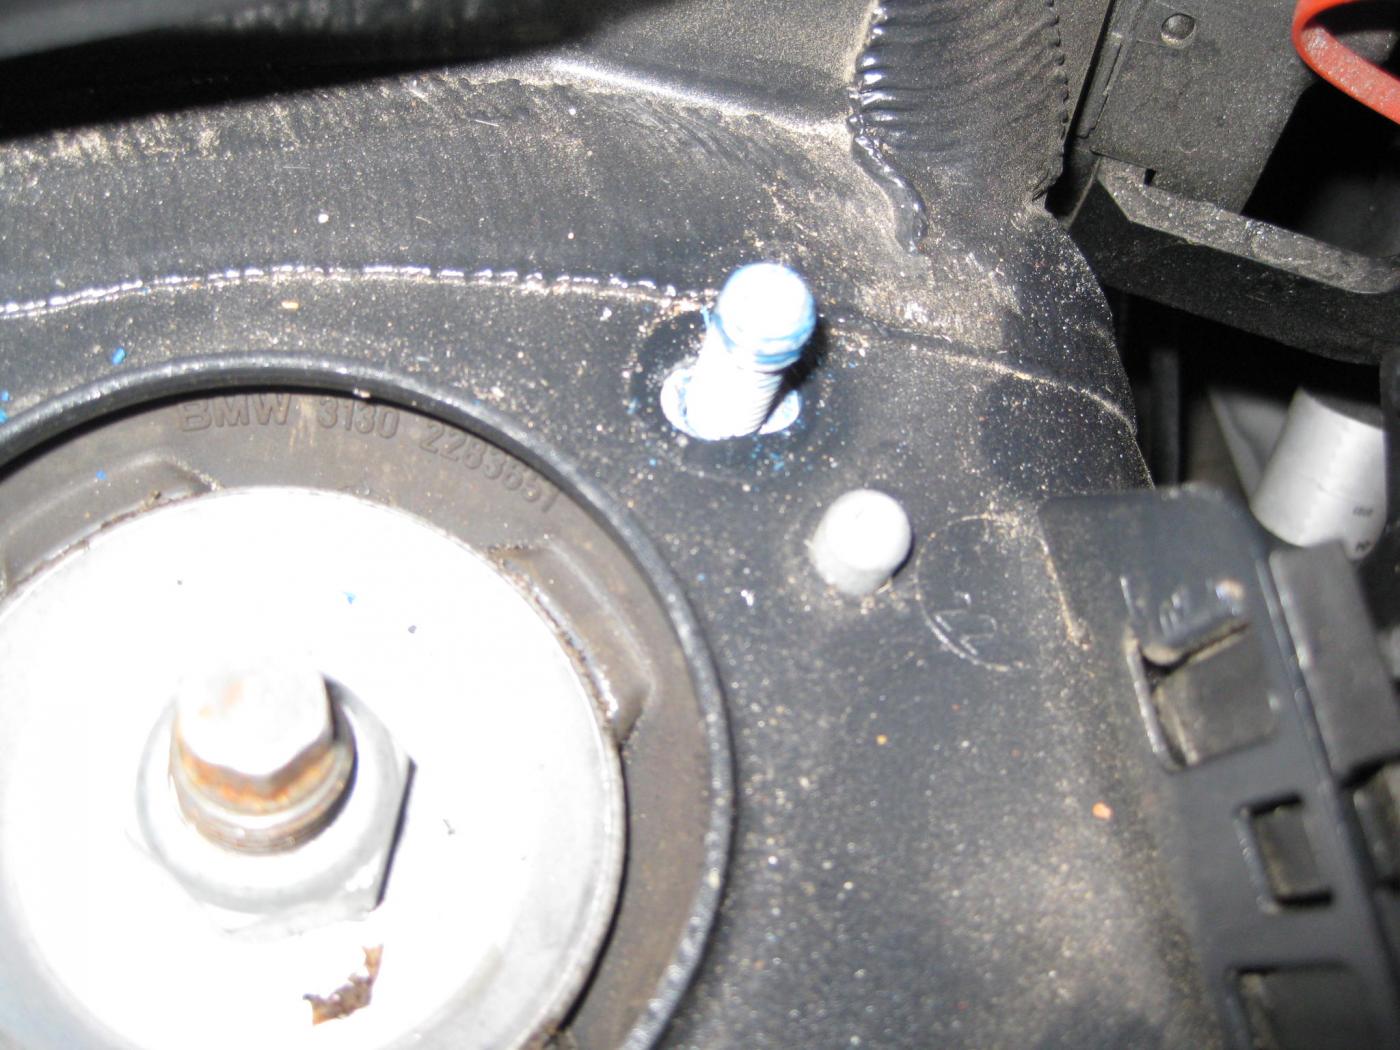
Jack up the side you're working on to take weight off that corner. Jacking up both sides just allows the suspension to droop, which isn't ideal, so I let the swaybar keep tension on everything. Remove the pin. The aluminum pin shown is the passenger side, it may come out easily with the 3mm allen key like my driver's side pin did, or it may be a bastard and strip immediately with a small amount of force (not even enough to deflect the 3mm allen key which isn't exactly stout) in which case you'll need to use channel locks or vise-grips to turn it.
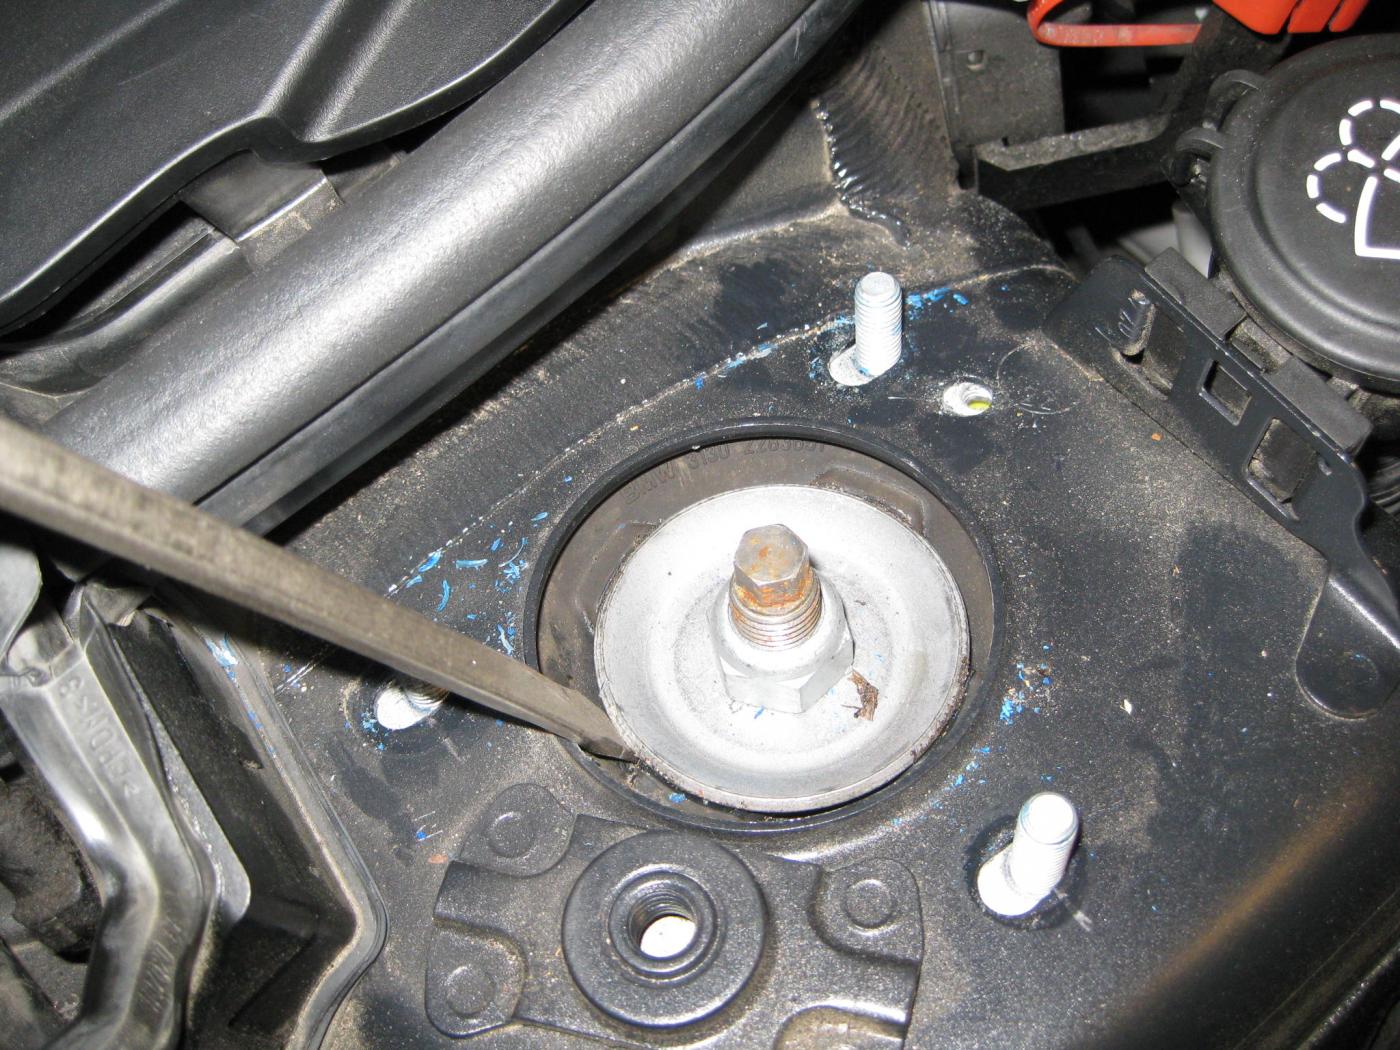
Now comes the fun part. Take the flathead screwdriver and pry *lightly* against the metal strut hat top with one hand to move the strut into position while your other hand is on the jack handle. Check that all three strut mount studs are bottomed out against the inboard side of the slotted strut tower stud holes. Maintain pressure on the screwdriver while slowly, gently lowering the car, loading up the suspension until the weight of the car is holding everything in place again.
Leave everything still loose and unbolted on that corner and push the car forward and backwards about 10-15 feet while bouncing the front suspension and turning the steering wheel. Helps to have a buddy for this. This settles everything to ensure that there is no residual bind in the bushings. Do a preliminary alignment check for toe and camber at this point if you have the tools to make sure nothing has gone sideways.
Bolt everything back together (don't forget that plastic cover it's important!!!111uno!!!). Use the blue loctite on the upper strut nuts. Start with the brace/strut studs first, then tighten down the two nuts that hold the brace to the firewall brace to avoid putting them in a bind.
Proceed to the other side and repeat. Once everything is complete and bolted down, bounce it and roll it again or drive it a short distance and come back to check alignment again.
In my case I ended up with 1.4 and 1.6 degrees of camber, with no change in toe. This puts the front about 0.2 degrees less negative than the rear as opposed to nearly an entire degree.
If you have EDC I'm sorry. And aside from being sorry for you  , I don't know what it takes to remove the EDC actuator, or if you even need to, to take advantage of this adjustment.
It should also be noted that I did this the laziest, easiest way possible without even going under the car. One could, if one were inclined to do so, probably get another couple tenths out of the stock front suspension by loosening everything and pulling it in the appropriate direction, then tightening under tension. I'm thinking of the lower strut mounting bolts in particular. Motorcycle tie-downs can do wonderful things for a car's handling.
As a side note, the OEM 220M 19's are nice as OEM wheels go for checking alignment with a Smart Camber gauge with that nice flat outer bead seat surface. The 18's are curved so it's tough to put it back in the same place twice.
As far as how the car responds to this, my car is completely factory suspension wise aside from the camber adjustment. It's much more "pointy" after turn-in now. There's still some turn-in reluctance (rear toe-in, probably) but as soon as it takes a set it's possible to get on the throttle much earlier and power through the corner. Before adding the camber the car had two ways to point the front in the right direction in 2nd and 3rd gear corners:
a) Turn in, stomp gas, countersteer to control power-oversteer all the way through
b) Turn in, apply neutral throttle, unwind wheel and power out once more throttle won't wash out the front and send you into the ditch
Now you have option c) Turn in, apply power and feed it in early and progressively without the front washing out.
You can actually apply the "string between your foot and your steering wheel" principle and feed throttle as you unwind the wheel without pissing off the front tires. Much better. If I had known how much more alert the frontend would be mid-corner with this simple 45 minute change, I would have done it the day I got the car. Adding less than a degree of camber to the front of the car isn't a silver bullet; there are still limits and the car still pushes some in faster corners but that's not such a bad thing for a street car. Still, balance is better in faster corners, and the car is more responsive to mid-corner throttle changes and doesn't need abrupt changes to change the arc through the corner. All of these results are pretty "DUH!" for people who know how it's supposed to work, but theory and reality aren't always in agreement.
Somehow I managed not to cause any negative effects either. Tracking, steering feel, bump steer are all just as good as before which is to say very good. And since I've been wearing the outsides of my fronts a little faster than the insides, this should help even out the tire wear too.
Great little improvement especially if, like me, you need to leave the suspension relatively untouched due to compliance and ground clearance concerns.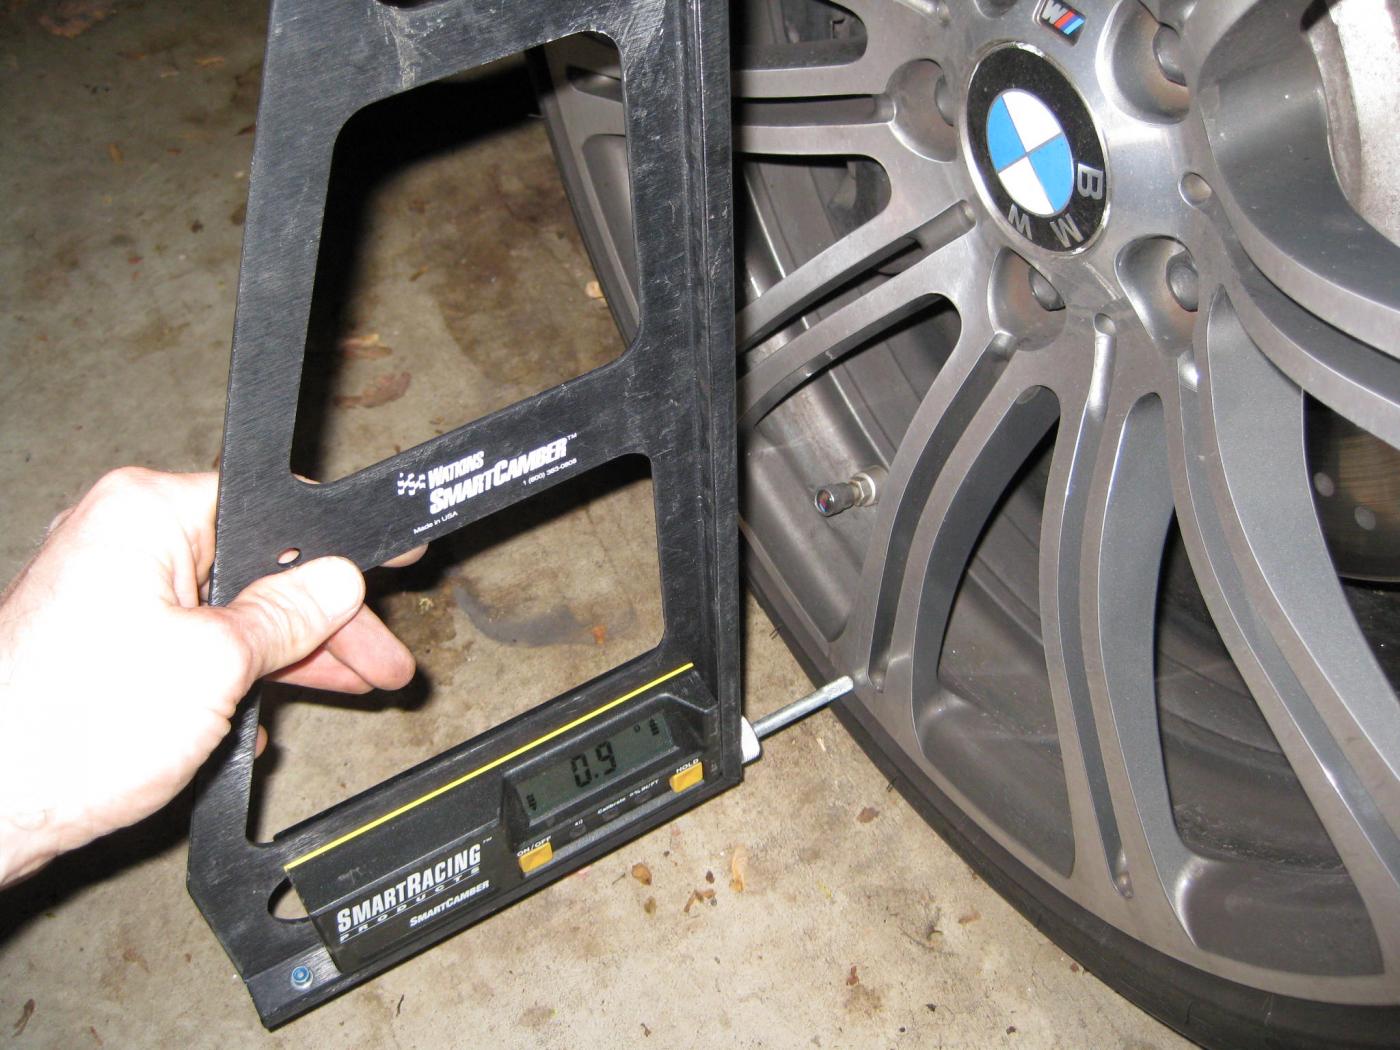

Take it to an alignment shop if you're afraid of breaking something, just make sure they aren't slaves to "the specs" and they'll do this the right way for you. I'm accustomed to, and comfortable with, perpetrating monumental acts of stupidity and paying for the consequences. If you're like me then read on...Time needed: 45 minutes + 5 minutes per beer
Tools:
Ratchets with 13mm and 8mm sockets
13mm combo or ratcheting wrench
Large flathead screwdriver
3mm allen key
Channel Locks or Vise-grips
Blue Loctite
Floor jack
An alignment at a shop or your own alignment tools are great for before/after comparison. There's not much moving here so not much is going to change except camber, but it's a good idea to do this on a level floor and mark the wheel centerlines so you can find your reference point again. I used my low-tech Smartcamber gauge and longacre toe plates to make sure I didn't throw anything out of whack. Personally I'm comfortable using my track alignment tools, but if you aren't familiar with how they behave it's probably better to get an alignment afterwards to make sure. Toe did not change, and negative camber increased by about 0.4 to 0.7 degrees using this method. I checked beforehand and had 0.8-1.0 degrees on each side. Zero toe on the front, and I checked the rear for sh!ts and giggles and found 3/32" toe in and 1.6-1.8 of camber.
Pop off the ///Marketing plastic shock tower cover with the flathead screwdriver and start loosening the 13mm nuts. Let the weight of the car hold everything in place. Remove the 8mm bolt holding the plastic cowl in place to give you enough wiggle room to remove the tower brace.
Jack up the side you're working on to take weight off that corner. Jacking up both sides just allows the suspension to droop, which isn't ideal, so I let the swaybar keep tension on everything. Remove the pin. The aluminum pin shown is the passenger side, it may come out easily with the 3mm allen key like my driver's side pin did, or it may be a bastard and strip immediately with a small amount of force (not even enough to deflect the 3mm allen key which isn't exactly stout) in which case you'll need to use channel locks or vise-grips to turn it.
Now comes the fun part. Take the flathead screwdriver and pry *lightly* against the metal strut hat top with one hand to move the strut into position while your other hand is on the jack handle. Check that all three strut mount studs are bottomed out against the inboard side of the slotted strut tower stud holes. Maintain pressure on the screwdriver while slowly, gently lowering the car, loading up the suspension until the weight of the car is holding everything in place again.
Leave everything still loose and unbolted on that corner and push the car forward and backwards about 10-15 feet while bouncing the front suspension and turning the steering wheel. Helps to have a buddy for this. This settles everything to ensure that there is no residual bind in the bushings. Do a preliminary alignment check for toe and camber at this point if you have the tools to make sure nothing has gone sideways.
Bolt everything back together (don't forget that plastic cover it's important!!!111uno!!!). Use the blue loctite on the upper strut nuts. Start with the brace/strut studs first, then tighten down the two nuts that hold the brace to the firewall brace to avoid putting them in a bind.
Proceed to the other side and repeat. Once everything is complete and bolted down, bounce it and roll it again or drive it a short distance and come back to check alignment again.
In my case I ended up with 1.4 and 1.6 degrees of camber, with no change in toe. This puts the front about 0.2 degrees less negative than the rear as opposed to nearly an entire degree.
If you have EDC I'm sorry.
And aside from being sorry for you , I don't know what it takes to remove the EDC actuator, or if you even need to, to take advantage of this adjustment.It should also be noted that I did this the laziest, easiest way possible without even going under the car. One could, if one were inclined to do so, probably get another couple tenths out of the stock front suspension by loosening everything and pulling it in the appropriate direction, then tightening under tension. I'm thinking of the lower strut mounting bolts in particular. Motorcycle tie-downs can do wonderful things for a car's handling.
As a side note, the OEM 220M 19's are nice as OEM wheels go for checking alignment with a Smart Camber gauge with that nice flat outer bead seat surface. The 18's are curved so it's tough to put it back in the same place twice.
As far as how the car responds to this, my car is completely factory suspension wise aside from the camber adjustment. It's much more "pointy" after turn-in now. There's still some turn-in reluctance (rear toe-in, probably) but as soon as it takes a set it's possible to get on the throttle much earlier and power through the corner. Before adding the camber the car had two ways to point the front in the right direction in 2nd and 3rd gear corners:
a) Turn in, stomp gas, countersteer to control power-oversteer all the way through
b) Turn in, apply neutral throttle, unwind wheel and power out once more throttle won't wash out the front and send you into the ditch
Now you have option c) Turn in, apply power and feed it in early and progressively without the front washing out.
You can actually apply the "string between your foot and your steering wheel" principle and feed throttle as you unwind the wheel without pissing off the front tires. Much better. If I had known how much more alert the frontend would be mid-corner with this simple 45 minute change, I would have done it the day I got the car. Adding less than a degree of camber to the front of the car isn't a silver bullet; there are still limits and the car still pushes some in faster corners but that's not such a bad thing for a street car. Still, balance is better in faster corners, and the car is more responsive to mid-corner throttle changes and doesn't need abrupt changes to change the arc through the corner. All of these results are pretty "DUH!" for people who know how it's supposed to work, but theory and reality aren't always in agreement.
Somehow I managed not to cause any negative effects either. Tracking, steering feel, bump steer are all just as good as before which is to say very good. And since I've been wearing the outsides of my fronts a little faster than the insides, this should help even out the tire wear too.
Great little improvement especially if, like me, you need to leave the suspension relatively untouched due to compliance and ground clearance concerns.


