

DrFerry wroteGreat feedback and confirms the route I should take...replace. Thank you!The answer is "it all depends".. Depends upon how old the valve covers are and how much of the OEM paint is bubbling or peeling. Since the valve covers are magnesium, they are porous. The hot oil eventually soaks through the valve cover metal and starts to lift and bubble the OEM paint. Then oil leaks from under the bubbling paint.
IF your valve covers have very little paint peeling and bubbling then asHelmsman mentioned many people just do the gaskets and the bolts. See the DIY thread. I just had mine done and am now wishing I had paid the money for powder coat new ones from
Vedubin01 because I can already see some seepage after less than 2K miles after valve cover gasket replacements.
Accordingdeansbimmer a portion of his customers *who don't get new valve covers installed* end up returning to his shop (after a while) to get the job done again due to leaks again. After 74K miles the OEM valve covers don't owe you anything IMO. So why not go ahead and replace them while you're in there? Just my two cents. You could also find a local shop to powder coat and refurbish your existing valve covers to save some money.
.
https://precision-sport.com/products/future-classic-e9x-m3-wrinkle-valve-cover-set?variant=32457004875839
.
https://futureclassic.us/products/future-classic-e9x-m3-wrinkle-valve-cover-set
126.7KVIEWS
186REPLIES
84APPRECIATES
01-15-2026LAST POST
schnellster wroteThe list never ends hey, sorry about that...Super helpful info, this was not on my list but will be now!

Richbot wroteDoes anyone have the part number and quantity for the cam sensor bolts? I suspect mine may have started weeping again after the PO just replaced the gaskets, thinking about going this route and just ordering 2 new valve covers instead of replacing the gaskets and bolts/grommets.Not contributing to the DIY other than to say this: New genuine BMW valve covers come dressed with gaskets, oil breathers, and bolts for about $1050 for the set if you can find a good sale. SEll the old ones to somebody wanting to powdercoat and you can offset that some. All you need is the Drei-Bond, spark plug tubes, and 4x cam position o-rings (13627796699)
It comes with new aluminum bolts for the breathers too, just have to reuse the cam sensor bolts or buy new if you like spending money, which you do if you bought new valvecovers.
recently changed bavarian cover
i used their supplied gasket and reuse my bolt but changed the bolt rubber
torque them to 7nm and seem to have minor seeping
the oil level seems to drop one level after 3 weeks of install!
should i try changing original gasket and buy new bolt or should i just retorque all bolts again?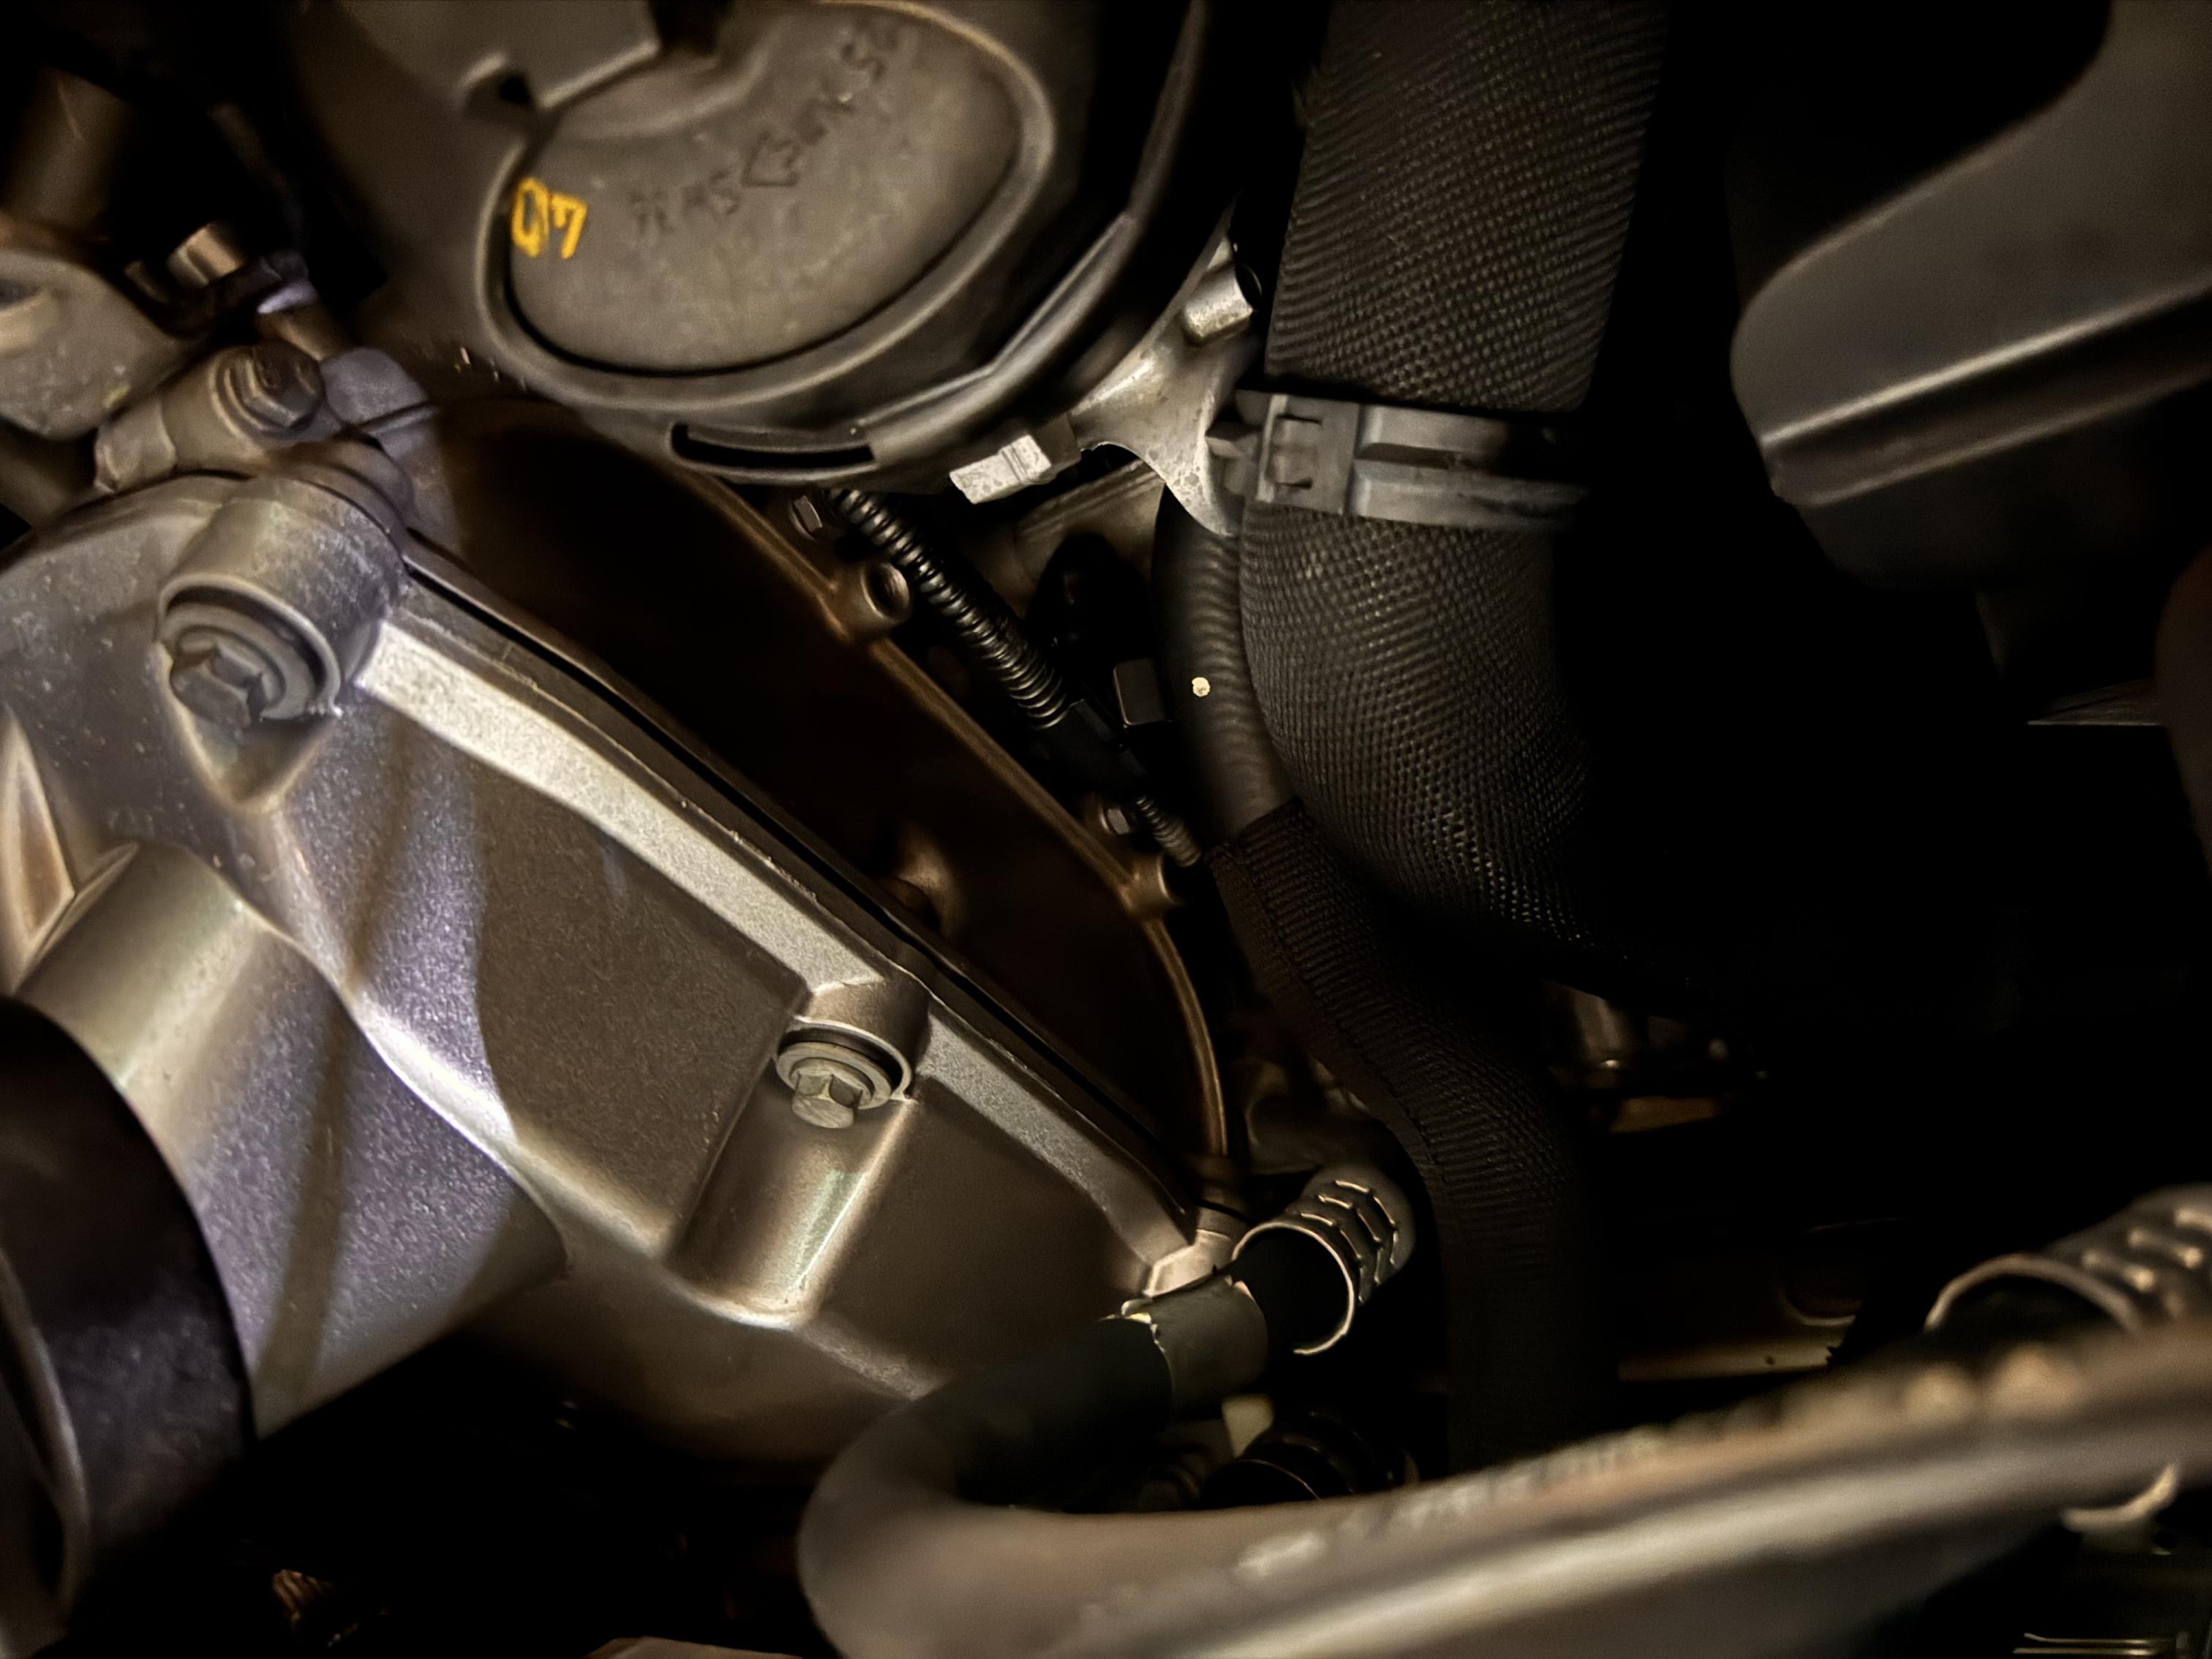
i used their supplied gasket and reuse my bolt but changed the bolt rubber
torque them to 7nm and seem to have minor seeping
the oil level seems to drop one level after 3 weeks of install!
should i try changing original gasket and buy new bolt or should i just retorque all bolts again?
This thread is linked from the excellent DIY Reference - Common E9X M3 Torque Specs thread, which has the torque specs for the main hardware correct (6 Nm).
However, nowhere in this actual thread does anyone get the torque specs correct, so I'm here to give that info.
Edit: I see KawBoy in post #58 has the correct info, but is followed by a baffling debate where "decoupling" is confused for "fastener loosening/untorquing/removal" when it actually describes the fact that the hardware (with its rubber grommets) is decoupled/isolated from the valve cover when installed properly (for various reasons I could get into). The correct info should not be so buried in this thread.
The torque specs below are from a comprehensive thread I put together about the aluminum valve cover options:
BMW S65 valve cover options (mostly inclusive).
There is tons of good info in there, go read it.
So, as for the torque sequence and measurements... This is the correct info:
Torque specs:
However, nowhere in this actual thread does anyone get the torque specs correct, so I'm here to give that info.
Edit: I see
KawBoy in post #58 has the correct info, but is followed by a baffling debate where "decoupling" is confused for "fastener loosening/untorquing/removal" when it actually describes the fact that the hardware (with its rubber grommets) is decoupled/isolated from the valve cover when installed properly (for various reasons I could get into). The correct info should not be so buried in this thread.The torque specs below are from a comprehensive thread I put together about the aluminum valve cover options:
BMW S65 valve cover options (mostly inclusive).
There is tons of good info in there, go read it.
So, as for the torque sequence and measurements... This is the correct info:
Torque specs:
- Inside-out sequence - main hardware
Just like any long, skinny mating surface, the torque order/sequence is from the center hardware spreading outward, with the corners last. There are many valid ways to accomplish this, but for those who don't want to think, here is one perfectly valid order that I put together. - 6 Nm - main hardware
The main hardware (galvanized steel bolts with M6 threads, 10mm hex head, captured depth-limiting sleeve/collar (also galvanized steel), and integrated rubber grommet) torque spec is a dry 6 Nm. (Listed as "AZ Decoupling adapter screw to cylinder head cover" in the linked source). Make note one of these bolts on each cover is actually a stud with upper nut used as an ignition coil ground. - 4 Nm + 45° turn - oil separator and cam angle sensor hardware
The oil separator and cam angle sensor hardware (aluminum bolts with M6 threads and T30 torx head) torque spec is a dry 4 Nm + 45° turn. - 10 Nm - upper timing chain cover hardware
The upper timing chain cover hardware (aluminum bolts with M6 threads and 10mm hex head) toque spec is a dry 10 Nm. - 10 Nm - coil cover pins
The coil cover pin (aluminum stand-off pylon pins with M6 threads and 13mm central hex provision) torque spec is a dry 10 Nm (but I prefer 8 Nm). Make note the rear-most pin on each cover also acts as an ignition coil ground. - 6 Nm - ignition coil ground nuts
The other ignition coil wiring harness ground hardware (galvanized steel 10mm nut with M6 threads and integrated washer) torque spec is not listed, but common sense says it should be no more than 6 Nm, and less wouldn't be better either.
BenFenner wroteI see at the link below you went with the NRW valve covers. Good choice. Edited too: "Maybe" a good choice.This thread is linked from the excellent DIY Reference - Common E9X M3 Torque Specs thread, which has the torque specs for the main hardware correct (6 Nm).
However, nowhere in this actual thread does anyone get the torque specs correct, so I'm here to give that info.
Edit: I see
The torque specs below are from a comprehensive thread I put together about the aluminum valve cover options:
BMW S65 valve cover options (mostly inclusive).
There is tons of good info in there, go read it.
So, as for the torque sequence and measurements... This is the correct info:
Torque specs:
- Inside-out sequence - main hardware
Just like any long, skinny mating surface, the torque order/sequence is from the center hardware spreading outward, with the corners last. There are many valid ways to accomplish this, but for those who don't want to think, here is one perfectly valid order that I put together.- 6 Nm - main hardware
The main hardware (galvanized steel bolts with M6 threads, 10mm hex head, captured depth-limiting sleeve/collar (also galvanized steel), and integrated rubber grommet) torque spec is a dry 6 Nm. (Listed as "AZ Decoupling adapter screw to cylinder head cover" in the linked source). Make note one of these bolts on each cover is actually a stud with upper nut used as an ignition coil ground.- 4 Nm + 45° turn - oil separator and cam angle sensor hardware
The oil separator and cam angle sensor hardware (aluminum bolts with M6 threads and T30 torx head) torque spec is a dry 4 Nm + 45° turn.- 10 Nm - upper timing chain cover hardware
The upper timing chain cover hardware (aluminum bolts with M6 threads and 10mm hex head) toque spec is a dry 10 Nm.- 10 Nm - coil cover pins
The coil cover pin (aluminum stand-off pylon pins with M6 threads and 13mm central hex provision) torque spec is a dry 10 Nm (but I prefer 8 Nm). Make note the rear-most pin on each cover also acts as an ignition coil ground.- 6 Nm - ignition coil ground nuts
The other ignition coil wiring harness ground hardware (galvanized steel 10mm nut with M6 threads and integrated washer) torque spec is not listed, but common sense says it should be no more than 6 Nm, and less wouldn't be better either.
.
https://www.sr20-forum.com/general-non-sr20-discussion/!79673-bmw-s65-valve-cover-options-mostly-inclusive.html?post_id=1054722#post!1054722
Yah, they really are an amazing product that we are lucky to have available.
Not many BMWs get such amazing aftermarket support (and ongoing this late into its life). The S65 folks really have it easy out there.
Not many BMWs get such amazing aftermarket support (and ongoing this late into its life). The S65 folks really have it easy out there.
I’m starting to also look at DIY valve cover repair to fix weeping despite a newish gasket (on original covers). I fear there’s a lot of misinformation though. I may also be wrong but for example:
I don’t believe the rubber grommets on the valve cover bolts contribute to leaks. The gasket fully surrounds the bolt so if there is oil pooling by the bolt tops around the grommets, the oil must migrate there from a leak in the main gasket or from the oil cap.
The valve covers look like forged magnesium alloy which wouldn’t allow oil to penetrate through from bottom to top. If it was sintered maybe. So this refrain that this alloy has limited life doesn’t make sense to me.
So on the above two points I think the struggle is with very small, maybe microscopic pits and imperfections, possibly from oxidation, possibly from peeling coating, possibly from damage somehow. So, I’m thinking a thorough cleaning of the gasket channels then either leaving them bare or applying something like cerakote then seating the gasket.
For example, on my valve cover, I can see a very tiny dent by the oil hole, probably from some Neanderthal bumping it with a tool. I think oil weeps out of this imperfection.
My plan to avoid buying $1200 replacements is to get a set from eBay, strip the coating, scotchbrite the gasket seating area to remove imperfections (not trying to sand, just smooth), clean and dry and paint the exterior. I don’t have a media blasting setup so finding some magnesium safe stripper seems like a more cost effective approach. Just not sure where to buy such a product (I know they exist).
Curious on others’ journeys with this and how projects have ended up! Also I will humbly accept criticism of where I’m wrong— I’ve been reading the forums a ton, but definitely not an expert!
I don’t believe the rubber grommets on the valve cover bolts contribute to leaks. The gasket fully surrounds the bolt so if there is oil pooling by the bolt tops around the grommets, the oil must migrate there from a leak in the main gasket or from the oil cap.
The valve covers look like forged magnesium alloy which wouldn’t allow oil to penetrate through from bottom to top. If it was sintered maybe. So this refrain that this alloy has limited life doesn’t make sense to me.
So on the above two points I think the struggle is with very small, maybe microscopic pits and imperfections, possibly from oxidation, possibly from peeling coating, possibly from damage somehow. So, I’m thinking a thorough cleaning of the gasket channels then either leaving them bare or applying something like cerakote then seating the gasket.
For example, on my valve cover, I can see a very tiny dent by the oil hole, probably from some Neanderthal bumping it with a tool. I think oil weeps out of this imperfection.
My plan to avoid buying $1200 replacements is to get a set from eBay, strip the coating, scotchbrite the gasket seating area to remove imperfections (not trying to sand, just smooth), clean and dry and paint the exterior. I don’t have a media blasting setup so finding some magnesium safe stripper seems like a more cost effective approach. Just not sure where to buy such a product (I know they exist).
Curious on others’ journeys with this and how projects have ended up! Also I will humbly accept criticism of where I’m wrong— I’ve been reading the forums a ton, but definitely not an expert!
mmojz wroteThe rubber grommets do indeed degrade leading to reduced compression forces on the gasket. This contributes to the leaking but is not the entire root cause. See next point below. Improved silicone grommets and/or improved hardware can be found at NRW's and Europower's websites.I’m starting to also look at DIY valve cover repair to fix weeping despite a newish gasket (on original covers). I fear there’s a lot of misinformation though. I may also be wrong but for example:
I don’t believe the rubber grommets on the valve cover bolts contribute to leaks. The gasket fully surrounds the bolt so if there is oil pooling by the bolt tops around the grommets, the oil must migrate there from a leak in the main gasket or from the oil cap.
The valve covers look like forged magnesium alloy which wouldn’t allow oil to penetrate through from bottom to top. If it was sintered maybe. So this refrain that this alloy has limited life doesn’t make sense to me.
So on the above two points I think the struggle is with very small, maybe microscopic pits and imperfections, possibly from oxidation, possibly from peeling coating, possibly from damage somehow. So, I’m thinking a thorough cleaning of the gasket channels then either leaving them bare or applying something like cerakote then seating the gasket.
For example, on my valve cover, I can see a very tiny dent by the oil hole, probably from some Neanderthal bumping it with a tool. I think oil weeps out of this imperfection.
My plan to avoid buying $1200 replacements is to get a set from eBay, strip the coating, scotchbrite the gasket seating area to remove imperfections (not trying to sand, just smooth), clean and dry and paint the exterior. I don’t have a media blasting setup so finding some magnesium safe stripper seems like a more cost effective approach. Just not sure where to buy such a product (I know they exist).
Curious on others’ journeys with this and how projects have ended up! Also I will humbly accept criticism of where I’m wrong— I’ve been reading the forums a ton, but definitely not an expert!
The OEM valve covers are cast magnesium not forged. Magnesium is a porous material. Because of this BMW coated the interior side of the OEM valve covers. However, over time the coating degrades and peels off causing oil to migrate through the covers. The peeling and bubbling coating ends up inside the oil filter pleats.
Replacing the OEM valve cover gaskets but keeping the old OEM valve covers only works to reduce leaks and seeping for a short while (read about 3 months) then the issue returns. Replacing the valve covers and upgrading the grommets and/or bolt hardware with aluminum covers is the only way I know of to completely solve the issue.
MRT Billet Valve Covers:
https://mltengineering-design.com/products/mlt-engineering-billet-aluminum-valve-covers
.
NRW Cast Valve Covers:
https://www.nrw-design.com/products/s65-aluminum-valve-cover-set
.
NRW Silicone Grommets:
https://www.nrw-design.com/collections/e9x-m3/products/s65-valve-cover-grommet-kit
.
Metal Upgraded Bolt Hardware:
https://europowermotorsports.com/products/valve-cover-hardware-kit-bmw-e9x-m3-s65
.

Thanks! The 3 months lines up with my observations of very mild seepage. And those new covers sure do look good!
Impastokitsch wroterecently changed bavarian cover
i used their supplied gasket and reuse my bolt but changed the bolt rubber
torque them to 7nm and seem to have minor seeping
the oil level seems to drop one level after 3 weeks of install!
should i try changing original gasket and buy new bolt or should i just retorque all bolts again?
 Impastokitsch Did you ever figure this out? I was looking at these covers so curious how they’re holding up after a few months?
