|
|
 |

|
|
|
| 08-22-2012, 04:55 PM | #1 |
|
Lieutenant General
 7736
Rep 12,405
Posts |
DIY: S65 Throttle Actuator
Background:
Our V8's are prone to have to throttle actuator issues. It throws the car into limp mode. On my particular car, it threw the code 2B21 along with a few other ones. Part number: The S65 has 2 throttle actuators, one for each bank. They are the same part. Part number = 13627838085. The cost is around $800 or so. If you are looking straight at the engine from the front, Bank1 is on your LHS (by coolant reservoir and oil cap) and Bank2 is on your RHS (air intake side) Tools needed: Your regular socket set (6MM, 8MM, 10MM ect...) Many ratchet extensions Torx Set Magnetic pick-up tool Bavarian Technic Tool to clear code (or something similar) - EDIT: Seems like a few people have gotten away with not having to clear anything. Some have started right up with no codes. I HIGHLY recommend getting a set of trim removal tools, rather than using a screw driver to pry and push things. Note: I've read dealerships quoting almost a $1000 for labor for this job, which is ridiculous. I'd say anyone with medium experience working on cars can do this. I do all my maintenance, but wouldn't know how to do an engine swap just to give you an idea of my skill level. I'd say around 4-5 hours for first timers if that. Probably less if you didn't have to go in blind without a DIY (this is why I'm here). Just note that there are some really tight spots in there but otherwise, it's not a bad DIY. Since you are in there, might not be a bad idea to change your sparkplugs if necessary since you'll have the most room possible. Warning: I'm not responsible for any damage to you or your car. Proceed at your own risk. Let's begin. If you cannot get to this point (i.e remove airbox), give up all hope and get your wallet ready: 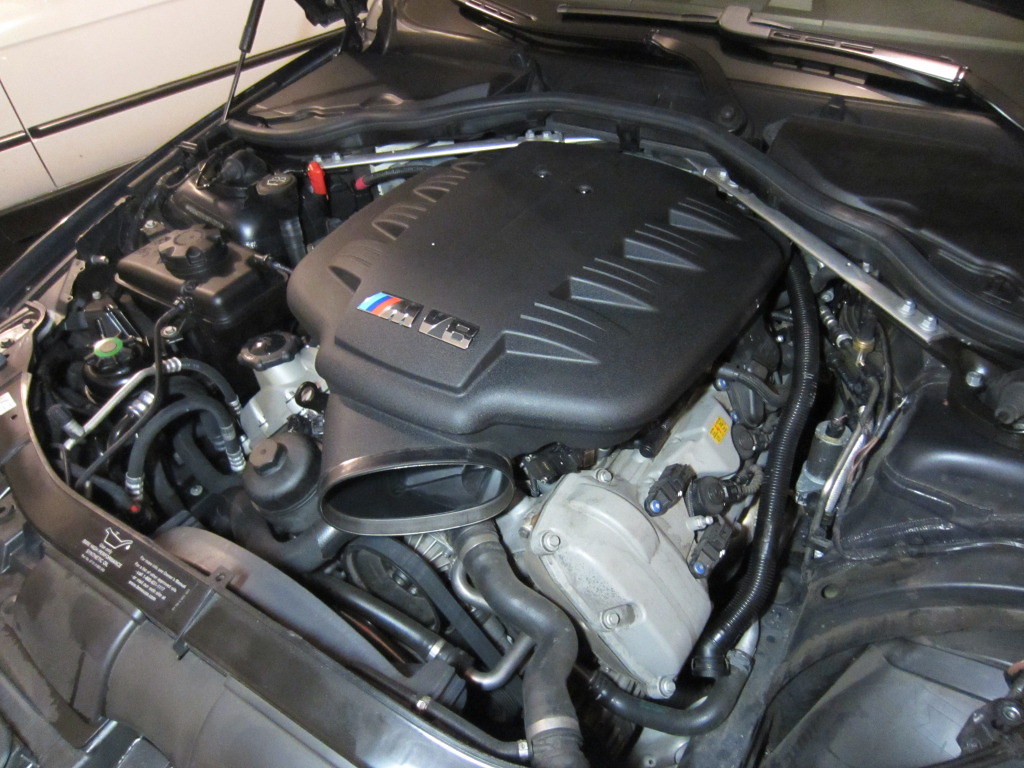 The next step is to remove the intake plenum. This is the DIY I used (thanks ELP_JC). I'll add my notes (in italics) and some pictures. 1 - 2. Remove air intake 3. Dislodge passenger's side sparkplug cover by giving it a yank on both ends. It is attached by 2 grommits. Once loose, you'll have to remove the 2 10mm bolts holding the coolant reservoir in place, push it to the front to dislodge it from the green grommet on the wheel well, and wiggle both (one with each hand) until you can remove the cover. 4. Remove driver's side sparkplug cover. It dislodges in the same manner as passenger side, but comes out much easier as there is more clearance. Just dislodge fuel hose from the top, and wiggle it under the hose. CAUTION: Plastic clamps are easily broken, proceed with care. 5. Remove a plastic hose connected to the small piece between the plastic elbow and air filter housing; it has a manual clamp so piece of cake. 6. Remove plenum connector by the oil cap. The PCV valve connection is to the right of the oil cap, you can remove the metal latch and then pull down on the wire to remove it from the plenum. 7. Loosen up all 8 TB (throttle body) clamps with either a long screwdriver or a 6mm socket with extensions. I recommend using a 6MM socket. It's easier. 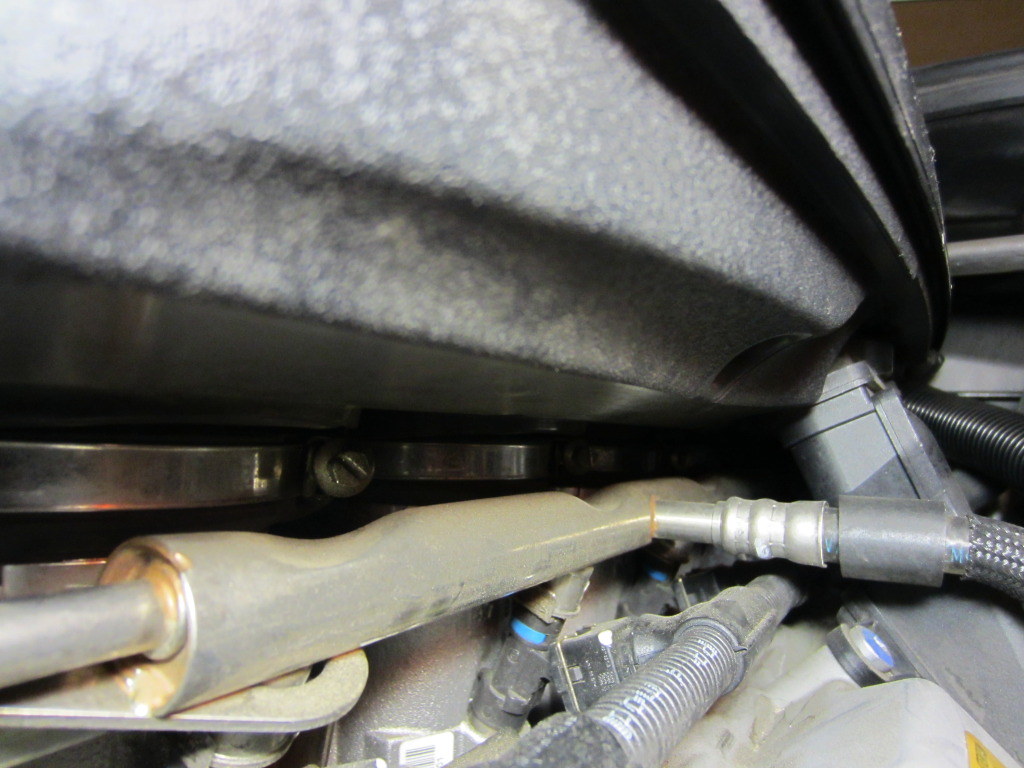 For the back 2 TB's, it'll be hard to see them. The easiest way to get to them is to go through the opening shown in the arrow. It'll be facing the same way as the other clamps 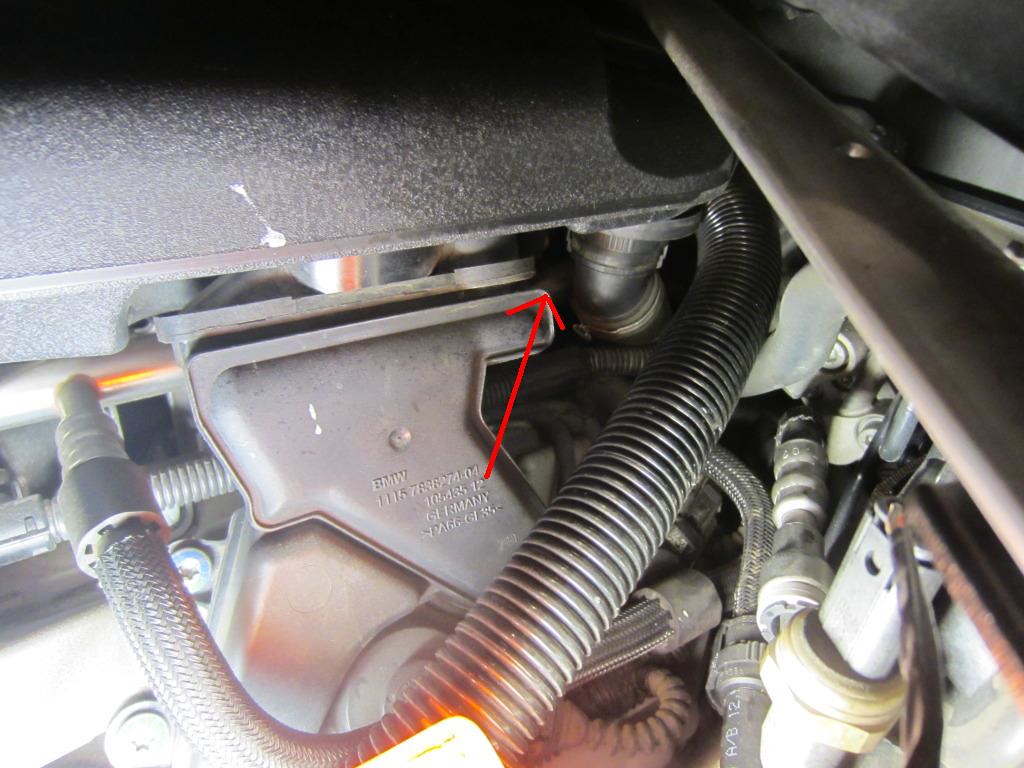 8. Push the plenum up to break it loose from the TBs. It will be on there tight, use a lot of force. Give it a few good yanks you will feel it break free. CAUTION: Plastic clamps are easily broken, proceed with care. Make sure all the clamps are very loose so that they aren't still holding the plenum. I'd say slowly push upwards in all directions first (so front, right, left) to loosen it up a little. Then use more force. 9. Once loose (it's easier), you need to disconnect another TWO hoses UNDER the plenum, both with manual clamps as well: a small one is in the front, below the 'snake' going to the air filter, and the big one at the rear, on the driver's side, where the brake booster should be. The manual clamps require pressure on each side to release the teeth holding it onto its Look at Step 7, the second picture with the arrow. That's the hose that needs to be disconnected. -------------------------------------------------------------------------- Congrats, you are half way there. The next step is to move the wire harness box out of the way to get to the throttle actuators! The goal is not to remove the item, but slide it to the side just so that we have enough access to get the actuator out. Remove 4 bolts with a 10MM socket. They are highlighted in green. 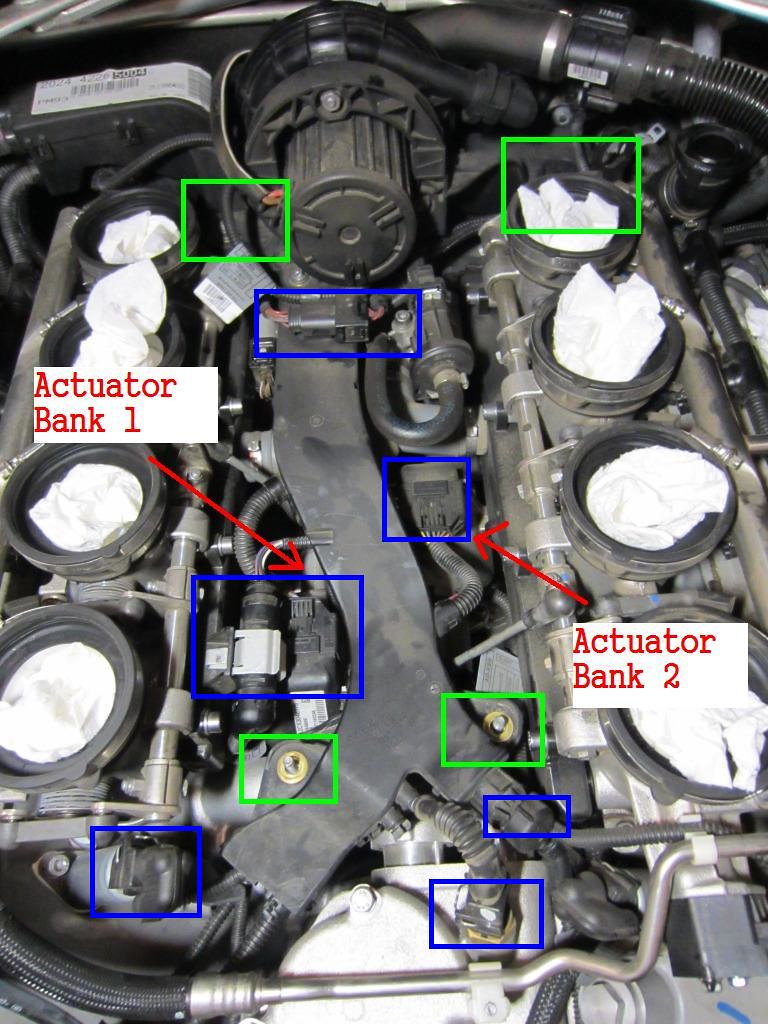 Next, unplug the connector to BOTH throttle actuators (part of blue rectangles). This is where that trim removal comes in handy. The release is only at the top (thank goodness). Push it down, and use the tool or screwdriver to slowly push the connector out. Next to the Bank1 connector, remove the clip you see that I highlighted. Compress it and wiggle it out, you'll need all the room you can get if that's the actuator you are removing. Then you need to look around and disconnect as many connectors in that area, all highlighted with blue rectangles. Without disconnecting them, the harness box does not move up high enough to get the actuator in and out. I labelled them with take just to be safe. Next, if you look down by the belts, you'll see 2 clips that need to be pulled away from the engine to give that wire enough play. I used one of the trim removal tools that looks like a "U"  Each actuator has 3 Torx screw. I loosened them most of the way using a ratchet, then used a magnetic pickup tool to completely loosen them because there's not enough room to fit your hand in there. Needless to say, be careful and don't drop the bolts. It might look like there's no way you'll be able to lift the actuator out of there, but it's definitely possible. First at the back of the harness box, move it straight up and off the stud (remember, we took the 10MM nuts off), then do the same with the front. Lift the actuator up while pushing the front of the harness box as far to the side as possible. With a little bit of maneuvering, it should come out. Then everything is just in reverse. Put the new throttle actuator in the same way, drop the harness box back to where it should be. Make sure you reconnect EVERY connector. I initially thought you had to take the car to the dealership to get the actuators reset, but I just cleared my SES light with my BT tool. So far so good. This is what the inside of the throttle actuator looks like if you are curious. 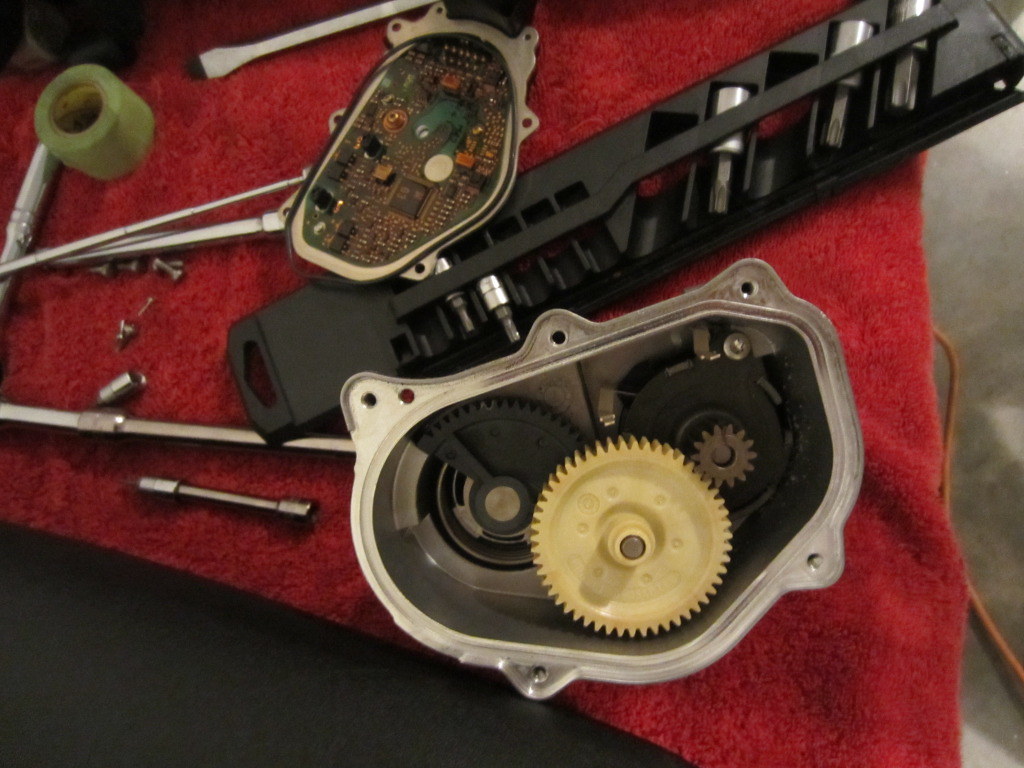 You can see damage to the plastic gear: 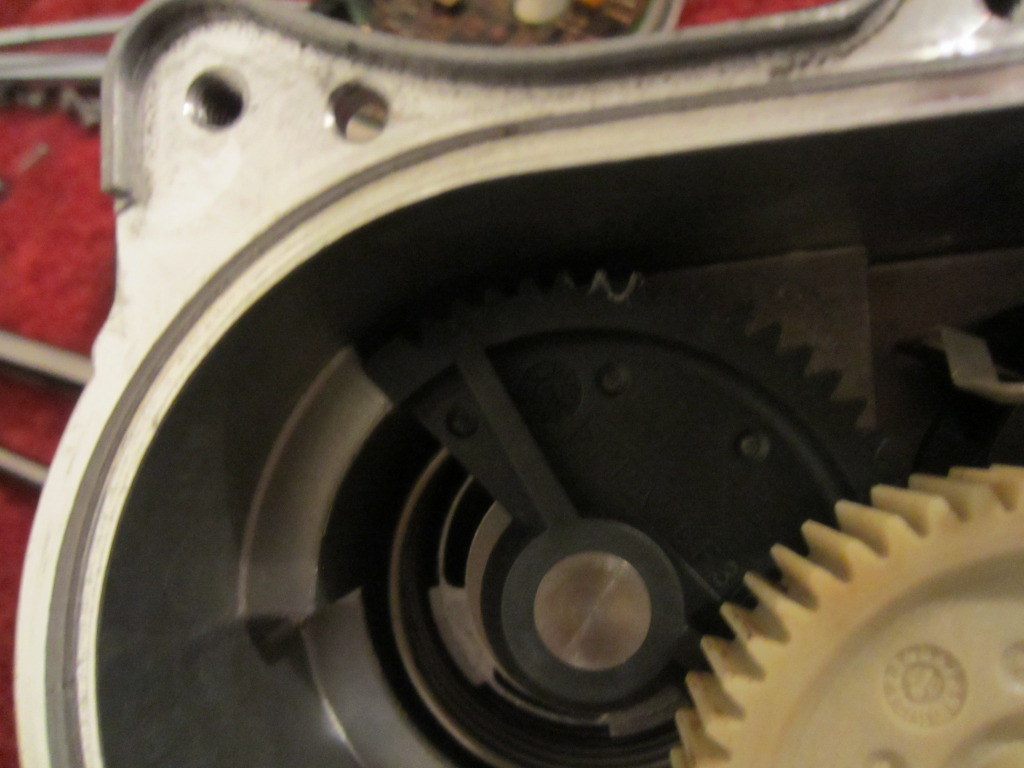 Feedback on how I did with this DIY is welcomed. This is my first write-up and first time I've done a job with essentially no guide to follow. If you see anything that could be done better, let me know. Good luck!
__________________
Current:
16 F82 M4 GTS, Black Sapphire/Black, DCT 08 E92 M3, Sparkling Graphite/Bamboo Beige, 6MT 07 E85 Z4M Roadster, Alpine White/Red, 6MT 99 E36 M3, Techno Violet/Dove Grey, 6MT Last edited by W///; 07-26-2017 at 01:18 PM.. |
|
Appreciate
31
CHE///MIST3375.50 AALLEEXX2.50 SYT_Shadow11736.00 Theodore692.00 m3gasm123.50 DreamTime867.50 M3MPH1S596.50 fbuzila369.00 Dpc2u11486.00 marcster19.50 DukeofAlexandria635.50 InnerBlueSkies1092.50 dickvr0.00 E92M3GT122.50 Scharbag2694.00 BOOF-M34449.00 S55_M378.00 harmantx4.00 |
| 08-22-2012, 05:05 PM | #2 |
|
BimmerPost Supporting Vendor
311
Rep 13,058
Posts 
Drives: BPMsport 2012 E92 M3
Join Date: Jun 2011
Location: Kansas
iTrader: (45)
Garage List 2013 Nissan GTR [0.00]
2019 Sierra Denali ... [0.00] 1999 Nissan Silvia [0.00] 1999 Nissan Skyline ... [0.00] 1998 Toyota Supra [0.00] |
Thanks for the write-up!
|
|
Appreciate
0
|
| 08-22-2012, 08:52 PM | #4 | ||
|
Lieutenant General
7736
Rep 12,405
Posts |
Quote:
Quote:
__________________
Current:
16 F82 M4 GTS, Black Sapphire/Black, DCT 08 E92 M3, Sparkling Graphite/Bamboo Beige, 6MT 07 E85 Z4M Roadster, Alpine White/Red, 6MT 99 E36 M3, Techno Violet/Dove Grey, 6MT |
||
|
Appreciate
0
|
| 08-23-2012, 07:05 AM | #5 |
|
///M Fan


366
Rep 2,159
Posts
Drives: '09 E92 M3 IB/'17 f85 X5M LBB
Join Date: Sep 2008
Location: Canton, GA.
|
Great write up. I love DIYs, so this should go on the Sticky section on the DIYs. Thank you for doing this.
Eric
__________________
'09 E92 ///M3 Interlagos Blue,6MT,Silver Novillo Leather,CF Trim,Premium Package,Technology Package,Cold Weather Package,Premium Sound,19"Wheels,Moonroof-Toy/'17 X5M, Long Beach Blue, Executive Package,Technology Package, Lighting Package, Driver Assist, Full Mughello Red Interior, 21" wheels-Toy/'14 535i with M Sport and 19" wheels-Daily
 |
|
Appreciate
2
|
| 08-24-2012, 05:35 AM | #7 |
|
Private
 
8
Rep 71
Posts |
Hi!
Nice write up. Did that job with the help of the dealer thinking that the car needed BMW Service initialization after replacement, but should trust myself and do it like you did. Good job!
__________________
 |
|
Appreciate
0
|
| 10-18-2012, 07:53 AM | #12 | |||
|
Lieutenant General
7736
Rep 12,405
Posts |
Quote:
Don't let these guys that go to dealerships for warranty and come back with a $2k bill throw you off. The part is $800 and this can be done in under half a day if you follow my instructions. Let me know if you end up doing it yourself and need help! Quote:
Quote:
__________________
Current:
16 F82 M4 GTS, Black Sapphire/Black, DCT 08 E92 M3, Sparkling Graphite/Bamboo Beige, 6MT 07 E85 Z4M Roadster, Alpine White/Red, 6MT 99 E36 M3, Techno Violet/Dove Grey, 6MT |
|||
|
Appreciate
1
zunzung36.00 |
| 10-19-2012, 06:13 AM | #13 | |
|
1178
Rep 7,712
Posts |
Quote:
Swapped bank 1 & 2 and fault followed so i had my boy ordered the actuator. $800 i got it for,much better than $1050 + tax ! Thanks for the help and great write up Sir ! |
|
|
Appreciate
0
|
| 10-25-2012, 02:14 PM | #14 |
|
Captain
 74
Rep 664
Posts |
Nice write up. Though I didn't do the work myself, I had both actuators replaced under warranty this week (08 E90 M3). The first one went out last week and brought on limp mode. The car recovered after I turned it off. Then yesterday when the dealer was bringing the car for a wash, the second actuator blew. I only have a few months left on warranty so pretty lucky there.
__________________
|
|
Appreciate
0
|
| 11-06-2012, 08:19 AM | #15 |
|
Major General
2793
Rep 6,785
Posts |
Thanks for the write up.
The only thing I couldn't quite understand from the pics is where the actuators are located precisely. Can you point out the shape & location in one of the pics?
__________________
 2018 F80 Santorini 2019 Z4 3.0i 2022 X2 M35i |
|
Appreciate
0
|
| 11-06-2012, 09:29 AM | #16 | |
|
Lieutenant General
7736
Rep 12,405
Posts |
Quote:
This is what they look like. Let me know if that cleared it up.
__________________
Current:
16 F82 M4 GTS, Black Sapphire/Black, DCT 08 E92 M3, Sparkling Graphite/Bamboo Beige, 6MT 07 E85 Z4M Roadster, Alpine White/Red, 6MT 99 E36 M3, Techno Violet/Dove Grey, 6MT |
|
|
Appreciate
0
|
| 11-06-2012, 10:14 PM | #17 |
|
Major General
2793
Rep 6,785
Posts |
Yes, perfect, thanks.
My car was just in for service with a throttle actuator fault (manifested as a SES), and BMW did a SW reflash for the ECU and then the DSC module which wouldn't initialize correctly with the new SW. My SA claims that the BMW service plan dor this fault calls for this new SW as a first measure, so I'm wondering if some of these failures you guys have been experiencing may also be cured that way. I'll call him tomorrow and try to get the SW version and any additional information he can supply...
__________________
2018 F80 Santorini 2019 Z4 3.0i 2022 X2 M35i |
|
Appreciate
0
|
| 11-20-2012, 10:05 PM | #18 |
|
Lieutenant
378
Rep 413
Posts |
W///
Thanks for the writeup, although I'm sorry to see that this problem is affecting S65 as well as S85s. I did a teardown on one of these yesterday over at M5Board. I am trying to find a way for people to repair these themselves, but haven't nailed down all the failure modes yet. If anyone uses this DIY to themselves and is willing to donate their dead actuator to the project, I think both communities can benefit from it. The actuators for the M3 and M5 look identical although they do not share part numbers. I suspect this has to do with different programming for the CAN bus signals passed to them from the DME, but I don't have an M3 actuator to compare physically. If anyone wants to get involved, PM me here or over on M5Board.  |
|
Appreciate
0
|
| 11-28-2012, 12:27 AM | #19 |
|
Registered
2
Rep 3
Posts |
Great write up!! I had fault code 2B25 5 days after Warranty expired http://www.m3post.com/forums/images/smilies/mad0260.gif and replaced Bank 1. Unfortunately, I still have the fault codes and ensuing "Gimp Mode". Not feeling really good now. Could ADC provide the SW version and additional info you were going to check on? Also, If anyone else has ideas. Please let me know. Much appreciated.
|
|
Appreciate
0
|
| 11-28-2012, 07:22 AM | #20 | |
|
Lieutenant General
7736
Rep 12,405
Posts |
Quote:
You're almost there though! Good luck.
__________________
Current:
16 F82 M4 GTS, Black Sapphire/Black, DCT 08 E92 M3, Sparkling Graphite/Bamboo Beige, 6MT 07 E85 Z4M Roadster, Alpine White/Red, 6MT 99 E36 M3, Techno Violet/Dove Grey, 6MT |
|
|
Appreciate
0
|
| 11-28-2012, 08:11 AM | #21 | |
|
Major General
2793
Rep 6,785
Posts |
Quote:
Anyway, wouldn't do much good since my error came back 2 days later, and they replaced the actuator...
__________________
2018 F80 Santorini 2019 Z4 3.0i 2022 X2 M35i |
|
|
Appreciate
0
|
| 11-28-2012, 01:58 PM | #22 |
|
Registered
2
Rep 3
Posts |
You guys are a life saver. I have found the Bavarian Technic tool as recommended. This looks pretty easy to use and reasonably priced. It looks like a great investment. But just for piece of mind, are there any other brands that I should research as well? Thanks, I will update the post if resetting the code works. Wish me luck!!
|
|
Appreciate
0
|
Post Reply |
| Bookmarks |
|
|