|
|
 |

|
|
|
| 01-10-2012, 02:48 AM | #1 |
|
Lieutenant
 80
Rep 446
Posts |
DIY: Fiberglass Subwoofer Enclosure
Hello Everyone
I just built a fiberglass enclosure for my E92 M3 and thought I'd do a DIY for those interested. I have the premium audio and think it sounds great. I just wanted a little more low-end to round it out. I decided to add a JL Audio 10W6-V2 in a small sealed enclosure in the left corner of the trunk. Trunk space is important to me so it needed to be out of the way and not cause any problems with accessing any areas of the car. Also, I wanted to make sure it was easily removable for days at the track or if I really needed the extra room on a trip. I worked in a car audio store as a teen and have done a couple of these before. They aren't necessary difficult to build, but there is a lot of work involved, and a lot of chemicals. You need to have an area available to you that is fairly well ventilated and allows for a mess to be around for a few hours at a time. Don't do this in your house or on your balcony... your wife/girlfriend will kill you due to the mess and the fumes. Overall this project took me about 20-25 hours of labor. There is a lot of time waiting between coats of fiberglass and you need to make sure you do things properly otherwise it will be a mess. You need patience for this. A few words about fiberglass work if you've never done it before. Avoid contact with fiberglass resin and cloth/mat. It has a tendency to get all over you hands and arms and is a pain to clean off. I wear a sweatshirt and latex gloves when working with the stuff. Also, I recommend a dust mask at a minimum for fumes and while sanding. Acetone will clean up any resin that gets on your hands, but rubbing acetone all over your hands several times a day causes some pretty serious irritation to your skin. Please use safety glasses when cutting and sanding. I've had shards of wood and fiberglass hit my glasses before. I can't imagine losing an eye over something so stupid. Just do it. Hardware Store Supplies ~ $125 total
Tools needed:
OK, let's do this. First I pulled the left trunk trim panel out. There are a couple of black clips that need to be popped out and one torx screw near the rear seats. After that the whole thing can be worked out with a little force. 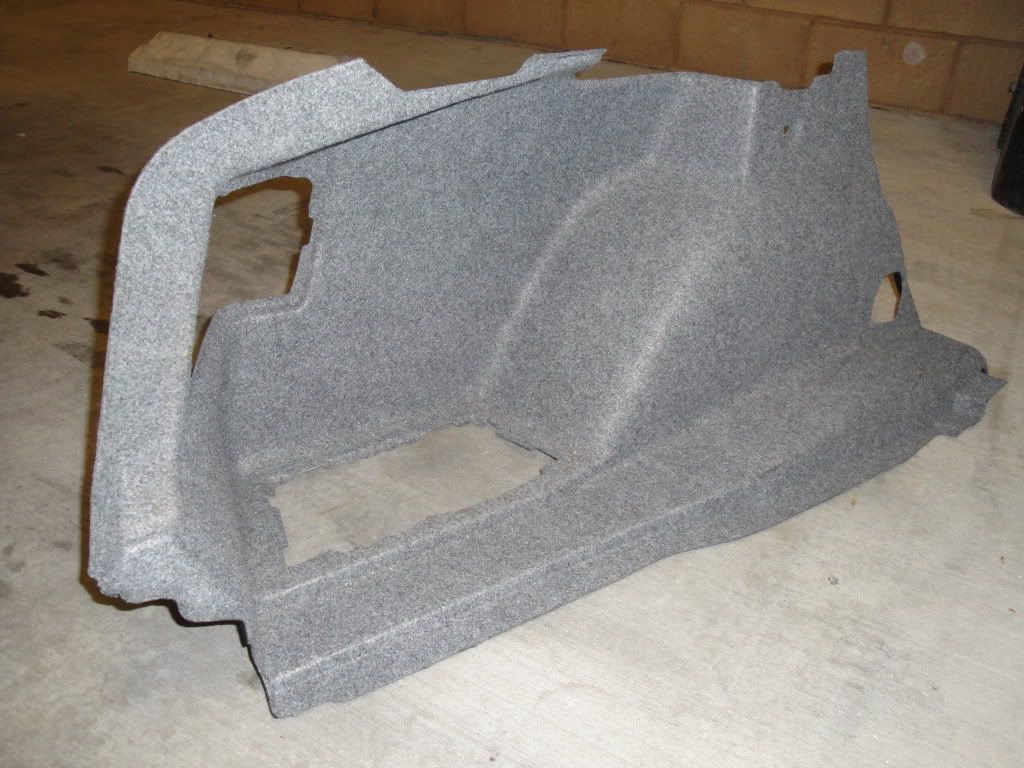 First I make some templates out of scrap cardboard to fit the trunk liner bottom and side profile. Then I trace them on the MDF and cut them out with the jig saw. Here they are during a test fit. 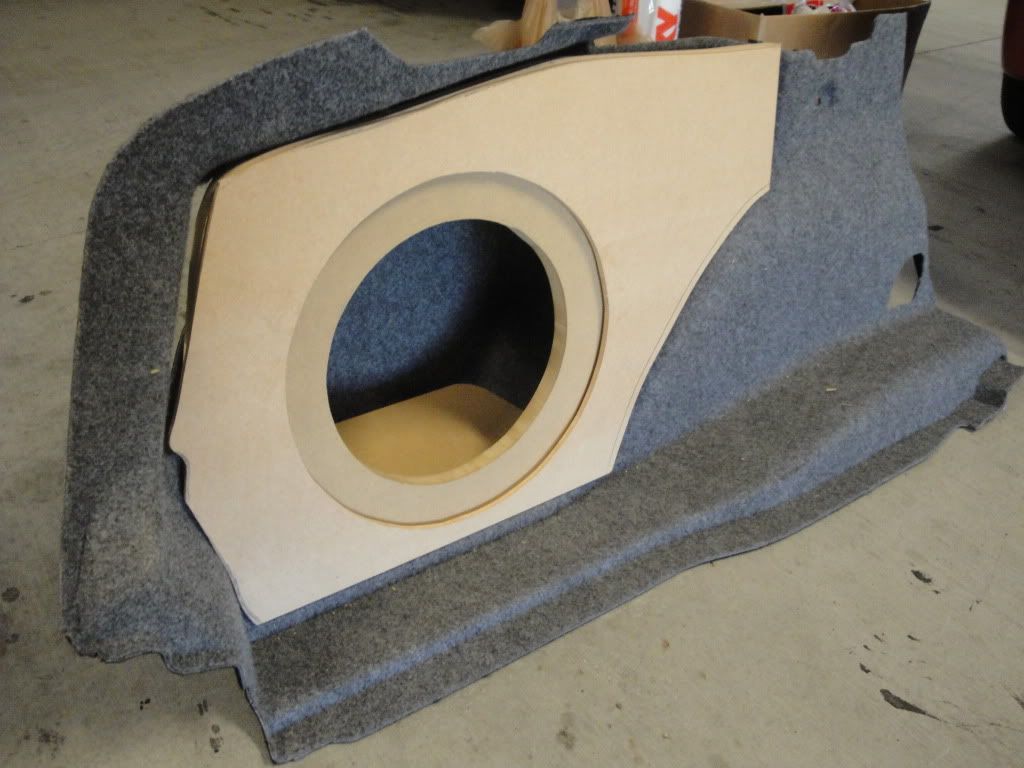 After the baffle is done I use the 3.5 mil plastic and cover the entire piece using masking tape to hold it down. This is difficult and may require using several layers and a lot of tape. This will be frustrating trust me. 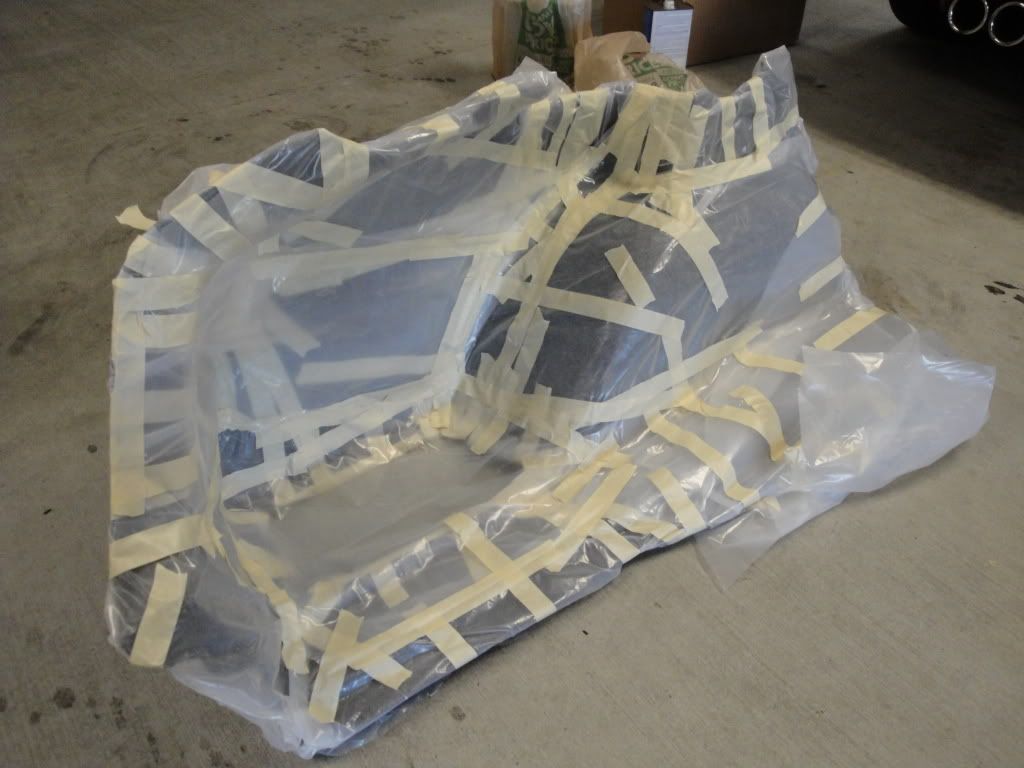 Once completely covered I add aluminum foil and more tape as a easy release layer. It also adds extra protection to the trunk liner. If you get resin on the trunk liner it's pretty much done for. I also slipped the bottom piece in for a test fit. 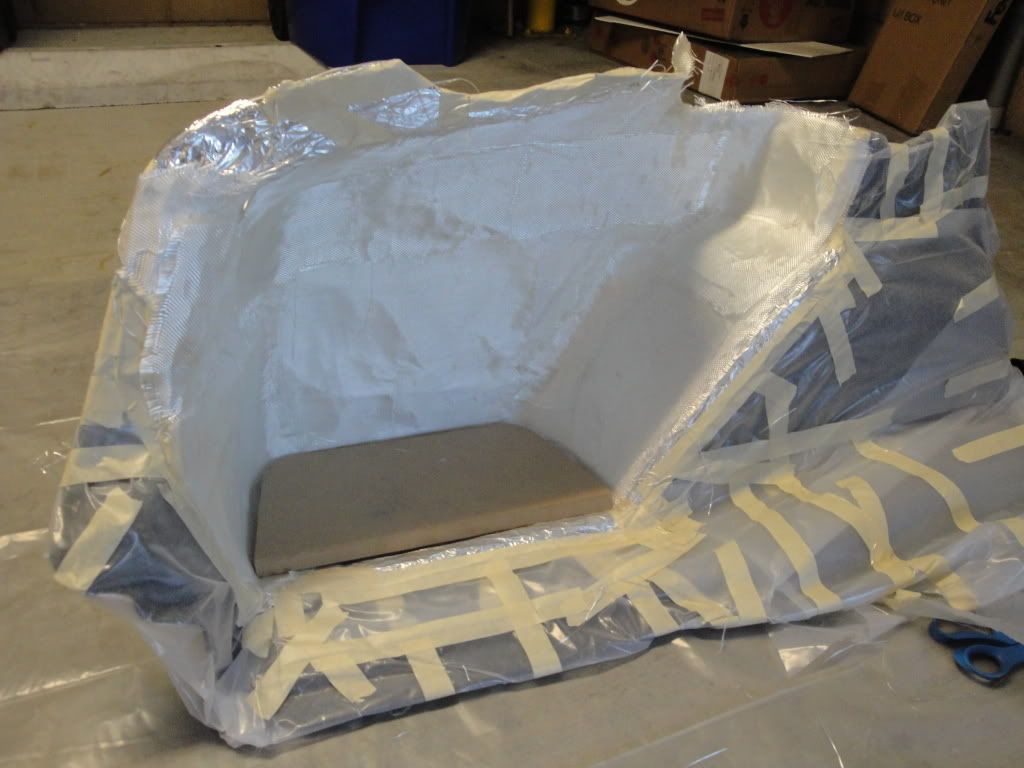 Now, it's time to get messy. First I cut the fiberglass cloth into strips about 4 inches wide by 10 inches long. Then I use spray adhesive to adhere them to the inside of the tin foil. This allows them to stay in place better while adding the resin. Then I mix about 12 ounces of resin in one of the disposable cups and stir it up with the catalyst. Use one of the disposable paint brushes to lay it onto the fiberglass cloth evenly. 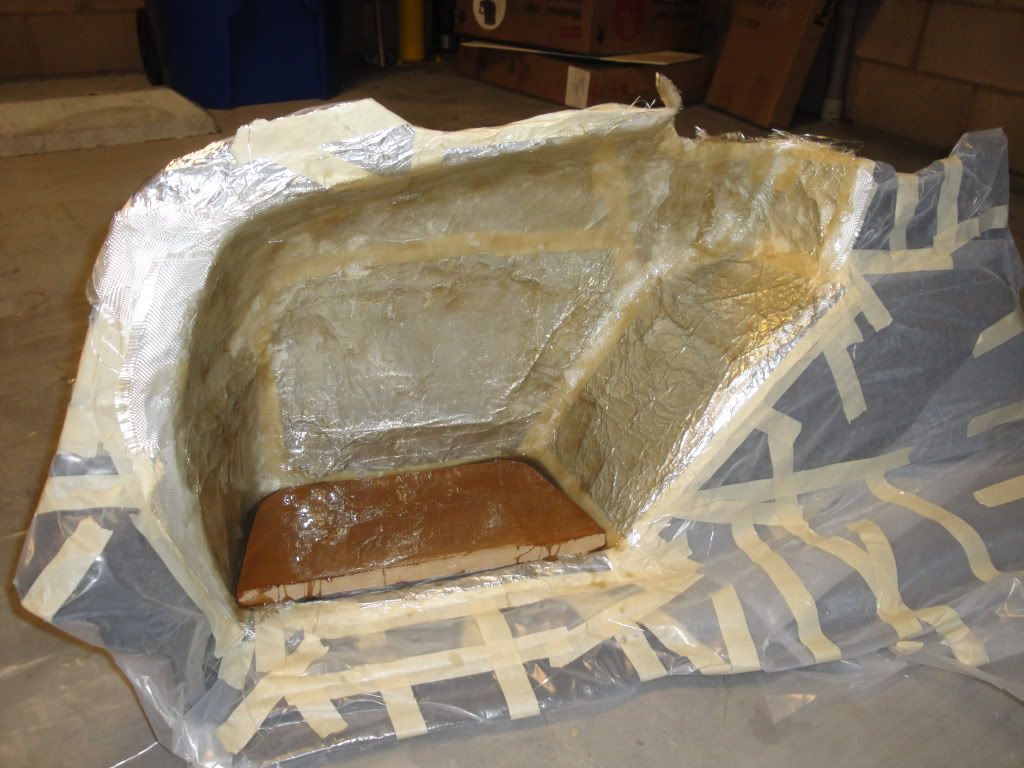 Repeat this process several times allowing it to dry. I use the fiberglass cloth first because it's thin and easy to manipulate. After the first layer I use the mat because it's thicker and builds the enclosure up quicker. Once you've applied several layers and it has dried you can take it out of the trunk liner. Remove the plastic from the trunk liner and hope that no resin leaked onto it. If it did then I guess you'll be going to Tischer to order another because there is no way to clean it off. Here it is popped out of the mold from the front and rear. 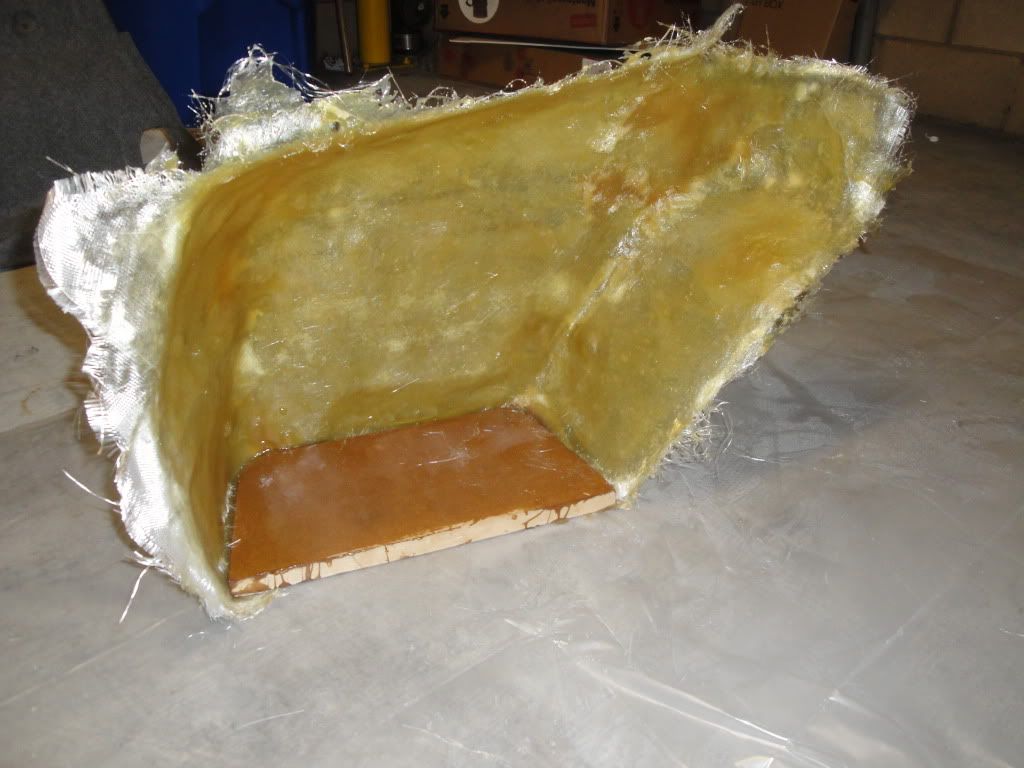 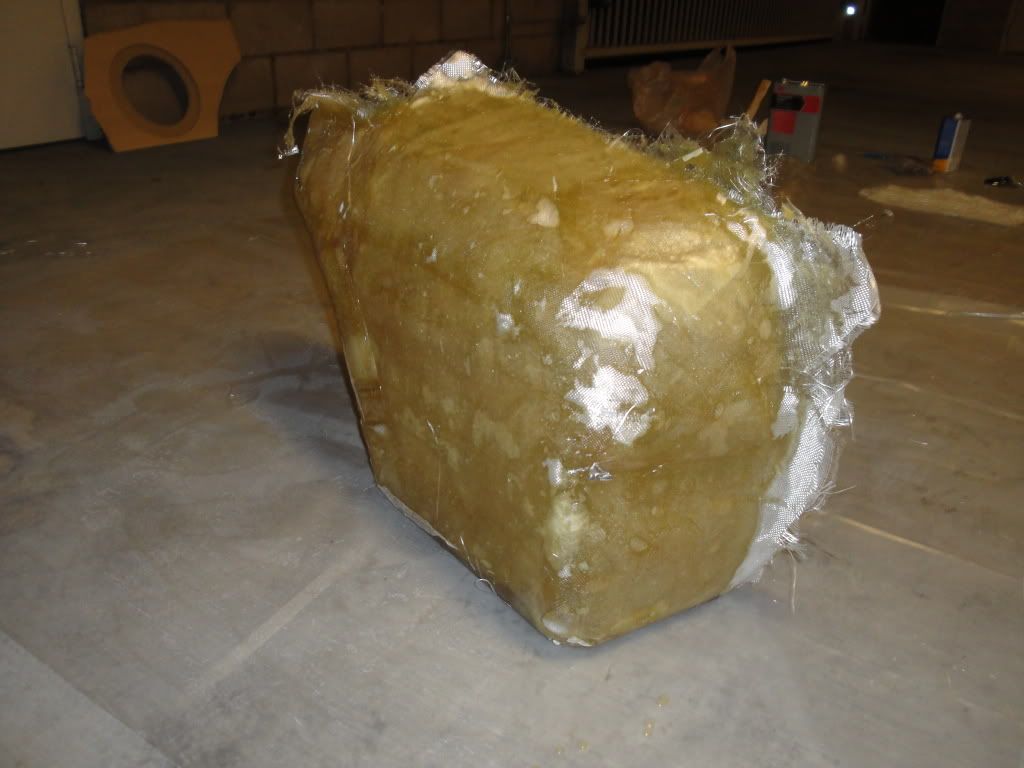 Then I use the jigsaw to cut the excess off as square as I possibly can. This takes a few passes and some eyeballing. I then sand the excess resin off the bottom piece in order to prepare to attach the baffle. 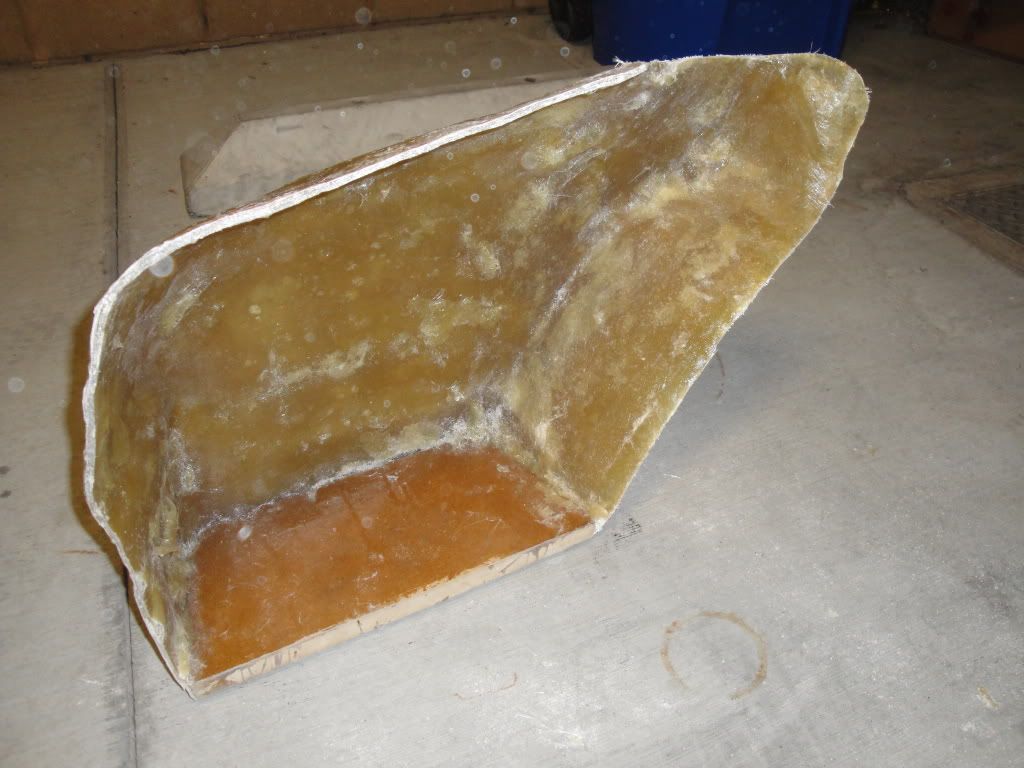 Using wood screws and a countersinking drill bit I attach the baffle to the MDF base. I then use more resin and fiberglass cloth to seal the gaps around the edges. 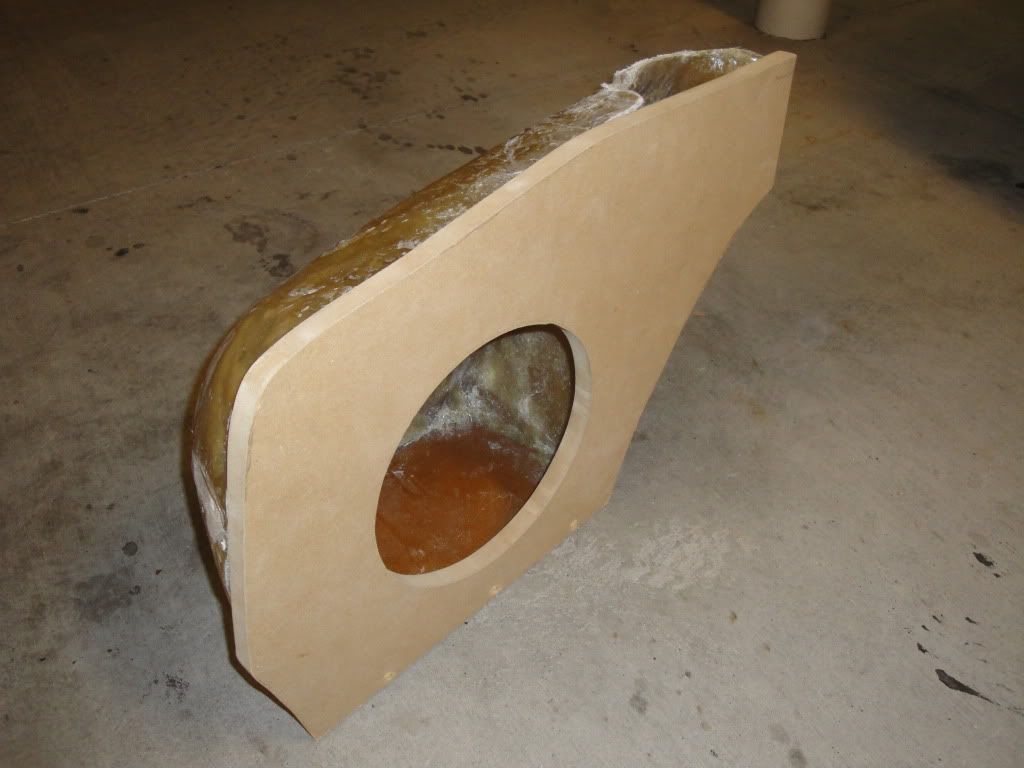 Test fit... looking pretty reasonable 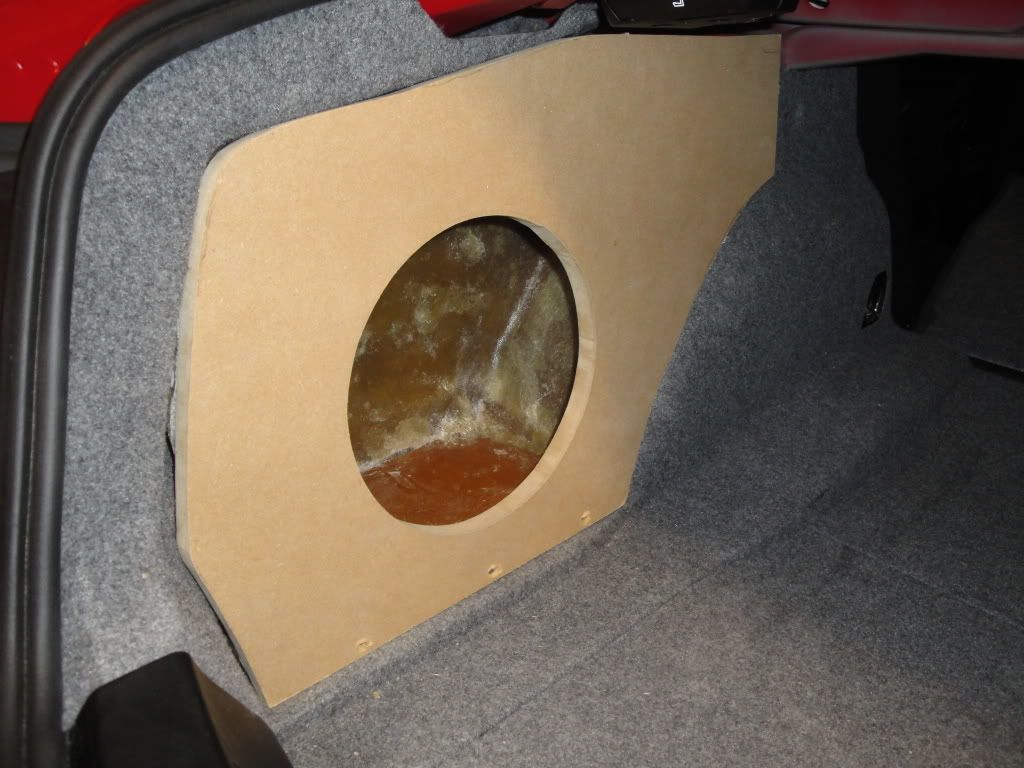 Next I add an extra baffle ring to add some additional mounting depth for the speaker. I also attach the second baffle (made of the 3/8" MDF) to original the 3/4" piece. This top baffle protrudes about a half an inch around the edges of the enclosure and really just fills the gaps around the edges. It is purely aesthetic. 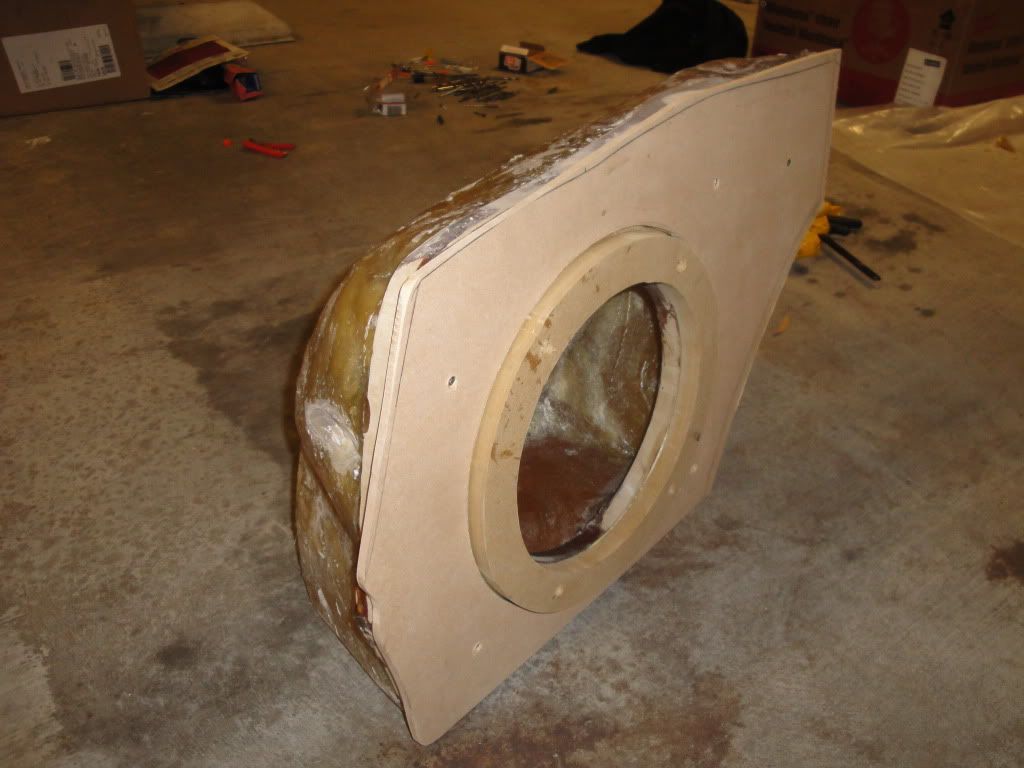 I then add Bondo to areas that need a little filling in and areas that I want to smooth out. Bondo is great stuff and is very moldable. You'll be tempted to use your hands to mold it. Use gloves. This stuff is really hard to get off your hands. 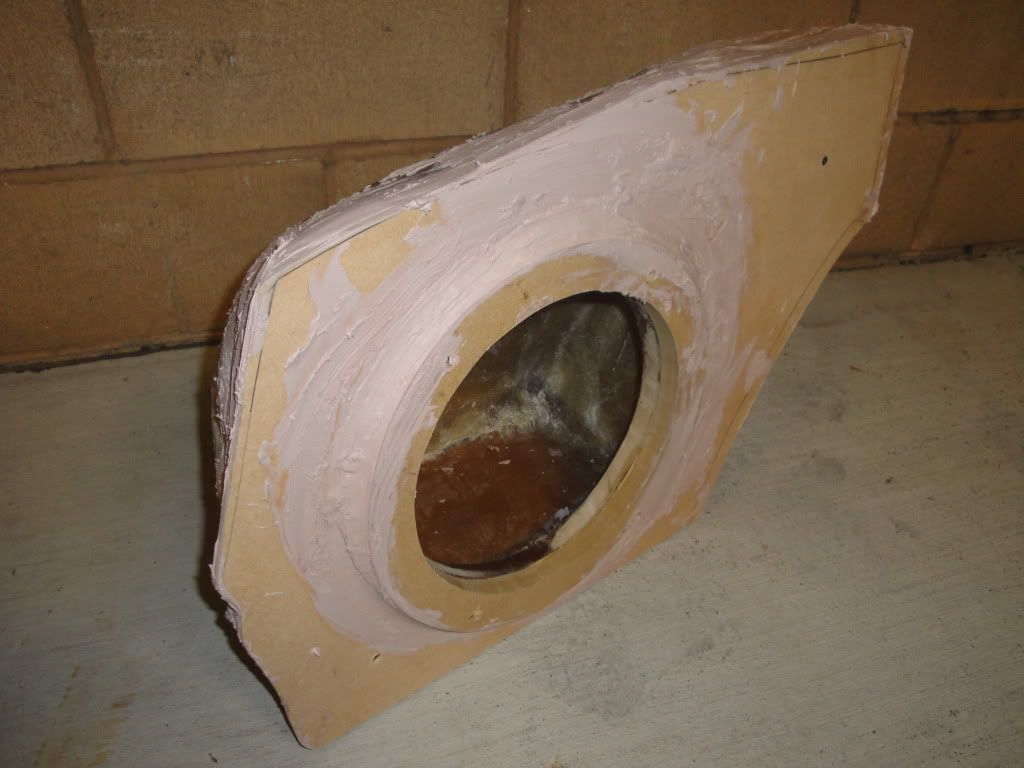 I then use my palm sander to sand all the rough areas smooth. I then hand sand it until I am happy with the result. It doesn't have to be perfect; the fabric will cover up small imperfections. 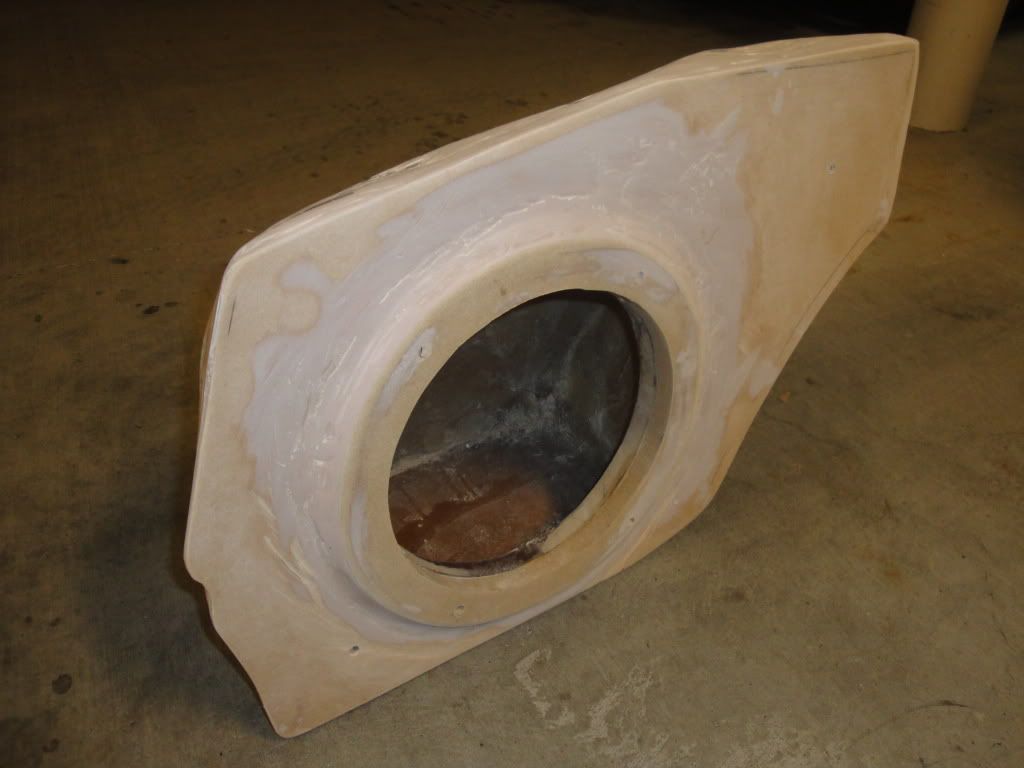 Test fit 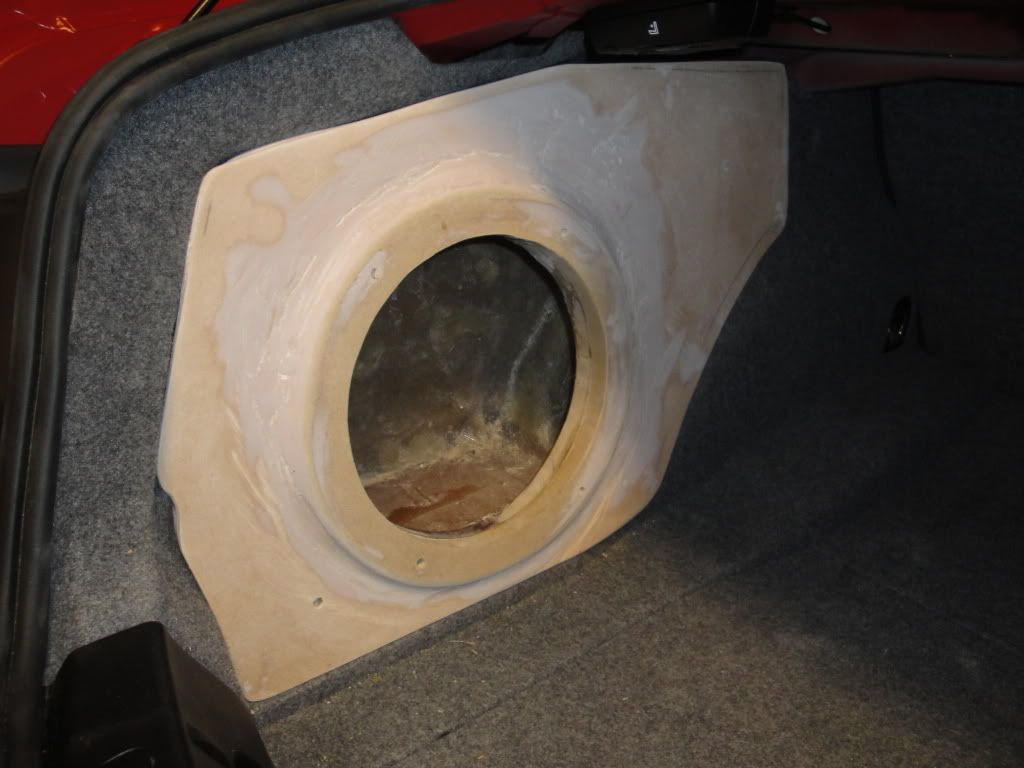 Next I use the spray adhesive and a razor blade to apply the finishing fabric. I also add a ring terminal for easily disconnecting and reconnecting the speaker. A bag of poly fiber fill is added to the enclosure for acoustic purposes. 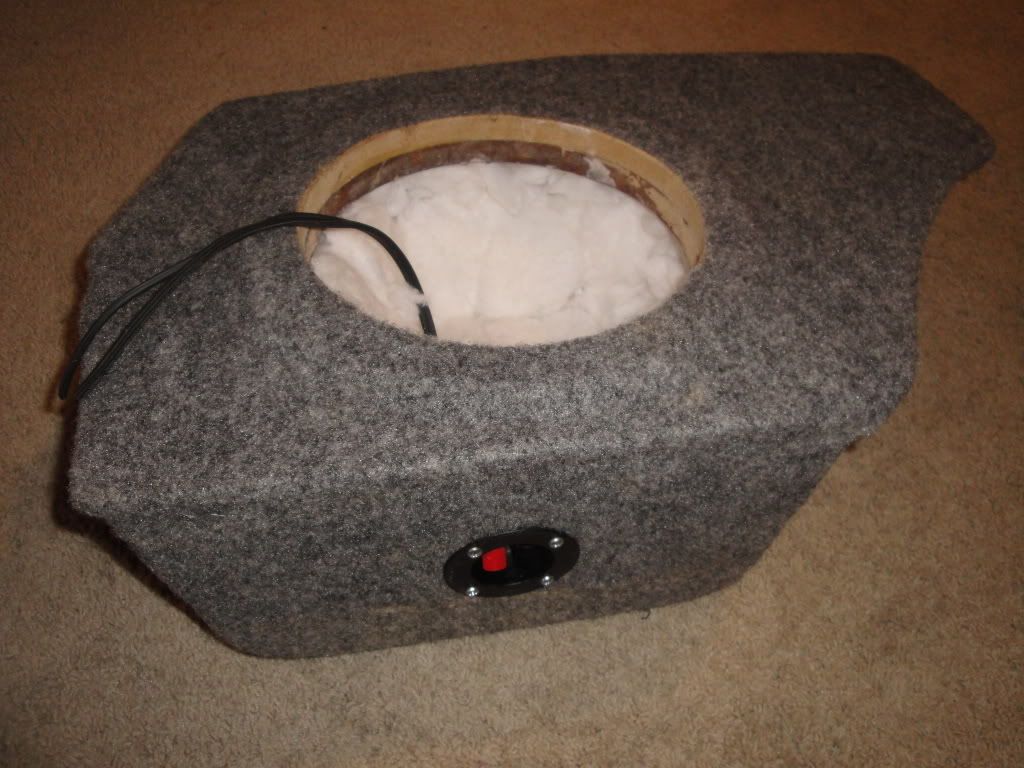 I then screw in the sub and the grill 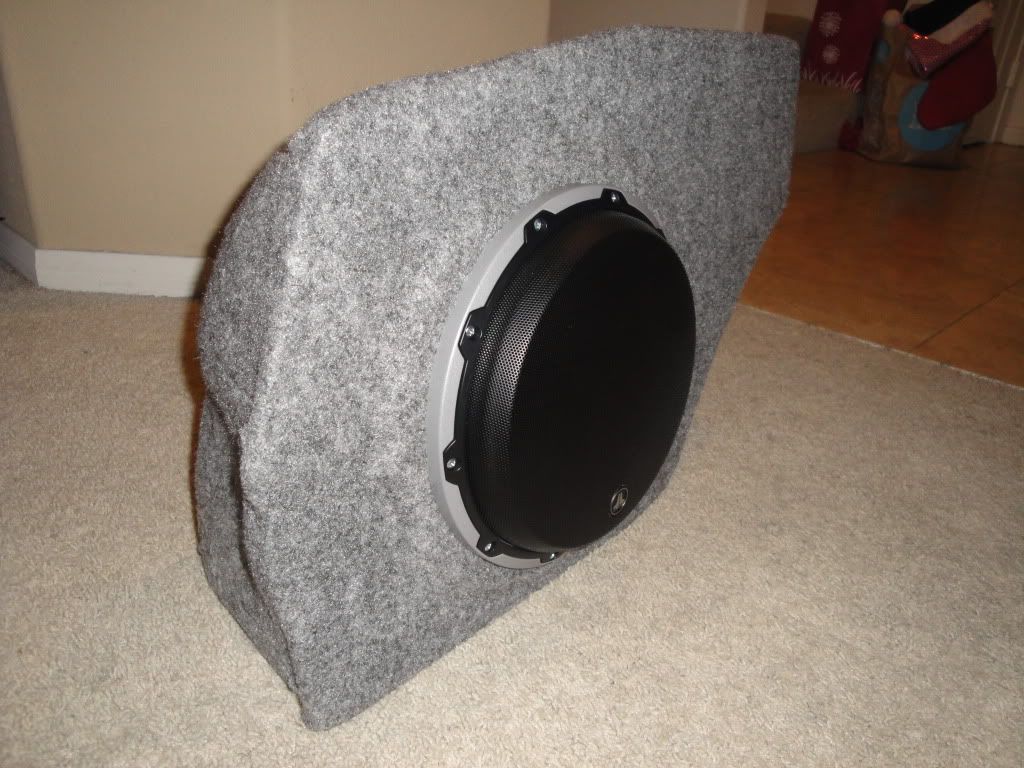 And it fits! The fabric is about a 90% match which is excellent. 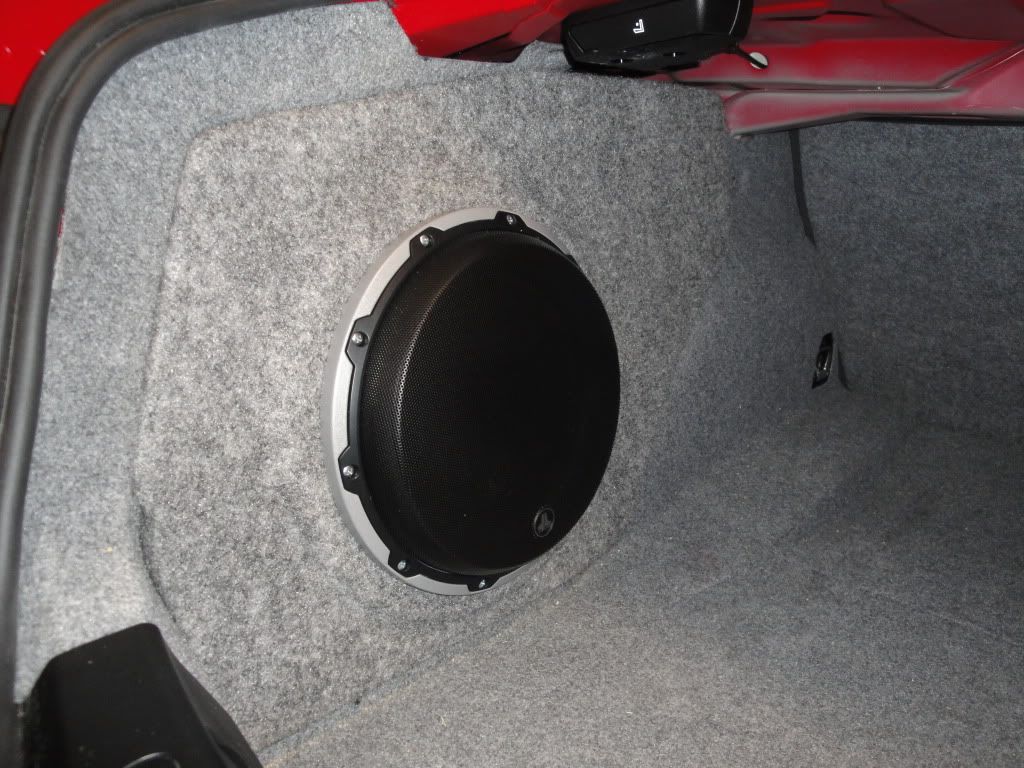  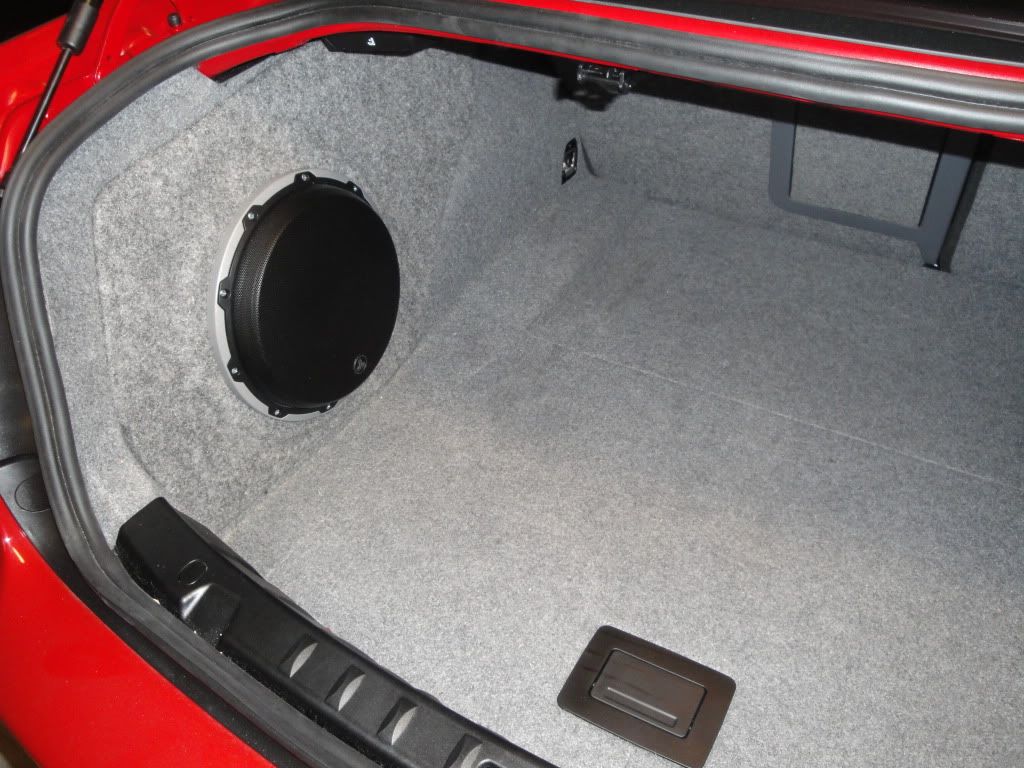 I added a JL Audio XD 600/1 to power the sub. I am in the process of finalizing the install for that and the Audio Control LC2i and will post pics when finished. I hooked it all up and it sounds great. It looks stock and is easily removable so I am happy. The weight and the snug fit alone keep it in place really well. However, I am looking into adding a small bracket of some sort to make sure it stays in place in case of a hard left turn or something worse. I'll update the thread when I finish that too. Many thanks to everyone who has posted other audio installs for ideas and info. Particularly, thanks to Technic for his hundreds of useful posts regarding wires, pin configurations, etc. These are really what forums are great for. Also, I did something very similar in my 2008 Infiniti G37 there are more pics and instructions for that project here: http://www.myg37.com/forums/audio-vi...r-install.html |
| 01-10-2012, 06:06 AM | #2 |
|
Razzor

29
Rep 516
Posts |
wow, looks great snug fit and clean. This is something i would like to add to my car.. good job.
__________________
2011 E90, 6 speed, technology package, black 220 rims , EDC, moon roof, matt black grills, matte side grills, 15% carbon tints, carbon fiber M pedals, ACS roof wing, IND painted reflectors, mfest black gloss m3badges, Mfest side window stickers, Tuner MS 15mm spacers, Carbon fiber M foot pedals, MS air filter, RPI air scoops, euro switch mod  |
|
Appreciate
0
|
| 01-10-2012, 08:34 AM | #3 |
|
BimmerPost Supporting Vendor
311
Rep 13,058
Posts 
Drives: BPMsport 2012 E92 M3
Join Date: Jun 2011
Location: Kansas
iTrader: (45)
Garage List 2013 Nissan GTR [0.00]
2019 Sierra Denali ... [0.00] 1999 Nissan Silvia [0.00] 1999 Nissan Skyline ... [0.00] 1998 Toyota Supra [0.00] |
Very nicely done!
|
|
Appreciate
0
|
| 01-10-2012, 11:33 AM | #5 |
|
Major General
 1607
Rep 8,074
Posts
Drives: 11 E90 M3 Individual
Join Date: Mar 2006
Location: Houston, TX
|
Good job. Only comment is I would have added some bracing - front to rear.
__________________
2018 F30 320iX Melbourne Red
2011 E90 M3 Monte Carlo Blue 2004 E46 M3 Imola Red 2000 E36/7 Z3 Steel Blue |
|
Appreciate
0
|
| 01-10-2012, 03:00 PM | #7 |
|
Colonel
 2347
Rep 2,847
Posts
Drives: E36M,E46M,E90M,X5M,i3,M2,i8,M2
Join Date: Dec 2007
Location: SoCal. in the hood!!!
|
I love it

__________________
 G87 M2 2025 Frozen Pure Grey -Stock for now F87 M2 Aw -Vorsteiner Aero Kit, VFF-107,Macht Schnell-Springs,VF-Engineering/Hex tuning Stage Two,ER DP,Stock Exhaust,Drop-In Bmc Filter,AA Intercooler,FTP Charge pipe+boost pipe/// Wish list :Mexico delivery 2024 BMW M2 (G87) |
|
Appreciate
0
|
| 01-10-2012, 03:10 PM | #8 |
|
Colonel
280
Rep 2,216
Posts
Drives: 991 GT3, Sold:'11 e92 M3 SG/FR
Join Date: Jul 2005
Location: Las Vegas/SoCal
|
Nice. Next time make a few sets in parallel, I'm sure they would sell.

__________________
991 GT3, Sold: '11 e92 M3 SG/FR ZCP|ZCV|ZP2|2MK|494|415|6NR|752
|
|
Appreciate
0
|
| 01-10-2012, 08:17 PM | #11 |
|
Major General

722
Rep 6,860
Posts
Drives: 2014 BMW 435i X-drive
Join Date: Jul 2008
Location: Reston, VA
|
damn impressive
the mounting hole for the 10W6-V2 is 9" you think you could fit a 12.5" hole to use the 13TW5? that sub is good as it only needs 2.5" mounting depth and only needs a 0.8 cubic foot enclosure i wonder how it would sound if i was only using the baffle sealed against the trim with weather stripping hmmmm
__________________
 |
|
Appreciate
0
|
| 01-10-2012, 10:11 PM | #12 | |
|
Lieutenant
80
Rep 446
Posts |
Quote:
|
|
|
Appreciate
0
|
| 02-08-2012, 02:06 PM | #15 |
|
Lieutenant Colonel

269
Rep 1,883
Posts
Drives: 2011 E92 M3
Join Date: Feb 2009
Location: One of the coasts...
|
Where did you put the XD 600/1 for power for the sub? Just interested in how you finished the project (if finished yet that is). Otherwise this is definitely something I'd like to do sometime! Looks great!
__________________
'11 BMW E92 ///M3 - ZCP and DCT
'15 Ford F-250 - Lariat, 6.7 Powerstroke Turbo-diesel  |
|
Appreciate
0
|
| 02-08-2012, 02:08 PM | #16 | |
|
BimmerPost Supporting Vendor
311
Rep 13,058
Posts
Drives: BPMsport 2012 E92 M3
Join Date: Jun 2011
Location: Kansas
iTrader: (45)
Garage List 2013 Nissan GTR [0.00]
2019 Sierra Denali ... [0.00] 1999 Nissan Silvia [0.00] 1999 Nissan Skyline ... [0.00] 1998 Toyota Supra [0.00] |
Quote:
|
|
|
Appreciate
0
|
| 02-08-2012, 02:55 PM | #17 | |
|
Lieutenant
80
Rep 446
Posts |
Quote:
|
|
|
Appreciate
0
|
| 02-08-2012, 02:57 PM | #18 | |
|
BimmerPost Supporting Vendor
311
Rep 13,058
Posts
Drives: BPMsport 2012 E92 M3
Join Date: Jun 2011
Location: Kansas
iTrader: (45)
Garage List 2013 Nissan GTR [0.00]
2019 Sierra Denali ... [0.00] 1999 Nissan Silvia [0.00] 1999 Nissan Skyline ... [0.00] 1998 Toyota Supra [0.00] |
Quote:
|
|
|
Appreciate
0
|
| 04-02-2012, 07:43 AM | #19 |
|
First Lieutenant

28
Rep 323
Posts |
This is nice I want one for my e90
__________________
|
|
Appreciate
0
|
| 04-02-2012, 12:53 PM | #21 |
|
Lieutenant
80
Rep 446
Posts |
If I had a good space to do it I probably would make several at once. I don't think my neighbors would be too happy if I was constantly stinking our common garage up with fiberglass fumes though! They were already looking at me like I was crazy while making this one.
|
|
Appreciate
0
|
| 06-02-2012, 10:09 PM | #22 |
|
First Lieutenant
28
Rep 323
Posts |
So are you gonna make some of these or what. I want one
__________________
|
|
Appreciate
0
|
Post Reply |
| Bookmarks |
| Thread Tools | Search this Thread |
|
|