I took over 2 months before I finally installed my gills (back in January) as I wanted to figure out an easier method to install them. Here's how I installed mine. Hopefully it'll help you guys. Once you get the hang of doing one side your see it'll take you less than a minute to pop them out. Hopefully this will help you guys.
Tools Required- Scotch Packing Tape (or any super strength tape that doesn't leave adhesive behind when you peel it off)
- Blue Painters Tape
Before you begin:
If you are afraid of scratching your car, tape the painted surface around the gills with painters tape
Installation
Step 1. Remove OEM chrome side gill
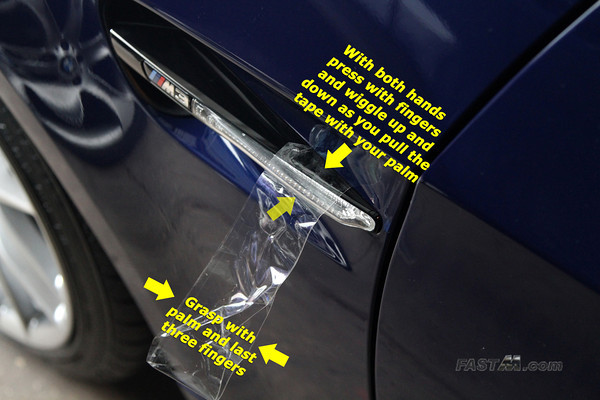
Apply packing tape to the end closest to the door (ie. the part pointing toward the rear of the car). To apply the tape, pull a long strip of tape and tape the ends to the top and bottom of the gill then press the tape together.
Assuming you are working on the driver's side (left) gill (you will do the opposite for the other side):
- Use your right hand and grasp the long piece of the tape with your right palm and your last three fingers (your middle finger, ring finger, and pinky finger).
- Now using your right thumb and pointer finger, grab the top and bottom of the gill pressing down on the tape.
- So that your left hand don't feel lonely, grab the middle of the gill with the fingers from your left hand.
- Wiggle up and down while you pull on the tape.
- The gill should pop right out easily.
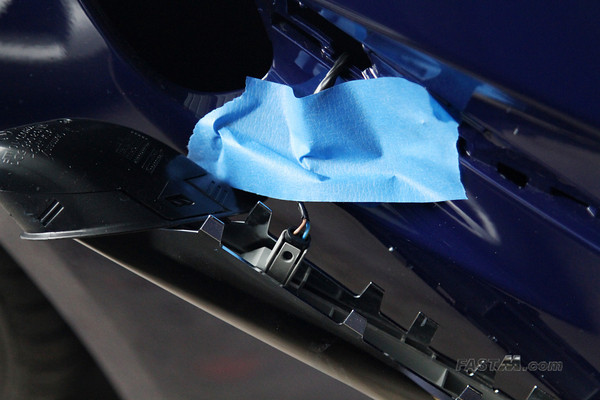
 Step 2. Do not drop the wire behind the fender
Tilt the gill out of the fender to expose and pull it out.
Before you disconnect the wiring, use some painters tape to tape down the wiring so that it doesn't fall behind the fender. If it fall behind the fender you will extend your install time MUCH MUCH longer trying to fish it out.
Once the wire is secure and you know it won't fall behind the fender, unlatch the wiring harness plug from the gill.
 Step 3. Install new gill
Finally, the easy part!
Plug the wiring harness into the new side gill then insert the larger end of the gill into the fender and line up the mounting points.
Simply press the gill into the mounting points till it's flush. You are done!

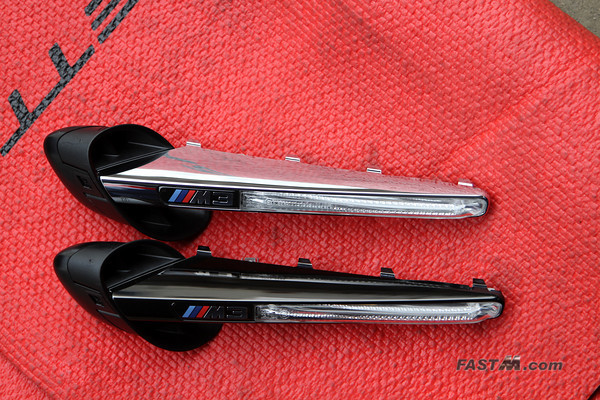
Below is a comparison of the OEM chrome gill vs the new OEM M3 Edition black chrome gill
Disclaimer: Use this DIY at your own risk, I'm not responsible for any damage to your car.