December 13, 2019
79,500 Miles
WHAT:
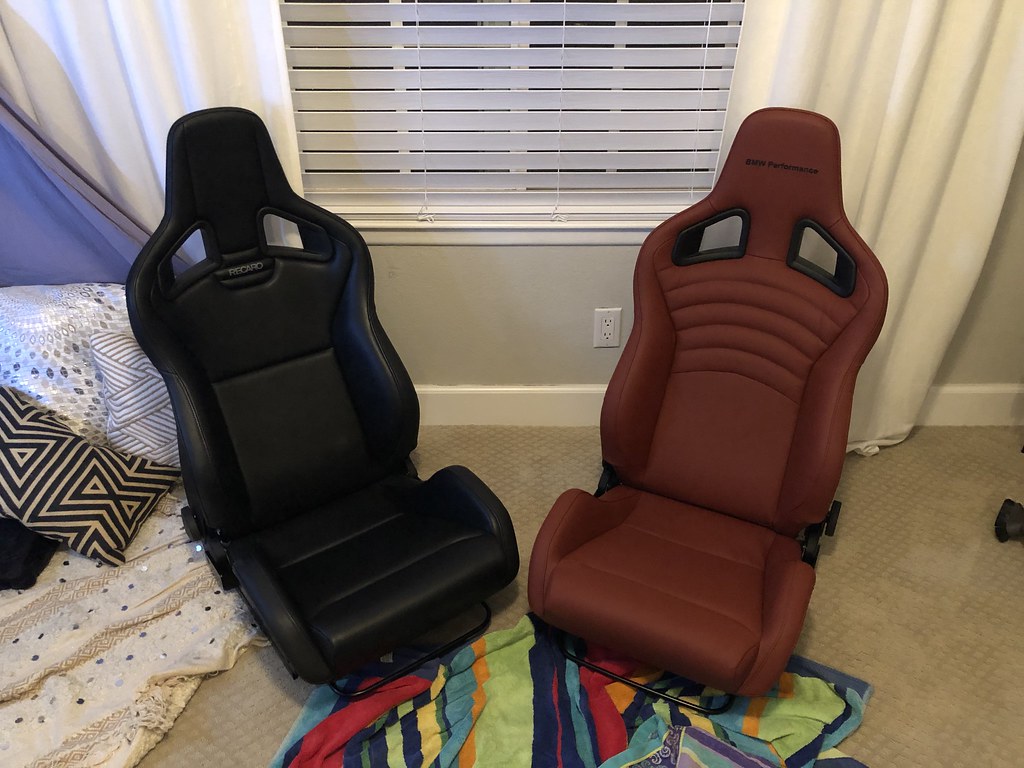
- Recaro Sportster CS
- Factory Fox Red BMW Performance Style Leather (from AMX Performance, Poland)
- Macht Schnell Floor Mounts w/ Recaro Sliders
- Glånz Ceramic Leather Coating by Protective Film Solutions
*Scroll to pics if you don’t care about the whole ordering and installation process. Cue wall of text:*
So i’ve had this in the pipeline for quite some time now. IT has always been a dream of mine since I purchased this car with fox red interior to have Recaro Sportsters back in the car since I previously had them in my old ’08 AW E90 M3. Naturally, I had multiple routes I could have taken with the seats, so I asked myself what the best method would be… Do I purchase the new Sportster GT’s with the red centers and live with a two-tone front seat with a non-matching red color? Do I simply run black front seats? Do I have the seats re-trimmed in a basic Fox Red looking vinyl? Do I go all out and get OEM Leather BMW Performance style leather covers?
Obviously, I opted for the final, and frankly the most expensive, option.
So I came across a page on IG a long while back called @AMX_Performance (I am sure many of you have already seen his work and drooled over it as much as I have) this gentleman is located in Poland and specializes in BMW Performance Seat re-trims and Recaro Sportsters in general. His work looked to be second to none, so I began chatting with him mid-year about what options he could do and pricing. I initially opted for a non-OEM leather which he said would be 9/10 color match compared to the factory leather, as the price point was slightly less than factory. Unfortunately, he ended up being unable to source a hide with close enough color after a month, so we had to upgrade the order to factory leather (which I am glad worked out anyways TBH).
All of our communication was done thru WhatsApp and payment done thru standard bank wire. Once we confirmed the order early September and I sent the deposit, he got to work on the covers. It was about 2 weeks until they were completed! I sent the final payment and they were delivered 2 weeks later. So overall once the details were confirmed, about 1 month total from order to delivery.
Once the covers arrived, they were packaged wonderfully in Recaro Boxes with plenty of foam and cling wrap. I was delighted to finally open them and smell fresh leather! Not only did they look amazing and were a perfect match to the factory Fox Red, but I’m gonna get some of that new-car smell back. Lol. Overall, the craftsmanship of the seat covers are wonderful. They have all of the factory Recaro Velcro and mounting features that the stock Sportsters come with, so they hold up extremely well once installed. We’ll discuss installation woes later.
So I knew that once I had the covers, I needed to get a pair of seats to put them on… Yes I know, a bit backwards of a process, but I wanted to get the longest wait out of the way and not tempt myself into installing the sportsters prior to having the covers on, then having to remove them just to install them again. I’m a bit impatient.
I had originally had a pair lined up from a vendor overseas at a great price, but figured that I had time to keep my eyes open for a local setup, preferably used since the condition of the existing covers was irrelevant to me. Well, I got very lucky and a friend Alec, who had purchased an e90 m3 recently that had Sportsters installed in it, was deciding to part out and make the car more street oriented since he already has one track focused e90 m3. It worked out perfectly. Picked up his seats and hardware on 12/11/19 and started my tear-down of them that same night when I got home from work. I’m impatient.. remember?
Alright, so moving on to the removal of the black vinyl covers from the Sportsters… This was not necessarily the easiest task. AMX has a brief series of how-to video clips that helped a lot, but it’s definitely tough if you’ve never attempted something like this before. I started around 7PM. Once I started to get the feel for it and how everything was connected I started to fly thru it. I had both the seat back and seat bottom covers off in about 30-35 minutes. In order to get the seat bottom cover off, you have to unscrew the seat bottom from the frame. This also makes it easier to re-install the seat back cover.
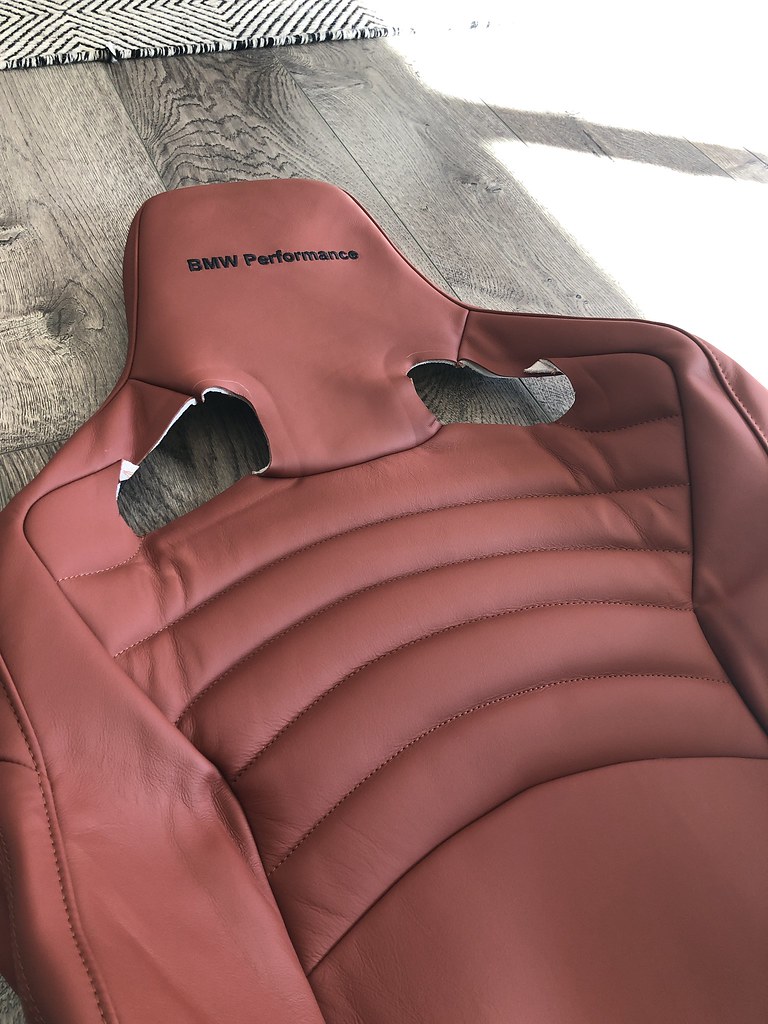
Once I had the foam inners exposed I noticed that the outer bolster on the drivers side was a bit worn and cracked from use (used seats this will happen to) so I simply duct taped it nicely and added some super glue and decided to swap the seat bottoms from the drivers seat to the passenger seat so that the foam thigh bolsters didn’t get even more worn in the future.
When it comes to the installation of the leather covers, this was not easy at all. I would rank this a 7.5/10 on the difficulty scale. While it is pretty “straight forward” it is a struggle muscling the edges into the seat backs and attempting to “stretch” the leather a bit to keep things tight and in their proper mounting locations. My finger-tips were beginning to get raw towards the end of the first seat, but I was determined to complete both in the same night, so I powered forward. I had the drivers seat completed in a grand total of 90 minutes from start to finish. I was excited but exhausted. Dinner time, thank goodness.
Now back to the second seat, same process, made good time on this one since I was familiar with all the clips and Velcro, etc, but would have been faster if my fingers didn’t hurt so bad along with the rest of my body for the most part. Who would have thought it would be a full body workout to get these bastards together. Right around 10:15PM I finished the job. I was so beat that I didn’t spend much time admiring my handy work, but hey, I accomplished the task.
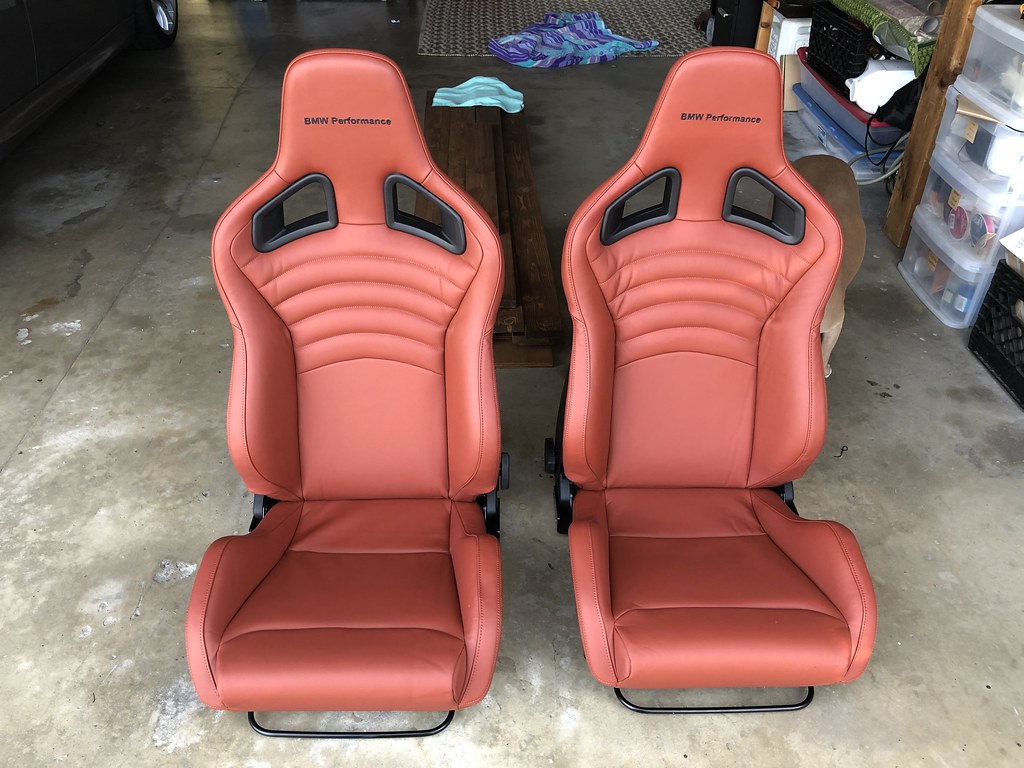
So I woke up on 12/12 and finally got to view the seats in some natural sunlight, and man they look amazing. Couldn’t have asked for them to look any better. The hard work of the install paid off, so I was excited. I really wanted to install them immediately, but decided that the best next step in order to protect the “investment” would be to have the seats ceramic coated. Yes, just like you can ceramic coat your paint on the exterior of your car, you can also ceramic coat the interior.
I called up my friends over at Protective Film Solutions in Santa Ana, CA and asked if I could come drop the seats off for their Glånz Ceramic Coating. Thankfully they were able to squeeze me in with another job since they’re always so busy! Dropped them off and picked them up on the 13th, took them home and installed them in the car!
Now for the moment you’ve all been waiting for!
Covers Delivered:

.
Packaging:

.
First Look:
.
 Color Match:
 Factory Black Vinyl Sportsters:
 Tear down:
 Assembly:
 One done!:
 One to go!:
 Assembly Complete:
 Ceramic Coating Completed:
 Install Begins:
 SUCCESS!!!:
 If anyone is interested in getting a set of these covers for their own Sportsters, please let me know and I’ll be happy to help out in communicating with AMX and such. If you do get a pair and are local to me in SoCal would like me to install them onto your seats for you, let me know and I can certainly help you out with that as well for a reasonable fee for my time and pain and suffering. Lol.