Quote:
Originally Posted by da jemster

OP, thanks for the write-up. Here's my new vs. old at 72K. One thing though, I had 5 1/2 liters come out of mine. I placed a level on top of the car, jacked the car up and placed them on jackstands and got close enough to level as when I started. I replaced the suction filter as well. So, the kit that I bought from ECS was insufficient as I needed one more bottle.
As for the cylindrical transmission filter, has anyone gotten to replace that yet? (You...if you had first-hand experience, not a shop that you left your car with). I was able to move the two heat exchanger lines #12 and #13 on the diagram, by unbolting the one bolt on the drivers side and the three bolts on the passenger side. But I was just inches from clearing the lines from the filter opening. I attempted this after I had replaced the suction filter, re-installed the DCT Tranny oil pan and filled it up with 5 bottles. I think if I left the oil pan off, I could've moved the tubes to clear the opening.
|
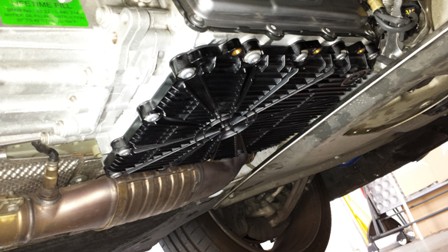
I just finished a DCT fluid service on my 2010 E90 M3. I had some kind of leak around the pan.

So I had to pull the pan and replace it. I would have replaced the gasket only, but it is not available without purchasing the complete pan and gasket. I purchased the compete DCT service kit from ECS tuning which included both filters and the fluid along with the drain and filler plugs. I also replace the trans oil cooler line o rings. ECS has those as well.
I did remove the pan and suction filter first.
E90-REP-28-10-000 Replacing suction Filter.pdf
I do think this helped make room to move the pressure lines out of the way to remove the pressure filter.
E90-REP-28-60-00 Replacing Pressure Filter.pdf
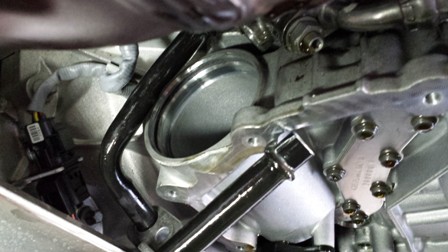
If you look at the above TIS, they want you to remove half the car and drop the trans, but I did not find it necessary. On page 2 of the pressure filter instructions above, the #1 bold needs to be removed which allows the lines to be pulled out of the trans. The bracket can be unhooked from the bottom line, which allows the lines to be separated. On the passenger side, the two pressure lines are attached with a bracket with one bolt in the center. Once the bolt (and metal sleeve) is removed, the lines can be moved out of the way. I pushed the top line above the opening to the pressure filter, and the lower line below the opening.
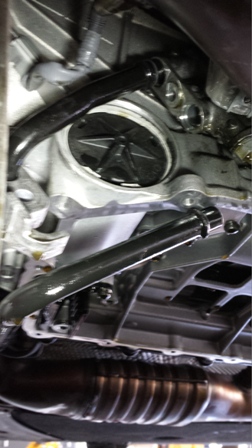
I used snap ring pliers to remove the snap ring. I can't imagine how difficult it would have been without the snap ring pliers. There was enough room to pull the cover then the filter.
Putting it back together and filling it up took some time, but it looks clean and it went into gear, so I would call it a success.
I did try to follow the torque specs as close as possible, but could not is some cases because of space limitations.
E90-AZD-28-1-10 Housing with add-on parts.pdf
and
E90-AZD-28-1-00 Transmission in general.pdf
So to answer your question, yes I think it helps to have the trans pan off first, before you take out the pressure filter.
Second, I noticed your diagram and notes reference the heat exchanger, but I only had to move the trans oil cooler lines.

My fluid looked in between the two samples you have in your photo. I am sending a sample to Blackstone to see what they think and will post the results when I receive them. My car has a little over 66 K on it.
I appreciate the original post and comments as they definitely helped me with this project.