Ok here is the update from yesterday. You'll have to be patient on the videos. I should have time this weekend to take some. Onto the pics..
This is the top side of the exhaust. The driver's side is tacked and ready to weld. Still need to button up the right side. RE: the post above.. note the exhaust pipes - you can clearly see the gaps around the welded part of the tips where they meet the body of the muffler.

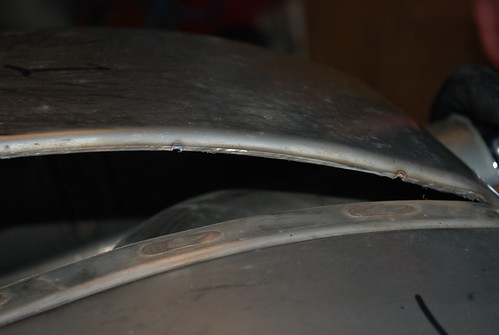
Just a detail shot showing the nice welds. I'm really happy with how they turned out!
This is a close-up detail of a couple spot welds Sam made to join the two skins together.
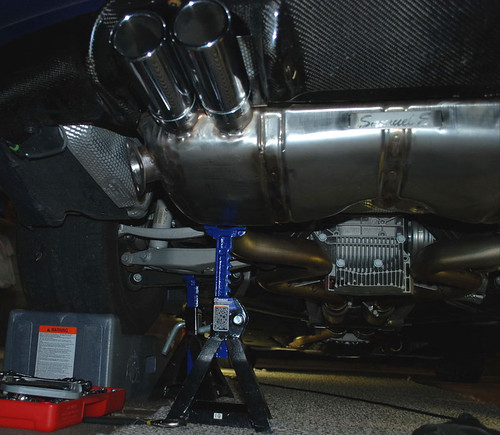
I'm getting ready to remove the old exhaust. I used rhino ramps, and put stands under the A-arms and the main weight of the exhaust and paint cans at the front of the exhaust. I removed the exhaust by myself and it wasn't too bad, but getting the hangers off was sort of a pita. I'll buy a tool next time. Strangely, getting them back on later was a piece of cake.

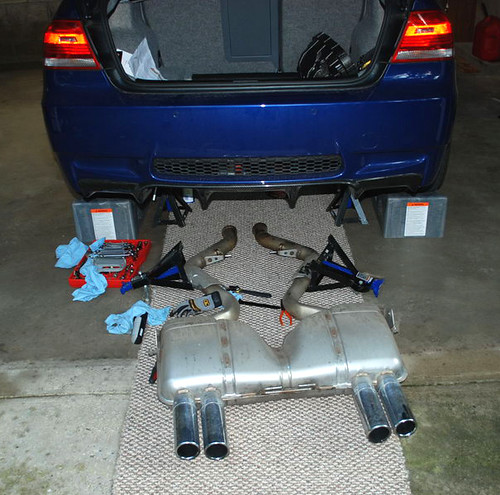
Old exhaust is out!
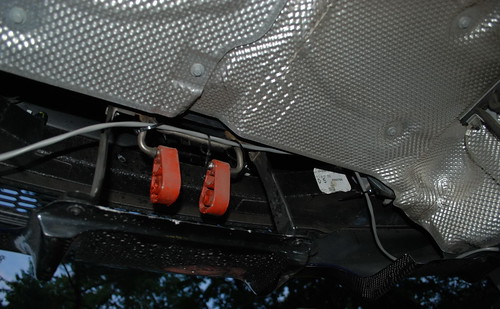
These are the hangers. You can also see the route my wiring takes for the passenger's side valve. I zip tied to the hanger mount and on the right side where there was an empty hole asking for a zip tie to be stuck in it.

I did use a self-tapping screw with a eyelet type zip tie to keep the wire out of the way here (this is the passenger side). I don't think I really needed this, but I wanted to be sure it stayed out of the way. Its screwed into the heat shielding. I think its thick enough to hold it.
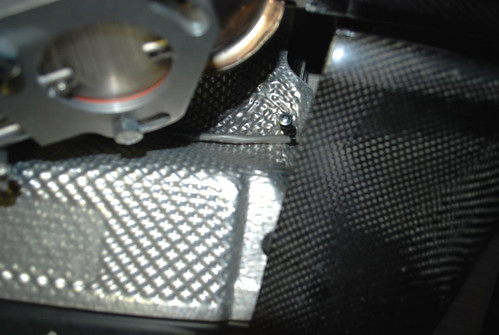
This is the new exhaust ready to go on. We decided to fab up a nice little stainless steel logo plate. Its pretty neat how we did this. Sam did his patent swirl pattern over the plate, then I cut out some custom vinyl with his logo and adhered it on. Then we went over it with bead blast to cover up the swirly pattern. When I removed the vinyl, this is the effect you get. Its hard to photograph, but it looks nice in person. You can see this name plate through the rear grill or if you look underneath from a bit away.

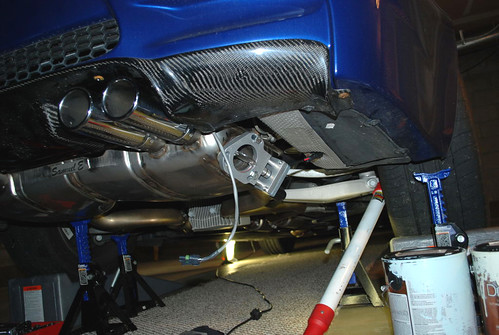
The Samuel E Valvetronic is installed! I'm really digging that name plate.
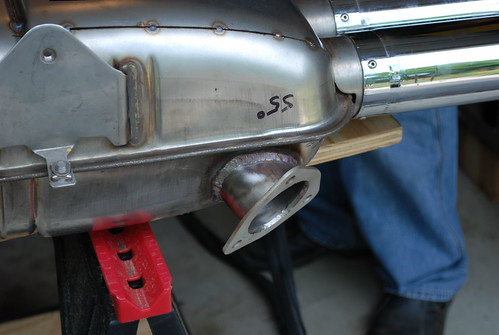
Test fitting the driver's side. Looks good (thank God).
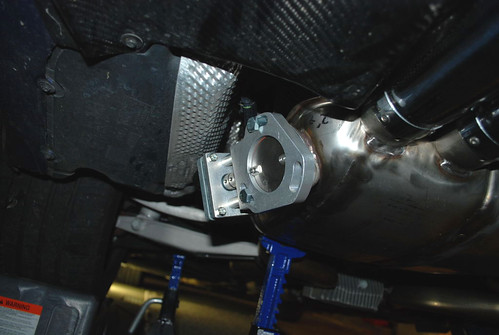
Passenger side is great too. Valve is open here to make sure that I center the valve on the hole.

Looks good. You can see the valve wire hanging here. The connector is quite large, but it is water resistant.
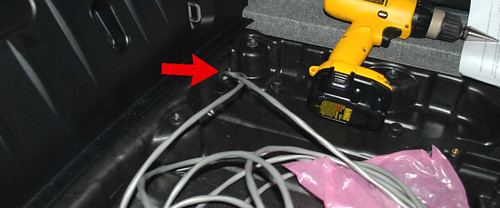
This shot is taken looking towards the rear driver's side corner of the car. The floor carpet is removed. The arrow shows the hole a I made. I looked around for a while to find an optimal spot. This was the easiest from an access position, it wasn't near any rotating parts, and I liked how it was on a rear facing vertical part of the car - not likely to be battered by water or the elements. I had to use the full size of the step bit to get the connector through. I'll sort out and slice a grommet for that area later, and if I cant find a suitable one, I'll just RTV the hell out of it.
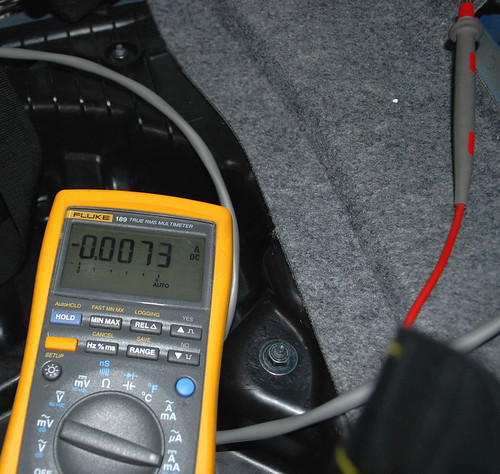
I didn't feel like sourcing a switched wire and didnt want to run one to the front of the car, so I decided to see if I could take the lazy man's way out. This is showing a pull of only 7.3 mA. A dirty calculation revealed that it would be months before the wireless controller drained my battery, so I just tapped onto the battery directly. Over the winter, I'll just pull the fuse when I store it so it doesn't draw any current.
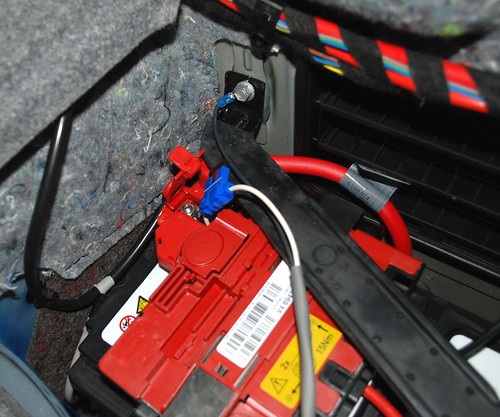
This is where I tapped into the battery. There were three choices that I saw but the place I put it had a little terminal screw, so it was perfect. This is the strangest battery cover I've ever seen. Those Germans sure like to over engineer! I grounded just above to the tie down strap screw. Easy! Note the little blue fuse holder I've added inline.
Installed:
Better installed pics and good videos are coming! In the meantime, here is a teaser video - a couple shots of the exhaust off (uninstalled) and one at the end of the Bates on there.. PLEASE NOTE that it does not really sound like this in person. I have a mic, but still need to learn how to use it properly.. need more experimentation to get it right. I shot the Bates video with a bass reduction, so it sounds a little tinny. Anyway, enjoy
http://www.youtube.com/v/VAqfW5k6XcY&hl=en&fs=1