

 |
|
 |

|
|
|
| 06-24-2012, 10:31 AM | #1 |
|
Lieutenant Colonel
 
394
Rep 1,519
Posts |
Looking for DIY on StopTech pad change
I've had my StopTech ST60/ST40 setup for over a year now and have been very happy with it. I initially did a couple of sets of the StopTech Street Performance pads, and now I've moved on to Pagid RS29s.
It's time that I learn how to swap pads myself, especially since the StopTech caliper design makes it so easy. I'm looking for a DIY guide to the procedure, specifically for a StopTech setup. I looked in StopTech's faq section on their site, but found nothing regarding instructions for swapping pads, and I haven't found anything on this forum or the rest of the web detailing the procedure for StopTech calipers. Anyone know of a link, or is anyone willing to type out a DIY for this? (Maybe Richard @ M-World?  ) )Thanks!  |
| 06-24-2012, 10:18 PM | #2 |
|
Captain

68
Rep 869
Posts |
It doesn't get any easier than this, you'll love it!
1) Jack up corner, remove wheel. 2) Remove the bridge bolts that are visible on the caliper face (x4 on ST60, x2 on the ST-40) with the 4 or 5mm(?) hex key that came with the kit. I usually remove them in sequence starting from the top down, since the bridge is spring loaded it can pivot on the bottom bolt. Otherwise it can pinch and bind on one of the middle bolts. 3) Remove the bridge on the outer part of the caliper. My ST-40s just easily pull straight out. The 60s on front have a very tight fit requiring some gentle persuasion. I use a long flat screwdriver with a soft rag btw/ the caliper so as not to chip the paint. It doesn't take a lot of force just a wiggle to get it started since it is spring-loaded. 4) Spread the pistons apart. I use a GiroDisc tool. 5) Pluck out the pads and insert the new ones. 6) Replace the bridge on the caliper. There is a top and bottom, with an arrow on the bridge face pointing up. Again, the 60s are tight. Here is where I get my rubber mallet with the soft rag and gently but firmly tap bridge inward until it seats flush. You'll see what I mean. 7) Reinsert bridge bolts (Don't lose washers). Careful not to cross-thread or let them bind up. Use the rubber mallet again if necessary. Tighten w/ hex key to what I would call "firm hand tight" (I don't know the exact torque specs but they are not load-bearing). 8) Wheel on, lower corner, repeat x 3. Pump brakes to seat pistons after all four are done. Piece of cake.
__________________
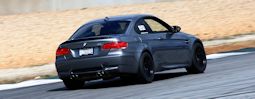 2008 M3 Coupe / DCT // StopTech BBK 380/355 / Pagid RS29 / Motul / Apex Arc-8 / BFG R1S / Ground Control / MS filter / Performance spoiler / BPM tune // Road Atlanta 1:39.70 / VIR Full 2:10.87 / Barber 1:42.20 |
|
Appreciate
0
|
| 06-27-2012, 11:18 PM | #5 | |
|
Captain
80
Rep 961
Posts |
Quote:
|
|
|
Appreciate
0
|
| 06-28-2012, 11:19 AM | #7 | |
|
Captain
80
Rep 961
Posts |
Quote:
|
|
|
Appreciate
0
|
| 06-28-2012, 01:07 PM | #8 | |
|
Brigadier General
 

125
Rep 4,971
Posts |
Quote:
|
|
|
Appreciate
0
|
| 06-28-2012, 06:55 PM | #9 | |
|
Major General
817
Rep 7,887
Posts |
Quote:
|
|
|
Appreciate
0
|
| 06-29-2012, 05:17 AM | #10 |
|
Lieutenant Colonel
67
Rep 1,895
Posts |
Pagids arrived yesterday so I did a test fit on my St 60/40. Used a 8" pliers like in the video - too easy. Maybe if I had $$ coming out of my ass or had to change my pads in the pits where the brakes were hot I'd spend the $250. It's a nice tool, but not $250 nice. Least not to me.
http://www.youtube.com/watch?v=uBtcTZPsLR8 |
|
Appreciate
1
|
| 06-29-2012, 07:28 PM | #11 | |
|
Captain
68
Rep 869
Posts |
Quote:
I love the tool but hey I'm a brake whore so it's worth it to me. Some people like you have a thing about expensive little pieces of carbon fiber. Me, I like brakes. So to each his own. It's all good. (BTW why would you pay $200 for those RPI scoops?  ) )
__________________
2008 M3 Coupe / DCT // StopTech BBK 380/355 / Pagid RS29 / Motul / Apex Arc-8 / BFG R1S / Ground Control / MS filter / Performance spoiler / BPM tune // Road Atlanta 1:39.70 / VIR Full 2:10.87 / Barber 1:42.20 |
|
|
Appreciate
0
|
| 06-30-2012, 12:31 AM | #12 | |
|
Lieutenant Colonel
67
Rep 1,895
Posts |
Quote:
And those RPI scoops add 7 HP @ upper RPM's |
|
|
Appreciate
0
|
| 06-30-2012, 12:08 PM | #13 | |
|
Captain
68
Rep 869
Posts |
Quote:
Sounds like a plan, you can borrow it anytime! Hey, I've got to get my money's worth out of it somehow. It's going to be 105 degrees F today in Georgia, you might want to wait til it's cooler to move back here though. And speaking of carbon fiber, I'm in the market for a front lip. Hoping to find one that will add ~5 ft-lbs of torque. Like I said, it's all good. 
__________________
2008 M3 Coupe / DCT // StopTech BBK 380/355 / Pagid RS29 / Motul / Apex Arc-8 / BFG R1S / Ground Control / MS filter / Performance spoiler / BPM tune // Road Atlanta 1:39.70 / VIR Full 2:10.87 / Barber 1:42.20 |
|
|
Appreciate
0
|
| 07-01-2012, 02:34 PM | #14 |
|
Major General
1571
Rep 8,076
Posts
Drives: 11 E90 M3 Individual
Join Date: Mar 2006
Location: Houston, TX
|
5mm hex for the bridge bolts.
I just use my hands or the brake pad to push the caliper back. I think the $200 tool would be great but not at all necessary. UUC has the best price I've seen...$200. Here's a video
__________________
2018 F30 320iX Melbourne Red
2011 E90 M3 Monte Carlo Blue 2004 E46 M3 Imola Red 2000 E36/7 Z3 Steel Blue |
|
Appreciate
0
|
| 08-26-2013, 11:17 PM | #15 | |
|
Colonel

650
Rep 2,601
Posts
Drives: G81 M3 Touring, GR Supra GTS
Join Date: Jan 2012
Location: Perth
|
Quote:
|
|
|
Appreciate
0
|
| 08-27-2013, 05:33 AM | #17 | |
|
Lieutenant Colonel
394
Rep 1,519
Posts |
Quote:
I don't open the reservoir cap when I change the pads, but I do make sure to pump the brake pedal a couple of times after doing each corner to reseat the pistons on the pads. I don't wait until all four corners are done before pressing the brake pedal--I would be concerned that the brake fluid reservoir would overflow. I would also think that, by opening the bleed screws on the calipers, you could run the risk of getting brake fluid all over the calipers and damaging the finish.
__________________
Past: E46 330Ci, E60 545i, E60 M5, E90 M3
Present: 2020 M2 Competition, 2022 GT3 |
|
|
Appreciate
0
|
| 08-27-2013, 12:18 PM | #18 |
|
Captain
68
Rep 869
Posts |
Yes, what he said. ^
__________________
2008 M3 Coupe / DCT // StopTech BBK 380/355 / Pagid RS29 / Motul / Apex Arc-8 / BFG R1S / Ground Control / MS filter / Performance spoiler / BPM tune // Road Atlanta 1:39.70 / VIR Full 2:10.87 / Barber 1:42.20 |
|
Appreciate
0
|
| 08-27-2013, 09:35 PM | #19 | |
|
Colonel
650
Rep 2,601
Posts
Drives: G81 M3 Touring, GR Supra GTS
Join Date: Jan 2012
Location: Perth
|
Quote:
Thanks, that's how I've done it. But yesterday I read something about forcing old fluid back up through the system and thought I'd ask. |
|
|
Appreciate
0
|
| 08-27-2013, 09:47 PM | #20 |
|
Private First Class
 10
Rep 119
Posts |
Help! Currently changing race pads back to street pads which are brand new. Am I missing something or doing something wrong, coz u make it aound like the brand new pads should just slide in. Pistons are in but the new pads that came with the stop tech BBK trophy wouldnt just slide in but instead I have to hammer it down?! Is this normal? AND unlike hawk the stoptech pads came with plates, am I suppose to take em out? They look like plates where the pistons press on.
|
|
Appreciate
0
|
| 08-27-2013, 09:56 PM | #21 | |
|
-
11817
Rep 23,187
Posts |
Quote:
|
|
|
Appreciate
0
|
Post Reply |
| Bookmarks |
|
|


