

 |
|
 |

|
|
|
| 12-16-2017, 07:06 PM | #1 |
|
Lieutenant
 
669
Rep 412
Posts |
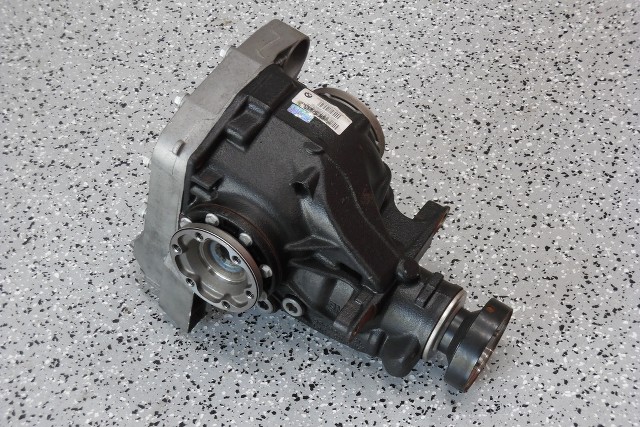
Differential Pinion Seal - Have You Replaced This?
Can anyone who has done this repair recommend alternative or less expensive tool options sufficient to complete the job?
Post Edited: Job completed and DIY instructions can be found at this link here.
__________________
Last edited by Theodore; 02-23-2018 at 04:19 PM.. Reason: Removed non-M diff information that could be confusing. |
| 12-16-2017, 07:35 PM | #2 |
|
Lieutenant General
 5234
Rep 10,614
Posts |
I think you can find substitutes for some of those tools and make do without others. The most important thing is getting the torque the same as it was which you try to do by putting the big nut back to exactly the same point. Scribe lines before removal. Have not done this on E90M3 but have on E36M3.
|
|
Appreciate
0
|
| 12-17-2017, 07:23 AM | #3 | |
|
Captain
371
Rep 615
Posts
Drives: E92 M3 6MT Space/Black
Join Date: Mar 2015
Location: Houston, TX
|
I need to do this job also (and have not done it before)
 my input seal will lose a couple drops every long drive. Like pbonsalb mentioned you can avoid using the torque angle meter by marking the position of the nut to replace it back as it was. Also many seals can be placed back in with a comprehensive bearing/seal kit such as this one for $23 : https://www.ebay.com/itm/Portable-Be...-/272725022067 my input seal will lose a couple drops every long drive. Like pbonsalb mentioned you can avoid using the torque angle meter by marking the position of the nut to replace it back as it was. Also many seals can be placed back in with a comprehensive bearing/seal kit such as this one for $23 : https://www.ebay.com/itm/Portable-Be...-/272725022067Pullers are available in many sizes and flavors for a lot less, find one that fits this application or you can even rent one cheaply. Also, the driveshaft tool extension for $260 !...why couldnt we just use this: https://www.homedepot.com/p/URREA-1-...-202797422-_-N Another point i've read plenty of times is to not push in the new seal too far, just a little below the flange or at least notice how far in it is now so you don't risk more leaking after the job is done. Please post pics of your progress! I think with careful planning, and not rushing things this job can be done properly and economically. GM Quote:
|
|
|
Appreciate
1
Theodore668.50 |
| 12-17-2017, 07:34 AM | #4 |
|
Lieutenant General
5234
Rep 10,614
Posts |
You can also buy an angle adapter pretty cheap if you do want one. The main thing is you dont want to buy $1200 in tools to change a $25 part. If you just wanted a challenge and did not mind buying the tools, I suppose you could rent them out to others, but not many work on their own cars and those that do probably know they can do the job without those tools.
If you are one of those BMW parts only people could not live with yourself unless you used every special tool listed in the TIS, then paying a shop to do the job might be an alternative. What does the TIS say for time? |
|
Appreciate
1
Theodore668.50 |
| 12-17-2017, 07:54 AM | #5 |
|
Captain
371
Rep 615
Posts
Drives: E92 M3 6MT Space/Black
Join Date: Mar 2015
Location: Houston, TX
|
I like the idea of a community on this forum sharing specialty tools
 I do as much repair work as possible at home and have acquired a few of these tools over the past couple years. I do as much repair work as possible at home and have acquired a few of these tools over the past couple years.On another note...I'm not seeing where the torque angle meter gets used for this job ? GM |
|
Appreciate
0
|
| 12-17-2017, 11:33 AM | #6 |
|
Lieutenant
669
Rep 412
Posts |
The torque angle gauge is mentioned in the related TIS for removing and reinstalling the driveshaft 26 11 000. The driveshaft to differential M10x52 Torx bolts require 20 NM + 90 degrees of torque. Good points on marking the bolts, 90 degrees should be easy enough to get very close to the exact angle. 14 degrees or 59 degrees would be another story.
Thanks for all the links. The unbranded Ebay "Bearing Race and Seal Driver Master Set" ($23) might even be the Astro 7824 model ($39), which someone on a tool forum identified as the original brand/model of the "Snap-on Bearing Race and Seal Driver Set". EDIT: From Deansbimmer these seal drivers don't have the clearance necessary for this job. See his post below. I don't think the Home Depot extension will work because the female end is sized for a standard 1/2" drive insert, while I suspect the BMW tool may be sized specifically for the BMW tool insert (possibly 9x12 mm?), similar to female inserts found on non-ratcheting torque wrenches. The community tool box idea is a great one for rarely used tools, but I'm not the guy dedicated enough to make that work. And unfortunately the TIS doesn't list an official book time, I think you need access to software BMW uses called KDS to get that.
__________________
Last edited by Theodore; 12-17-2017 at 02:26 PM.. |
|
Appreciate
0
|
| 12-17-2017, 12:29 PM | #7 |
|
BimmerPost Supporting Vendor
3751
Rep 2,907
Posts 
Drives: 2011 E93 M3
Join Date: Nov 2014
Location: DFW, Texas
|
I think there is something going on with that beta version of TIS. While the job number is correct, the contents of that link don't match up to M3 components. Try this link, which for me comes up with the repair for M3 diffs (and a much simpler procedure): https://www.newtis.info/tisv2/a/en/e...th-lid/PeahQlD
I doubt any independent uses 100% of the specialty tools suggested by BMW for any particular job. I would bet that even most dealership techs skip using all of the special tools for every single job. It costs more time. This job can be done with off the shelf tools with the exception of removing the pinion nut which needs a thinner wall socket. You can spin the pinion nut off with an impact, pull the flange off with a generic puller, swap the seal like you would any other blind seal, and carry on. Would it be done to the same level of precision and accuracy as suggested by BMW? No but it would solve the leak for probably as long as you're going to own the car. That's how most indy's would do it, whether they tell you they use OEM tools or not... Edit: You cannot use typical bearing/seal drivers on that seal because the pinion protrudes out the front of the housing. Most would substitute a large deep well socket or piece of PVC pipe to drive it in without distorting it. The only caveat I can think of on this job if you're not going to use the special tools is to not overtighten the pinion nut when reinstalling the flange. If you overtighten it past the point it was tightened to originally, you will increase the pinion pre-load which will cause other major problems. Last edited by deansbimmer; 12-17-2017 at 12:56 PM.. |
| 12-17-2017, 05:15 PM | #8 |
|
Lieutenant
669
Rep 412
Posts |
Content edited to prevent confusion on the E9X M3. See the completed DIY guide at this link here.
__________________
Last edited by Theodore; 02-23-2018 at 04:19 PM.. Reason: Removed non-M diff information that could be confusing. |
|
Appreciate
0
|
| 12-17-2017, 05:19 PM | #9 |
|
Lieutenant General
5234
Rep 10,614
Posts |
You may not be able to use an impact because they are too thick. A regular socket should work and you can grind down the wall if needed. I dont know the sizes but doubt they are uncommon.
|
|
Appreciate
0
|
| 12-17-2017, 05:24 PM | #10 | |
|
BimmerPost Supporting Vendor
3751
Rep 2,907
Posts
Drives: 2011 E93 M3
Join Date: Nov 2014
Location: DFW, Texas
|
Quote:
You can use an impact and regular impact socket if you grind down the socket wall to fit. 36mm IIRC. |
|
|
Appreciate
0
|
| 12-17-2017, 05:36 PM | #11 |
|
BimmerPost Supporting Vendor
3751
Rep 2,907
Posts
Drives: 2011 E93 M3
Join Date: Nov 2014
Location: DFW, Texas
|
This is an M3 diff. It has a separate flange that the M3 driveshaft mates with. This is the diff put into all 08-13 M3's. This is not the same as the "inserted shaft" style diff that came on regular 3-series and as shown in the TIS literature you're going by. The TIS page content you're using is mismatched to the title and erroneous. None of the tools in that kit would be used on an M3 diff.
  |
|
Appreciate
3
|
| 12-17-2017, 06:27 PM | #12 | |
|
Colonel
 

2621
Rep 2,138
Posts
Drives: 2011 E92 M3
Join Date: Oct 2017
Location: Victoria
|
Quote:
|
|
|
Appreciate
1
CHE///MIST3370.50 |
| 12-17-2017, 06:45 PM | #13 | |
|
Lieutenant
669
Rep 412
Posts |
Quote:
__________________
Last edited by Theodore; 12-17-2017 at 06:55 PM.. |
|
|
Appreciate
0
|
| 12-17-2017, 10:00 PM | #14 |
|
Captain
371
Rep 615
Posts
Drives: E92 M3 6MT Space/Black
Join Date: Mar 2015
Location: Houston, TX
|
These detailed threads are my favorite on M3post ! How to keep these machines running ourselves.
GM |
|
Appreciate
0
|
| 12-18-2017, 07:39 AM | #15 | |
|
BimmerPost Supporting Vendor
3751
Rep 2,907
Posts
Drives: 2011 E93 M3
Join Date: Nov 2014
Location: DFW, Texas
|
Quote:
|
|
|
Appreciate
0
|
| 12-18-2017, 04:36 PM | #16 |
|
Lieutenant
669
Rep 412
Posts |
Bumping this up to find someone who either has an E9X M3 diff out of the car and can measure the "pinion nut" size or someone who works as a BMW tech who has access to more accurate repair/part guides. The free online BMW TIS incorrectly describes the non-M driveshaft to differential connection and RealOEM strangely doesn't list this nut at all for the M3.
|
|
Appreciate
0
|
| 12-18-2017, 08:20 PM | #17 | |
|
Colonel
2621
Rep 2,138
Posts
Drives: 2011 E92 M3
Join Date: Oct 2017
Location: Victoria
|
Quote:
  Looks like a chrome 32 fits fine. These diffs are awesome in the fact that they are easy to work with!! Cheers, Dave
__________________
 2011 E92 M3 - 6MT, ZCP, ZF LSD, ESS G1, Some other goodies... |
|
|
Appreciate
1
Theodore668.50 |
| 12-18-2017, 08:23 PM | #18 |
|
Colonel
2621
Rep 2,138
Posts
Drives: 2011 E92 M3
Join Date: Oct 2017
Location: Victoria
|
One thing: Can anyone confirm that the bolts for the drive shaft are 20NM +90 and the axle shafts are 120NM? <-- updated to show proper values here.
Cheers,
__________________
2011 E92 M3 - 6MT, ZCP, ZF LSD, ESS G1, Some other goodies... Last edited by Scharbag; 12-19-2017 at 12:02 PM.. Reason: Put the right values in from below to reduce future confusion!! |
|
Appreciate
0
|
| 12-18-2017, 09:54 PM | #19 | |
|
Lieutenant
669
Rep 412
Posts |
Thanks for testing the size!
Quote:
120 NM for the M12 Torx bolts from the axles to the differential. And to add to the thread, here is the part number for the drive flange washer: BMW Part # 33121205138 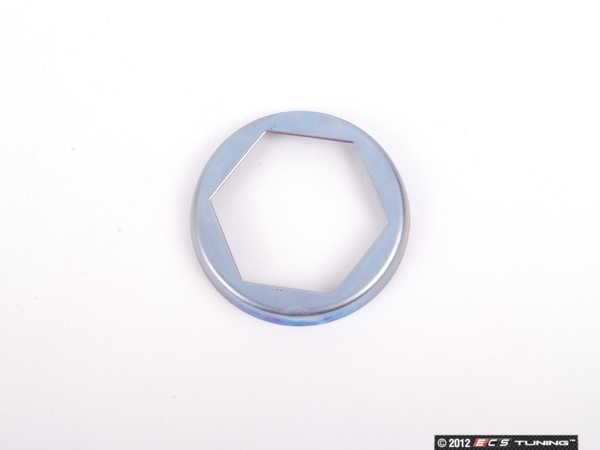
__________________
Last edited by Theodore; 12-18-2017 at 10:08 PM.. |
|
|
Appreciate
1
Scharbag2620.50 |
| 12-19-2017, 09:51 AM | #20 | |
|
Colonel
2621
Rep 2,138
Posts
Drives: 2011 E92 M3
Join Date: Oct 2017
Location: Victoria
|
Quote:
For completenes: Silver M10 CV to diff bolts (normal) = 26117526322 Black M10 CV to diff bolt (counterbalance with blue marking) = 26112284154 Green M10 CV to diff bolt (counterbalance with yellow marking) = 26112284153 Drive shaft to diff M12 bolt = 33211227944 One last question - is it really really required to replace all the bolts for the axles and drive shaft? Or just use a little blue loctite? Cheers,
__________________
2011 E92 M3 - 6MT, ZCP, ZF LSD, ESS G1, Some other goodies... Last edited by Scharbag; 12-19-2017 at 11:09 AM.. |
|
|
Appreciate
1
Theodore668.50 |
| 12-19-2017, 10:48 AM | #21 |
|
BimmerPost Supporting Vendor
3751
Rep 2,907
Posts
Drives: 2011 E93 M3
Join Date: Nov 2014
Location: DFW, Texas
|
Any torque to yield bolt must be replaced after use in order to maintain consistent application torque. With that said, many people do not replace them.
|
| 12-19-2017, 11:51 AM | #22 | |
|
Colonel
2621
Rep 2,138
Posts
Drives: 2011 E92 M3
Join Date: Oct 2017
Location: Victoria
|
Quote:
I am torn if it will be blue loctite and re-use for this hardware or new... Damn OCD...
__________________
2011 E92 M3 - 6MT, ZCP, ZF LSD, ESS G1, Some other goodies... Last edited by Scharbag; 12-19-2017 at 12:08 PM.. |
|
|
Appreciate
0
|
Post Reply |
| Bookmarks |
|
|


