

 |
|
 |

|
|
|
| 11-03-2012, 12:27 AM | #1 |
|
Banned

825
Rep 3,387
Posts |
Laser Interceptor/V1/AudioControl stealth install
As I make changes to my car, one of the main concerns is to keep a pretty stealthy appearance. I'm all about keeping the interior stock looking, without too much flash and without too many "gadgets" littering the cabin. After participating in the LI group buy a few months ago, I was looking at where people were mounting the on/off switch. I wasn't too impressed with many of the options, as the locations mandated conspicuous movement to turn them off. As I thought about this little project, those are a couple of the criteria I wanted to adhere to. I'd been accumulating parts over the last few months, waiting to install them as I only wanted to disassemble the interior once. I ran the wires along the passenger's side of the car and didn't have to pull out the front seat. My upgrades included:
-LCI Idrive controller and console -Laser Interceptor -modmynav w/backup camera -V1 w/remote display -MusicarNW sub box install w/Technic harness and Audio Control LC2i I installed the LI (with instructions also found on e90post (http://www.e90post.com/forums/showthread.php?t=157728 thanks, Calvino). The LI can also function as a (rudimentary) PDC, so in case you get into a squeeze and have to show that what you're using is actually a PDC, you can flip a switch and it will go into that mode, and when you flip the switch back you can go back to the normal LI function w/out having to go through the Windows-based application. The LI manual shows you how to rig it up. I wanted to make sure this function was available as well. I went to Fry's and picked up some RS-232 tin shells, and soldered in the wires as per the LI manual. I finished them off w/some heatshrink, then covered the wired area w/hot glue to provide a little more stability @ the base of the connection. 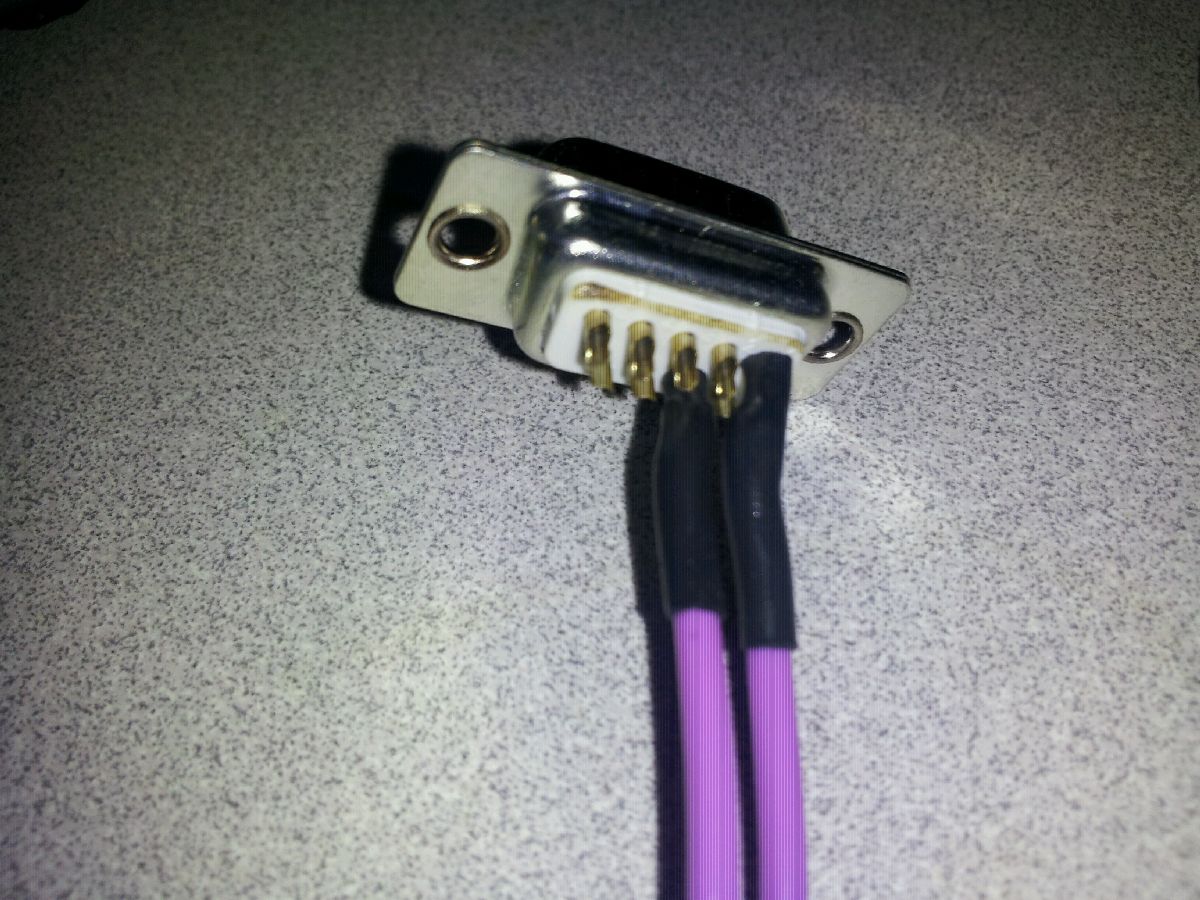 I put some quick release connections on the end and wired those to the switch. 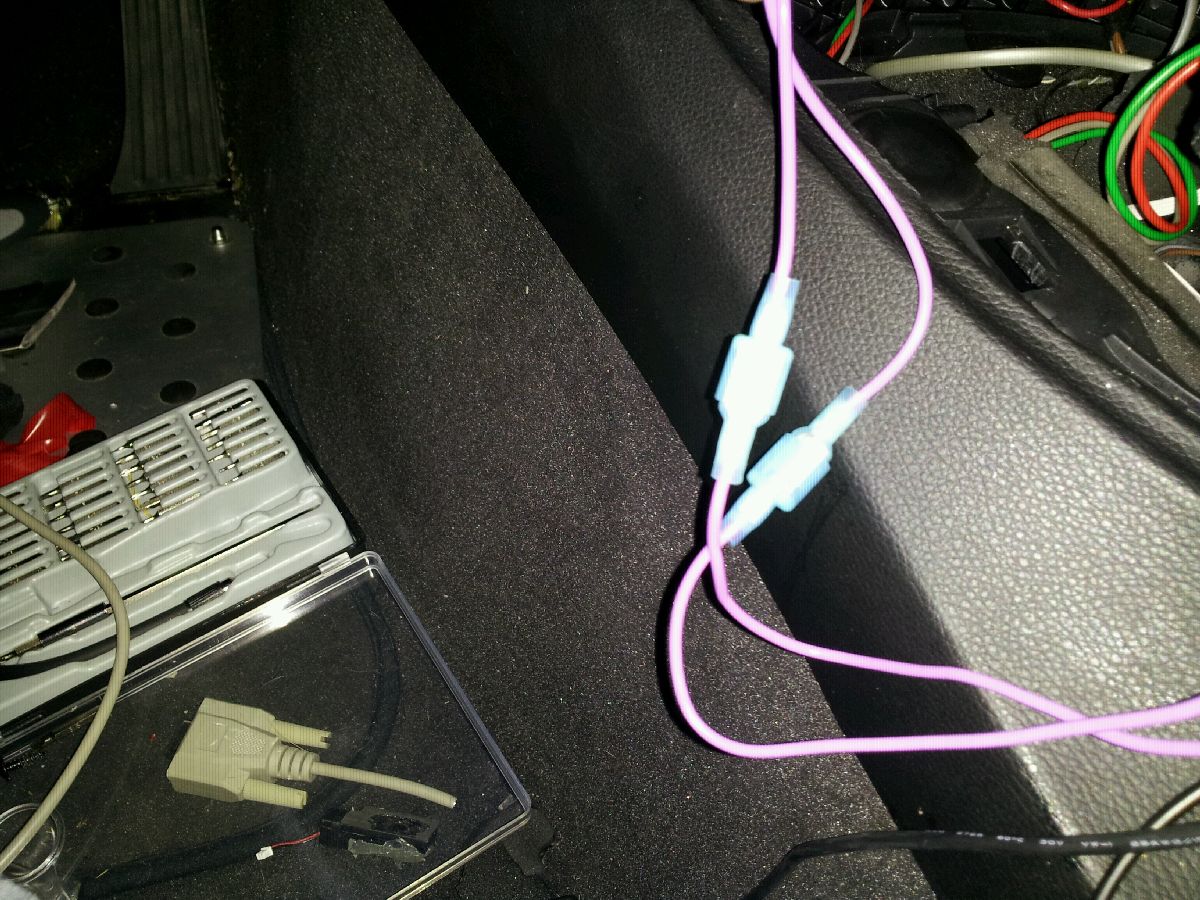 To run the wiring from the front of the car to the interior, I used the info from the E90post. I pushed through a lead wire, then used electrical tape to attach the RJ-11 connectors and pulled them through. 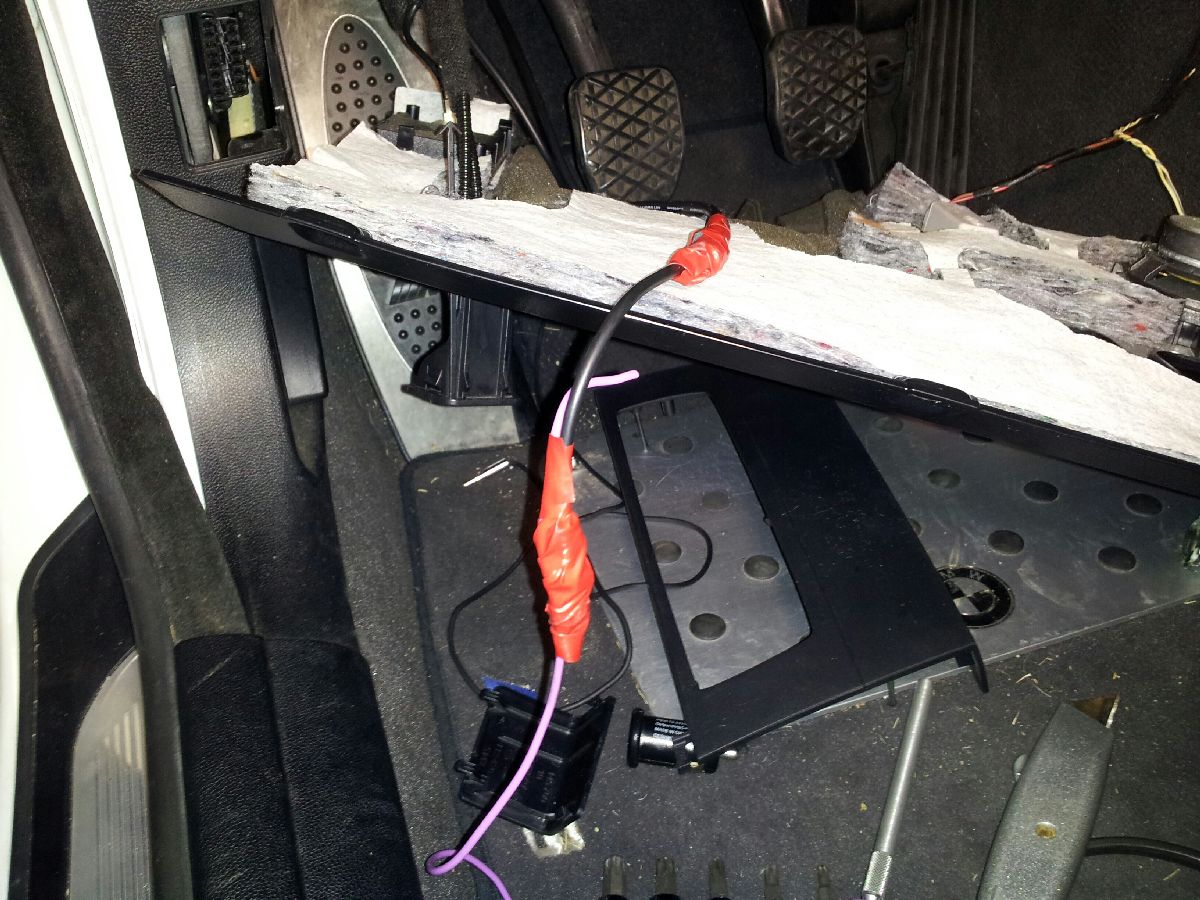 The modules are mounted vertically in the kidney grilles. I used double sided tape on both sides of each laser module. Doing so required wedging one of the trim removal tools in between the kidney grille slats to create some space so the tape would remain flat for final insertion. 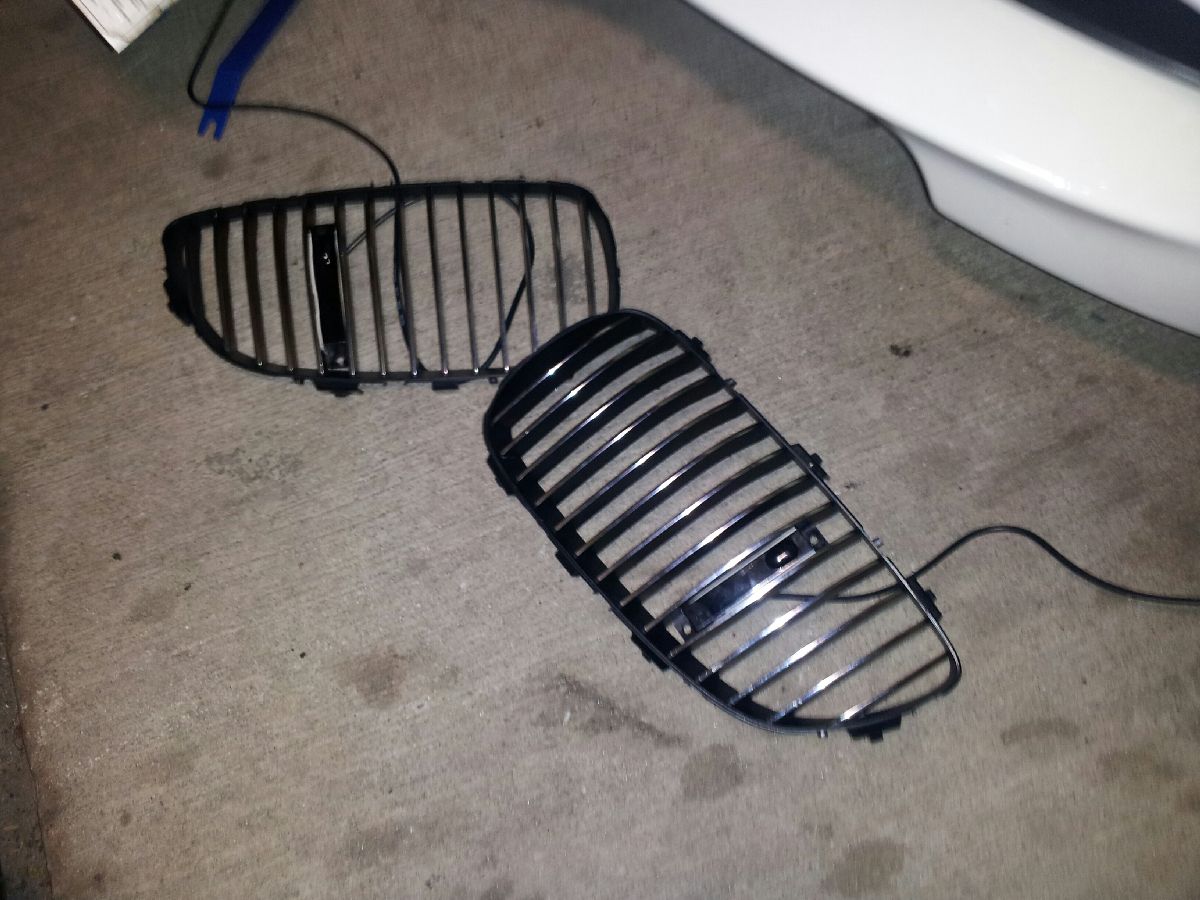 Final install 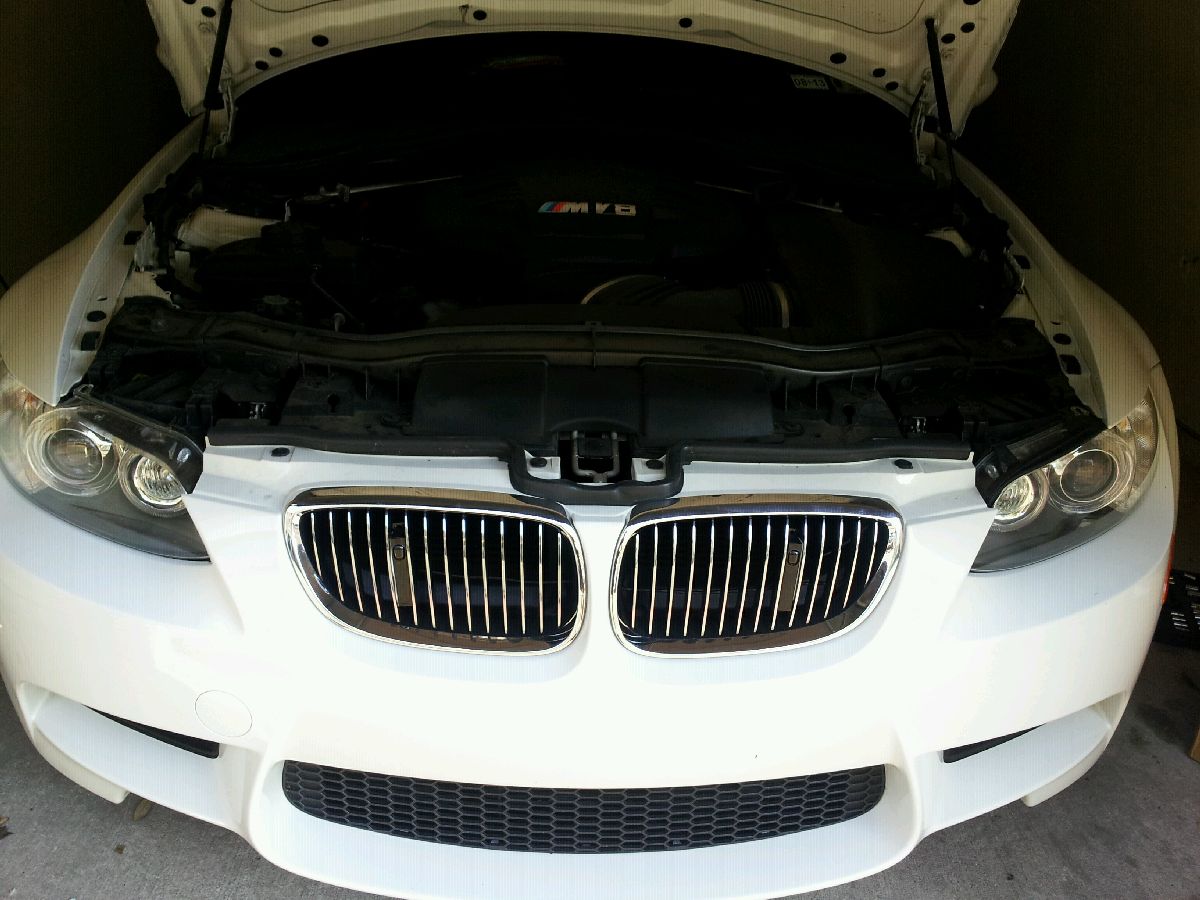 I put the head unit near the steering wheel, making the unit easily accessible to a serial to USB cable so that I can install updates. 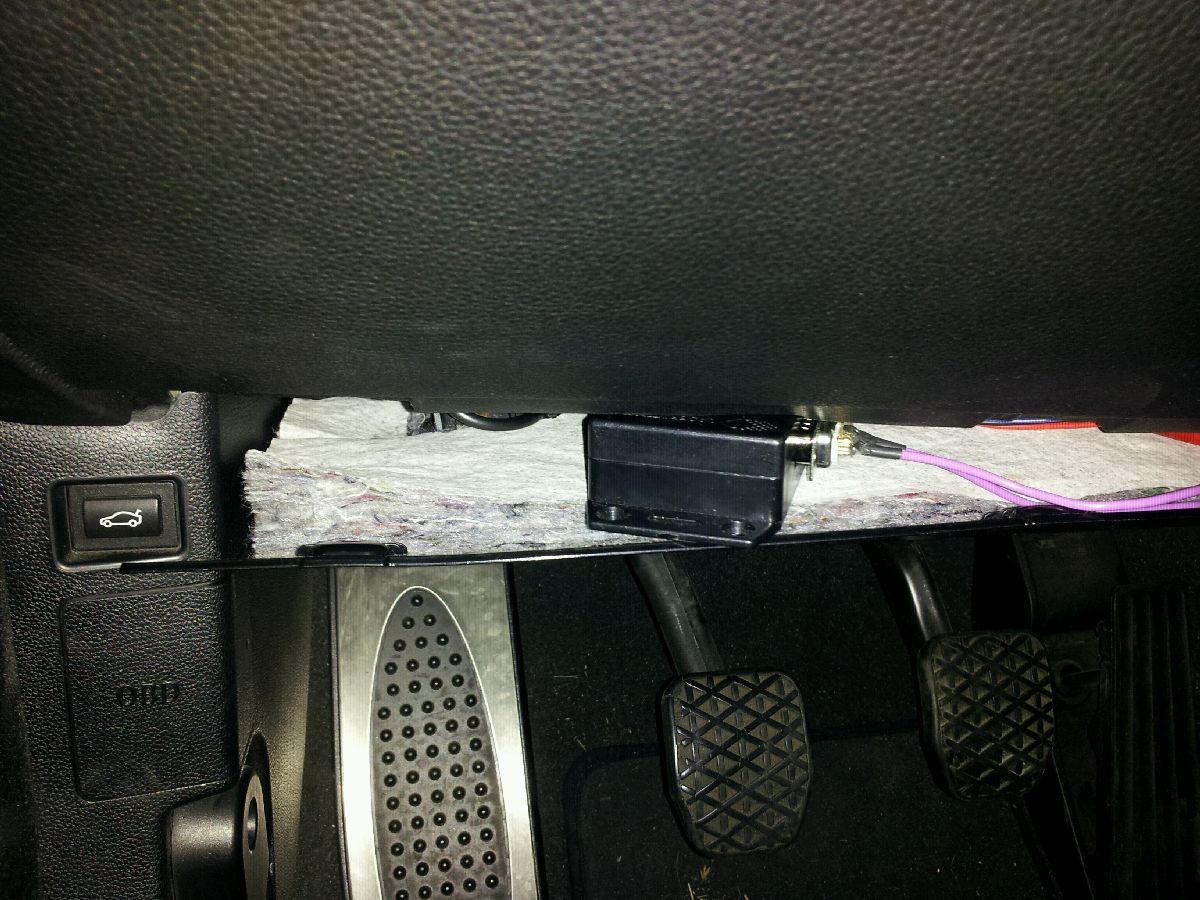 I picked up a very lightly used V1 w/the hard wire kit on Craigslist for $285, and wanted it installed in the headrest. I saw there were a few vendors offering it, but I thought that there has to be a DIY somewhere. A little searching, and I found the instructions on how to mount it in the headrest on m3forum.net (http://www.m3forum.net/m3forum/showthread.php?t=290578 thanks to mrtm2008). I didn't want to disassemble it, so I figured out how to squeeze it in the headrest as is. Pain in the butt, but I was rather pleased.  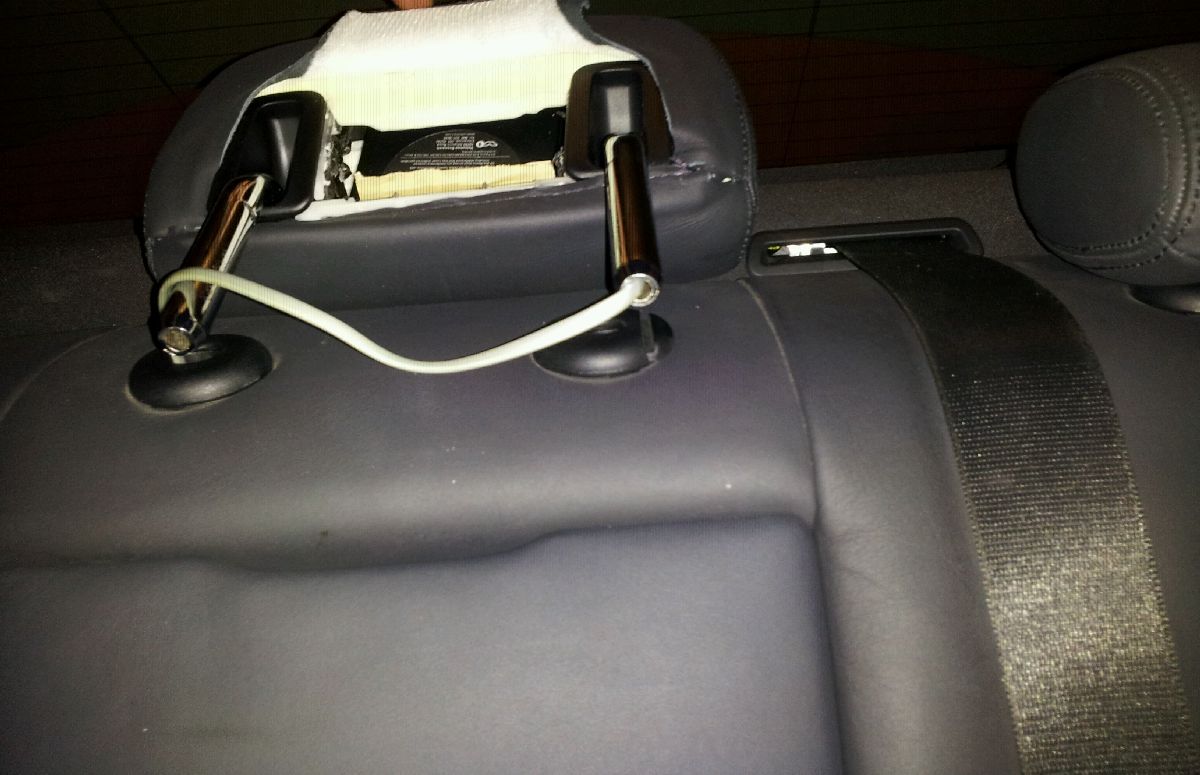 I have a ID10V3 D2 from a previous install, so I was already ahead on the install for the sub. I wanted to install the amp in the trunk hatch area, and didn't have something that would fit and allow the hatch to close. My concern then became locating an amp that was not so tall as to prohibit it from sitting in the hatch and letting the hatch close. Which means I had to find an amp less than 1.75" tall. This pretty much mandated a Class D amp, one that was 1 channel, 2-ohm stable and ~400 watts to go along with the sub. I did a *BUNCH* of searching over a couple weeks and *finally* found what I was looking for: Soundstream's Picasso Nano line of amps. The PN1.450D is 450W RMS @ 2-ohms, has a remote gain control, and most importantly, is only 1.5" tall. The wireless BT headset was attached to the bottom of the V1 remote unit using hot glue. I drilled out the back of the sunglasses holder and ran a 6 ft microusb and a 3.5mm audio cable under the console and connected them inside the armrest. I used the 12v charger instead of the USB connection so as to not take that port. 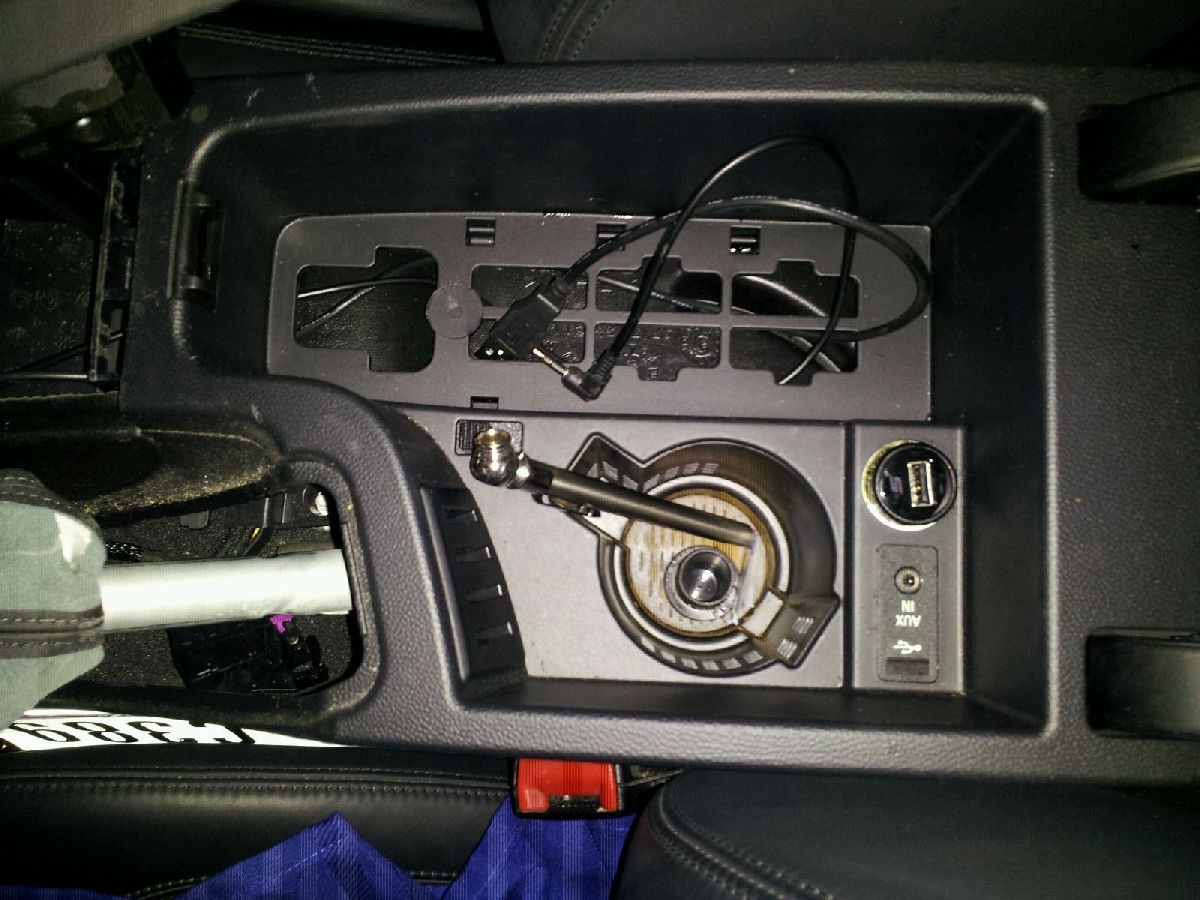 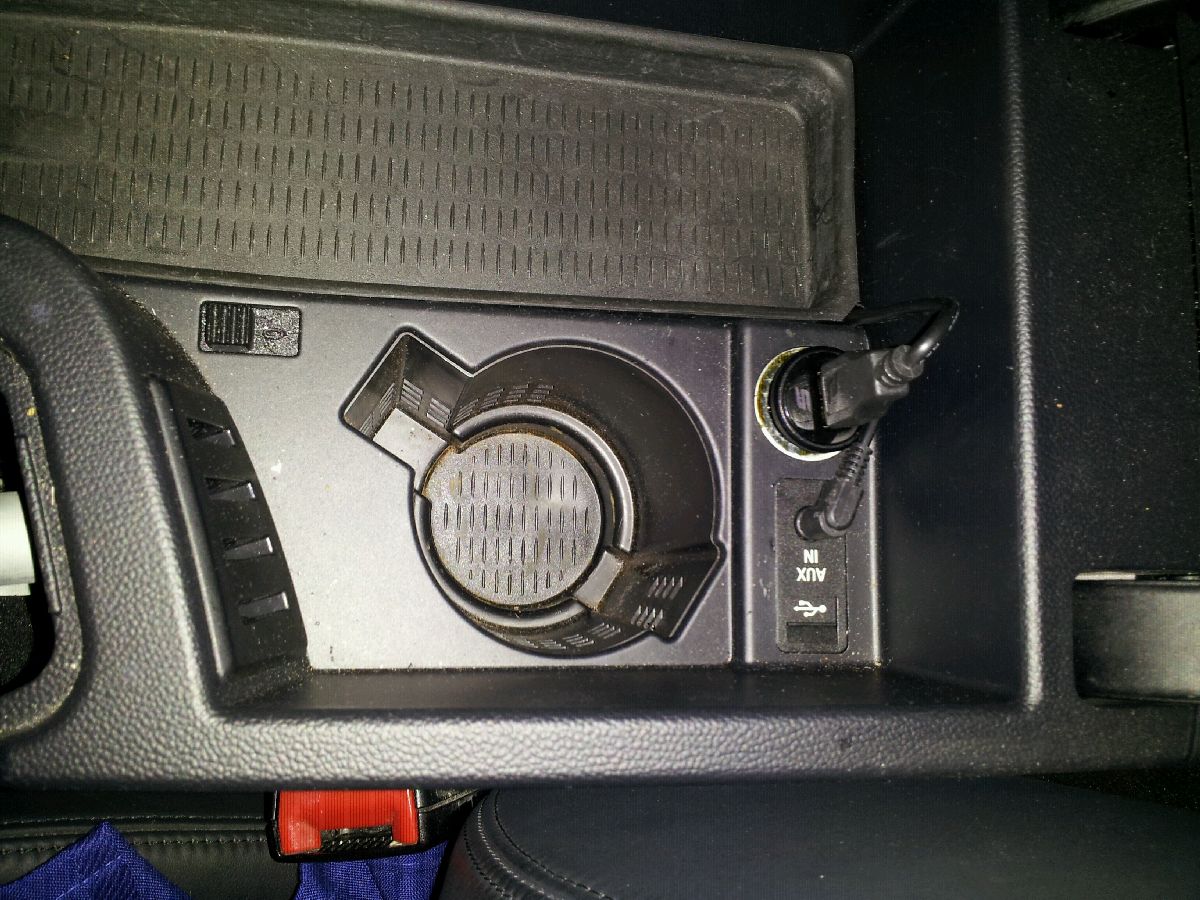 I extended the speaker connections on the LC2i so that I could mount it in the hatch w/the amp. Finally, I pulled the cigarette lighter from the ashtray and relocated it to the passenger's side footwell. 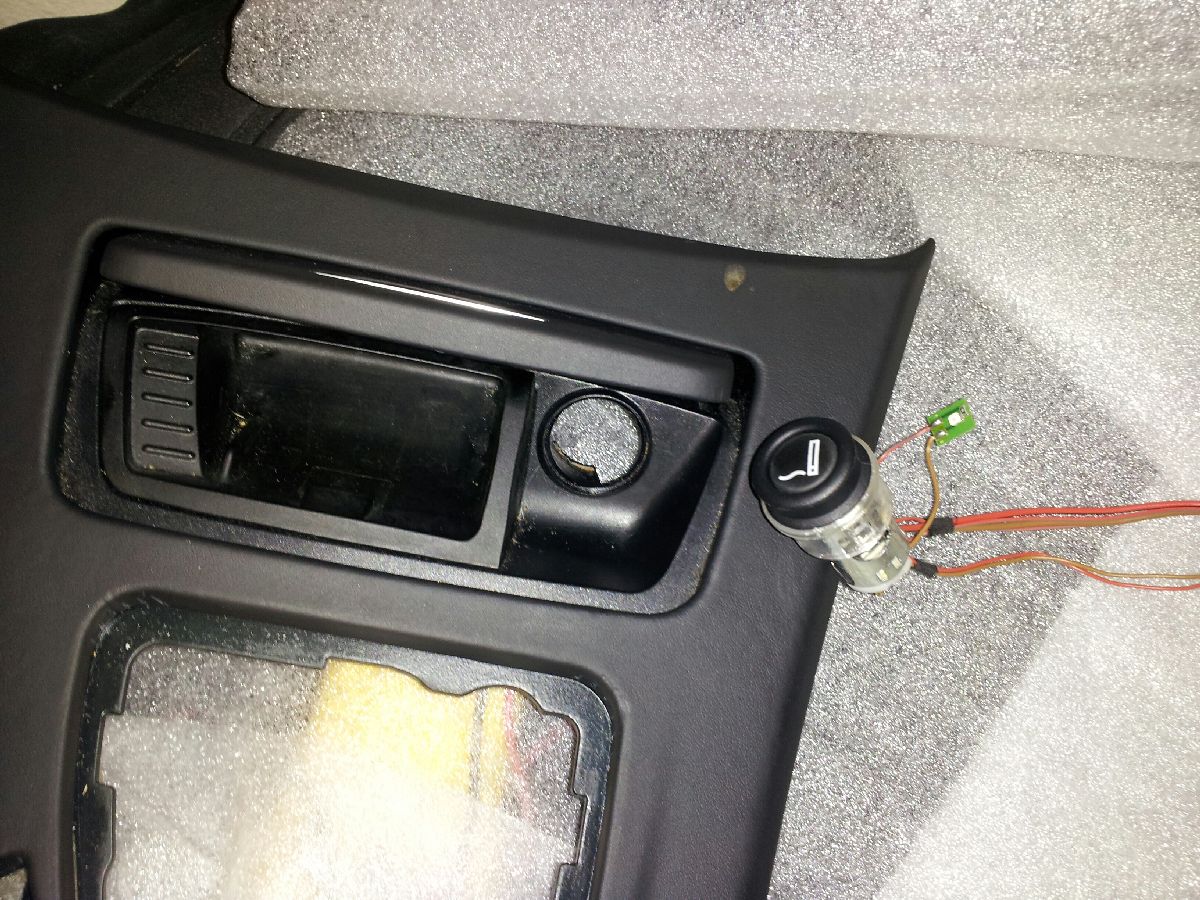 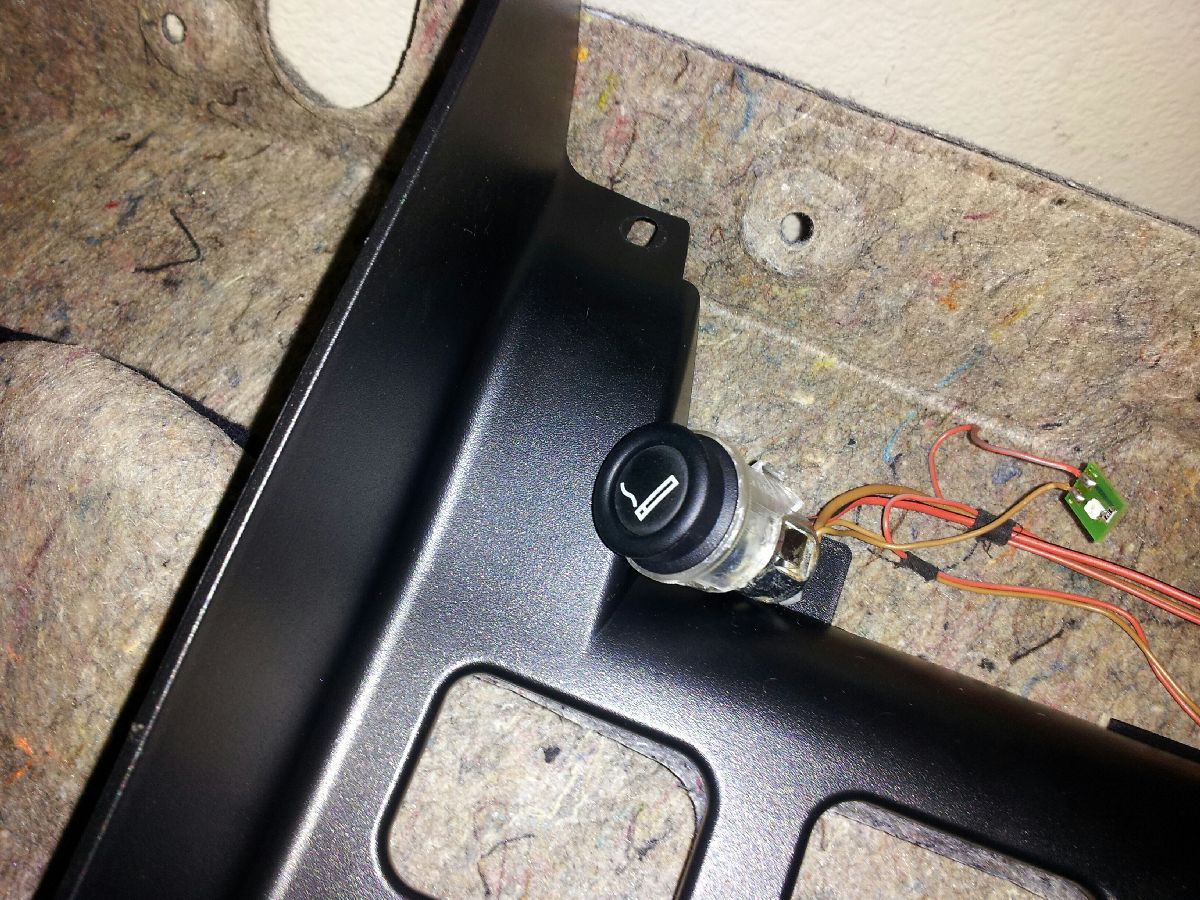 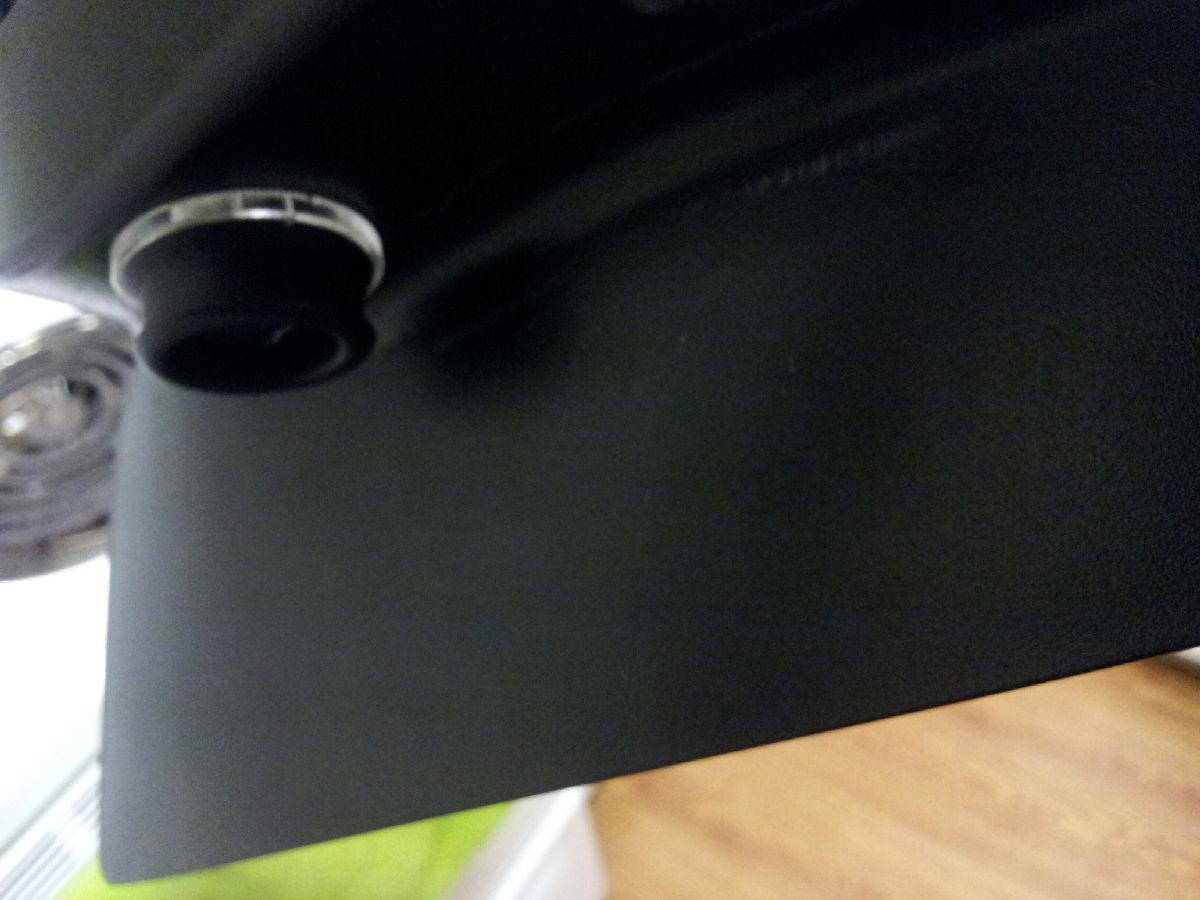 Finished installs: 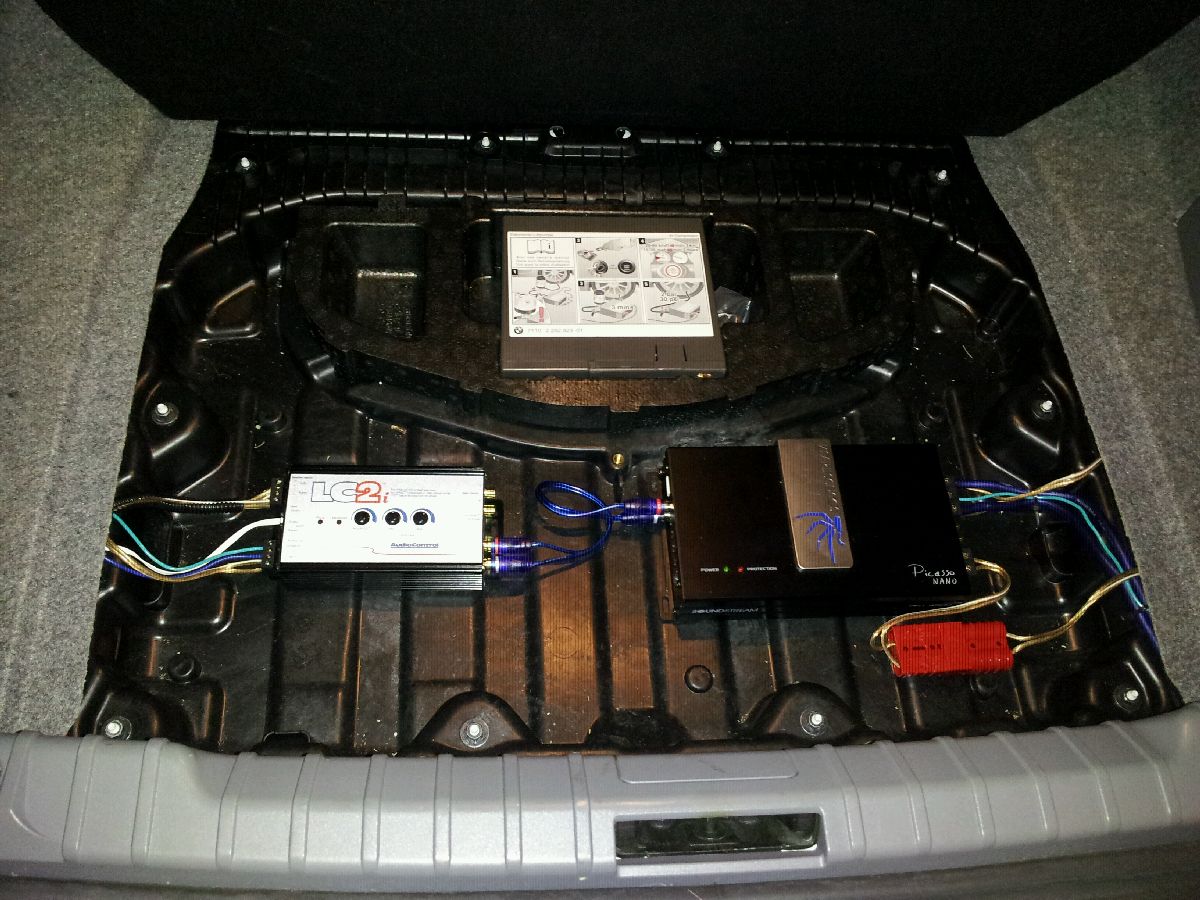  Update: The audio for the LI is turned up all the way, and over the radio and open sunroof, it can't be heard. The unit does have leads for an external speaker install. I'll be looking to resolve that issue shortly. Last edited by whats77inaname; 12-12-2012 at 02:47 PM.. |
| 11-04-2012, 10:00 AM | #2 |
|
BimmerPost Supporting Vendor
3387
Rep 7,541
Posts  |
Nice Job.. love doing projects like that.
Let's see pics of it installed in the car!
__________________
 -----| Like us on Facebook | Instagram || Tuning Information | Remote Coding |----- ----Visit us at www.BPMSport.com - Emotion. Driven. | Toll Free: (888) 557-5133---- |
|
Appreciate
0
|
| 11-05-2012, 12:11 PM | #4 |
|
BimmerPost Supporting Vendor
307
Rep 13,093
Posts
Drives: BPMsport 2012 E92 M3
Join Date: Jun 2011
Location: Kansas
iTrader: (45)
Garage List 2013 Nissan GTR [0.00]
2019 Sierra Denali ... [0.00] 1999 Nissan Silvia [0.00] 1999 Nissan Skyline ... [0.00] 1998 Toyota Supra [0.00] |
Looks good.
|
|
Appreciate
0
|
| 11-06-2012, 09:35 AM | #7 |
|
Banned
825
Rep 3,387
Posts |
Thanks. I went ahead and grabbed the remote audio adapter for the V1 and will end up putting it in the pod. I wanted to try out just the remote display to see if I would be okay w/out adjusting the sensitivity, etc. I'm not *lol*.
Valentine 1's hard wire adapter only has 2 RJ-11 female sockets, and with both the remote modules + the V1, you'll need 3. I picked up this unit from Safe-N-Sound1 that has 3, so all should be good. Last edited by whats77inaname; 11-06-2012 at 09:49 AM.. |
|
Appreciate
0
|
| 11-12-2012, 04:27 PM | #8 |
|
New Member
0
Rep 5
Posts |
Great install! Nice, tidy work. I like the placement of the remote knob for the LC2i. We would love to post some of your pics on our Facebook page. Would that be alright with you?
Thanks, AudioControl |
|
Appreciate
0
|
| 12-03-2012, 11:11 AM | #10 |
|
Banned
825
Rep 3,387
Posts |
Install round 2
When I mounted the Laser Interceptor control box, I mounted it under the dash for easy accessibility and to keep it hidden. I was a bit concerned about not being able to hear it b/c of the mounting location, but after testing it w/the volume on the unit turned all the way up, I thought it was fine. Fast forward to driving the car with the windows down and the stereo blaring.....not so good at all. I couldn't hear it at all. I didn't want to move the control unit, as there was no place I felt like I could mount it and keep it hidden. My first thought was to hook up an external speaker, so I was going to disconnect the internal speaker and run two outside wires to accomplish this. Glad I like to read install manuals, b/c I found out there's a jumper inside the unit that you can utilize to switch to an external speaker setup, as well as +/- leads on the harness. I switched the jumper and went looking for a speaker. I found this @ Parts-Express:
http://www.parts-express.com/pe/show...number=280-002 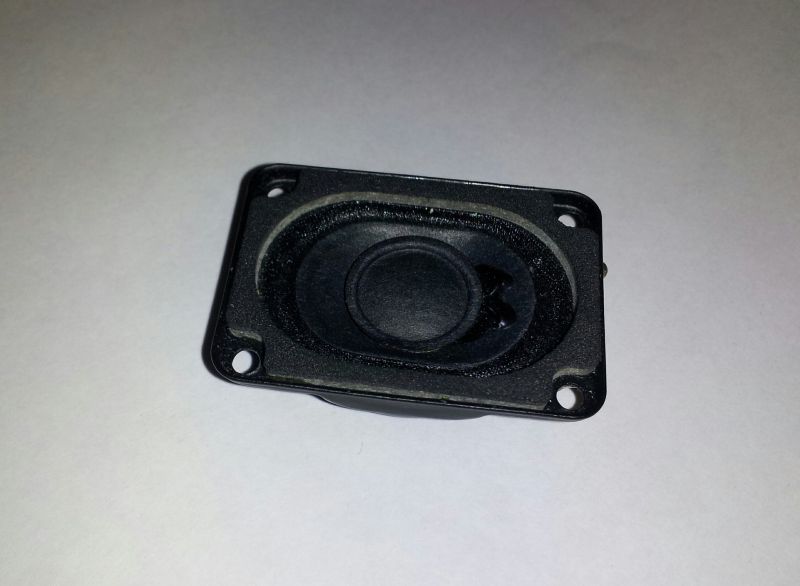 My thought was that I could integrate it into my little control pod w/out too much trouble b/c it is tiny. I wasn't sure about how powerful it would be, and thought I should pick up a mini-amp, so I purchased this as well: http://www.parts-express.com/pe/show...number=320-551 My thought was that if I needed the amp, I would have it on hand so that I wouldn't have to a) wait more time and b) I could combine shipping. After adding the V1 remote, there was just no way I could fit the speaker in the pod and have the setup look clean. I spent quite a bit of time trying to ascertain the best fitment method, and finally resigned to the fact that I was going to have to mount the speaker elsewhere. My mounting criteria follows all cabin-located mods I put in place: it has to be easily reversible, no modifications of anything permanent, and it has to be invisible. After spending another good bit of time trying to figure it out, I found a perfect place: the headliner. I opened the sunroof, then pulled the gaskets from around the sunroof and the door frame. 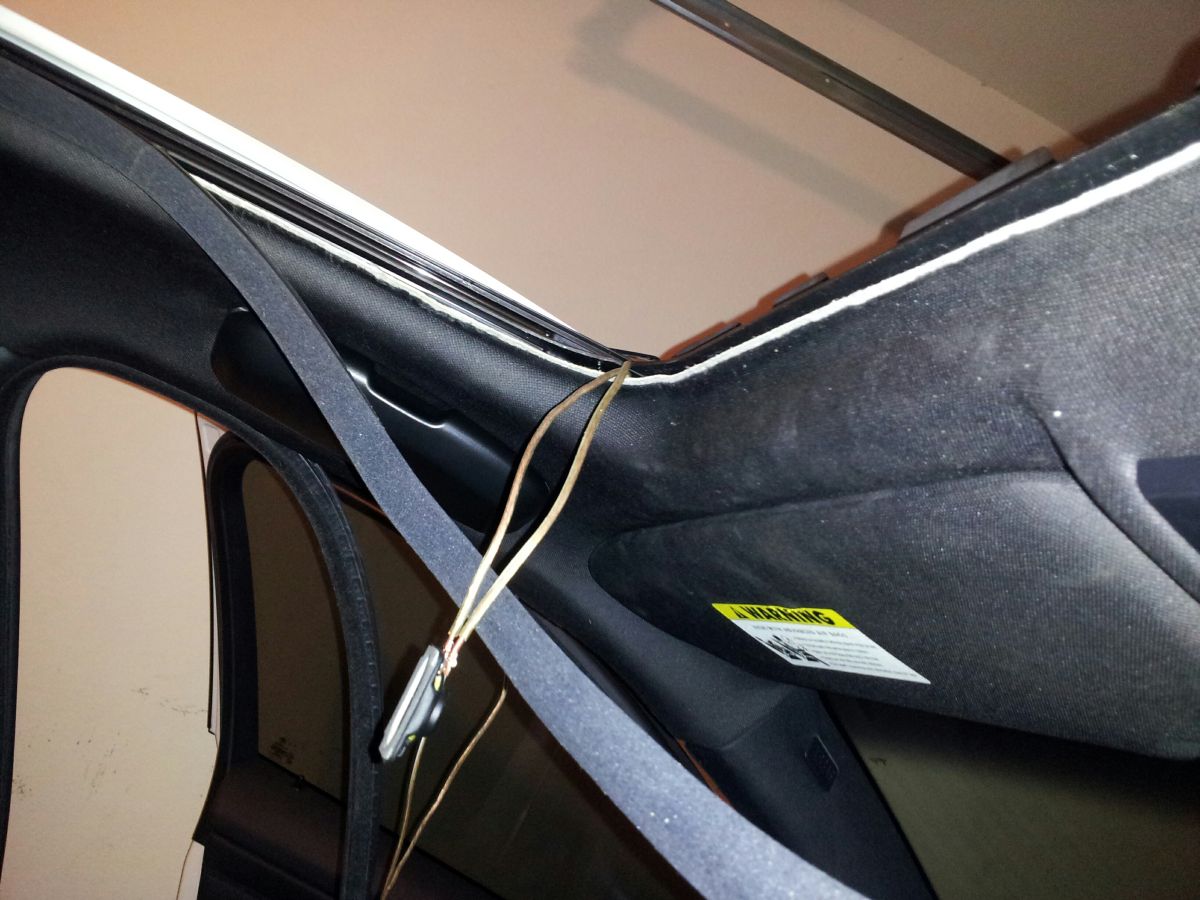 The speaker mounts *perfectly* in the channel between the sunvisor and the sunroof. 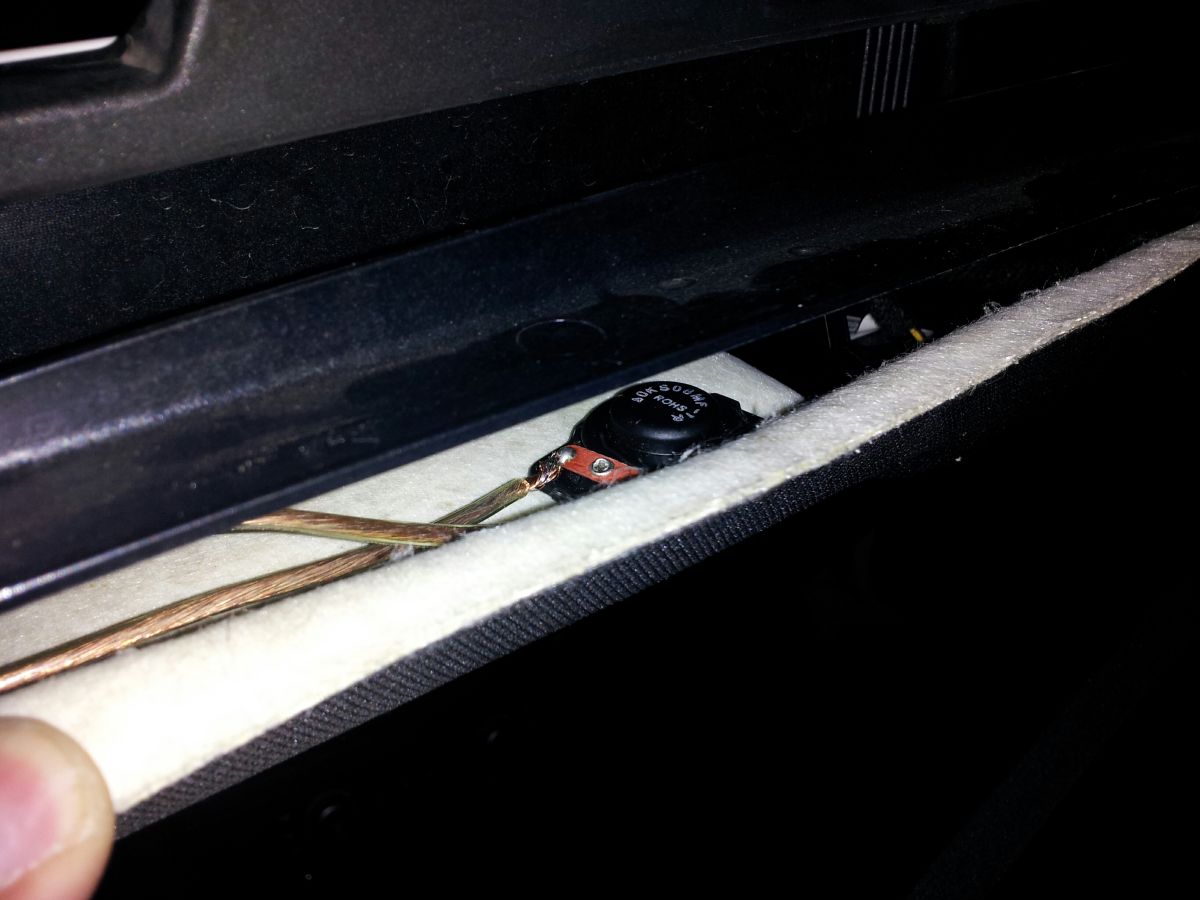 I ran the wires down the pillar, and soldered them to the control box. I was mindful of the fact that there's an airbag there, so I made sure to run it in the channel that's available when the gasket comes off. 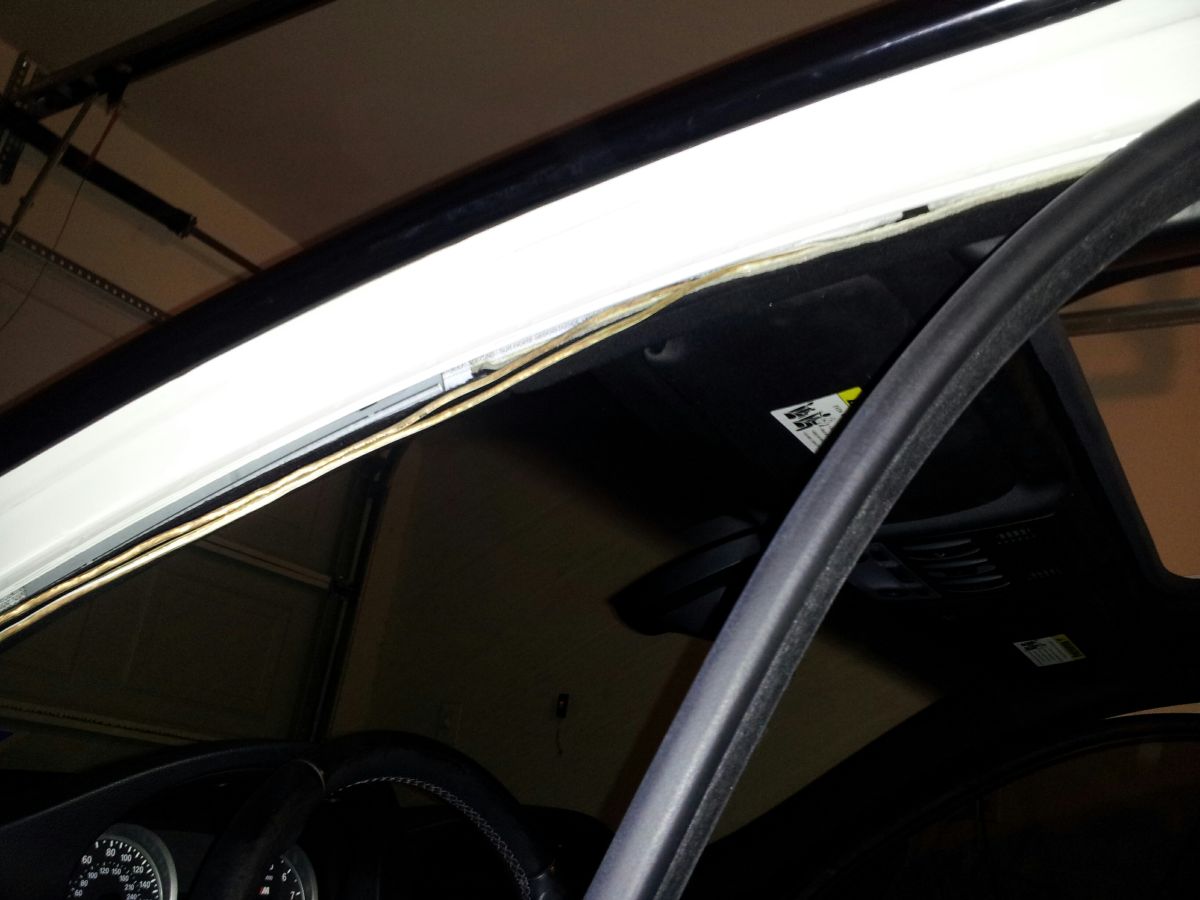 It is *quite* a bit louder than it was before, and the headliner, being a mix of fiberglass and foam, is very transparent in regards to the passing of sound. The car is down right now due to some other work I'm doing, so I'll test while driving when I'm done. If I have to wire in the amp, that'll be done, but honestly, it's quite loud now, and easily discernible over the music. Last edited by whats77inaname; 12-03-2012 at 11:45 AM.. |
|
Appreciate
0
|
Post Reply |
| Bookmarks |
| Thread Tools | Search this Thread |
|
|


