Ive been looking into retrofitting a review camera into my car for quite some time now. Most make it yourself kits did not have the quality I was looking for (ebay cameras) and I always felt like the full kits sold by vendors on here are too much money. Recently, I stumbled upon the Bimmer Retrofit kit while searching on Google. Asked their customer support team some questions, and decided to order it soon after. In about a week after the order I got the Bimmer Retrofit rear view camera kit and installed it over the weekend. Ive never done an install like this before, but I decided to DIY and see what happens.
Link to the rear view camera kit:
http://www.bimmerretrofit.com/store/...product_id=114
Packaging and Quality:
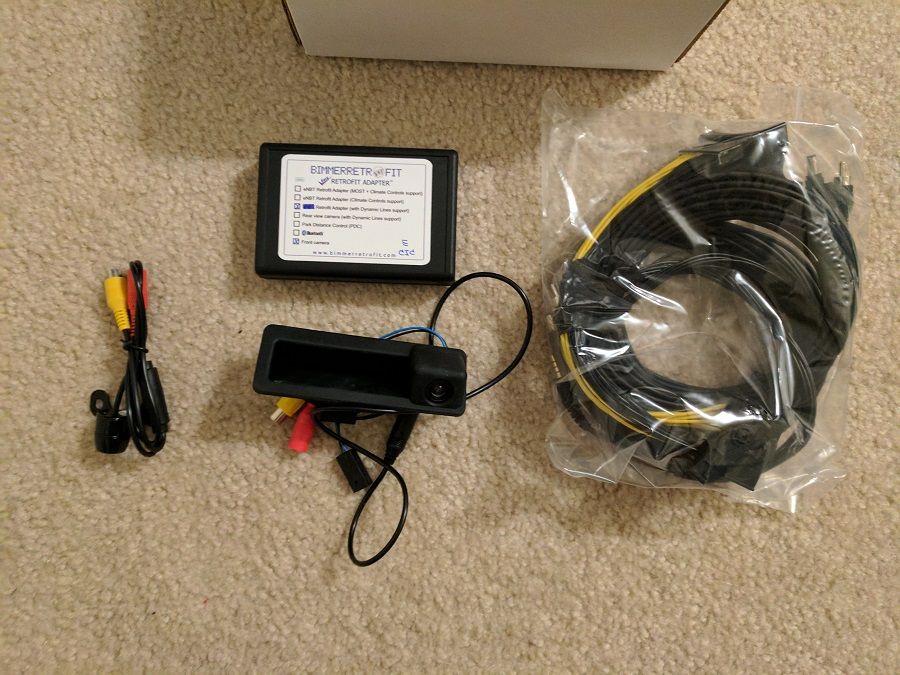
The packaging it came in was nice and I was easily able to distinguish the parts. After the order they gave me a PDF on instructions on how to connect the the camera, which was nice to be able to look over before the cameras arrived. The quality of the kit is also great. Everything looks and feels like it could be an OEM part. The camera integrated into the trunk handle looks like it was a stock piece, exactly what I wanted.

 Install
Install was pretty straight forward; Ill go into details on that in the DIY. It was not difficult at all. If you have a few standard tools and a few hours, you can definitely complete it without a problem. I was concerned about the length of the cable that had to go from the trunk to the navigation unit, but in the end I had a couple feet extra. It is definitely enough to route the cable anyway you feel is easiest. The best part of the kit was that it is completely plug and play. I did not need to splice any wires from the navigation unit and did not have to do any coding. They supplied an adapter that plugs into the navigation unit and a separate coding module. Plug both of those in and the wire from the camera and you are good to go. After reading through other camera kits reviews, splicing wires and coding is always a hit or miss for some people, and I was really happy I did not have to do any of that.
Usage
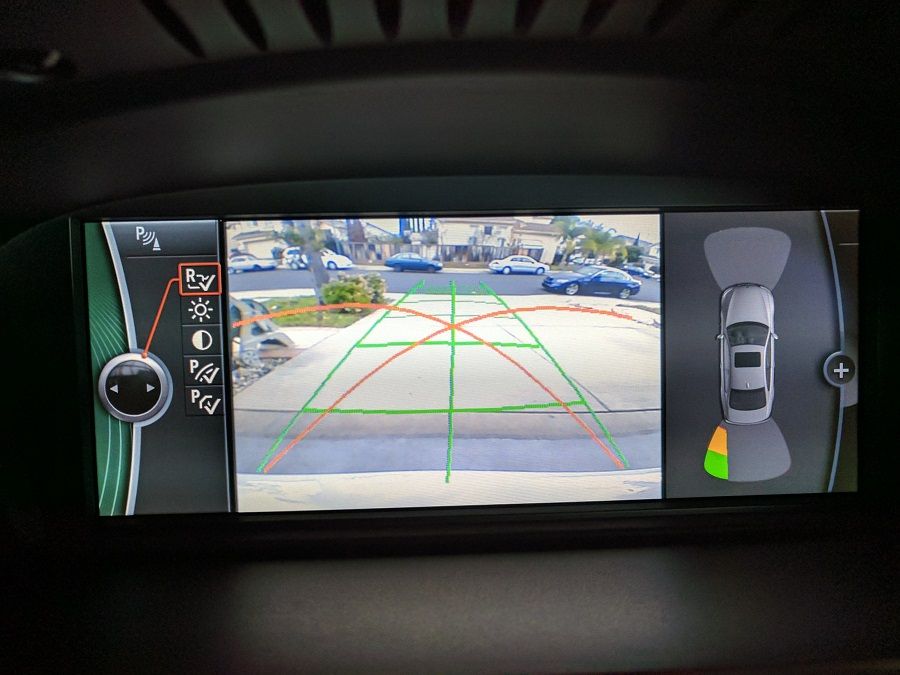
The quality of the picture from the camera is great. I can clearly see everything whether it is light or dark out. Another huge feature that pulled me towards this kit is the dynamic guide lines. I feel like a rear view camera isnt very helpful without guide lines and they work flawlessly on this kit. Very easy to see where you are going with the help of guide lines. Now Im not scared of curbs hitting my exhaust or diffuser when I back into parking spots!
Customer Service
Before I got the kit I did read over the instructions and had a couple things I needed clarified. The Bimmer Retrofit support team was great at answering my questions extremely quickly. Within hours I would have an email back from them answering all my questions in detail. What was amazing is that I would send most of the emails late in the day and I would still get a response back from them the same day! They have been a pleasure to deal with.
Overall I am very happy with the Bimmer Retrofit rearview camera kit. It is just so helpful in everyday driving I dont know why I waited so long to install one. I definitely recommend Bimmer Retrofit to anyone looking for a rearview camera. Great parts, quality, customer service, price, and a clean install.
DIY:
Install was pretty straightforward thanks to the instructions that came with the kit. The package contained the trunk handle with camera, a wire, CIC adapter and self coding module.
It was recommended to test out everything before installing and I did do that. Im just making the DIY in steps as if nothing was connected before.
Step 1: Disconnect the car battery.
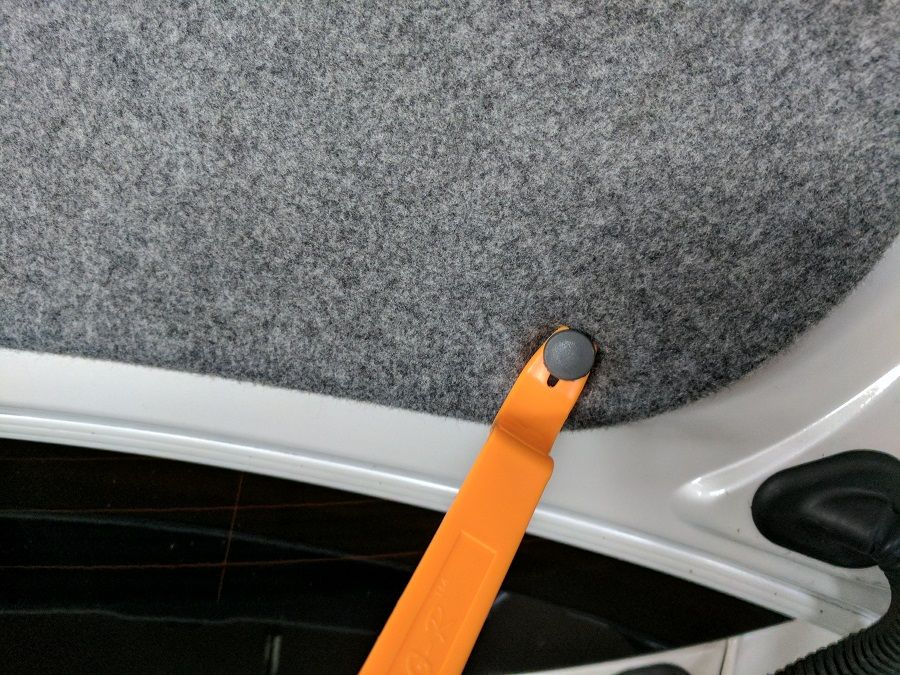
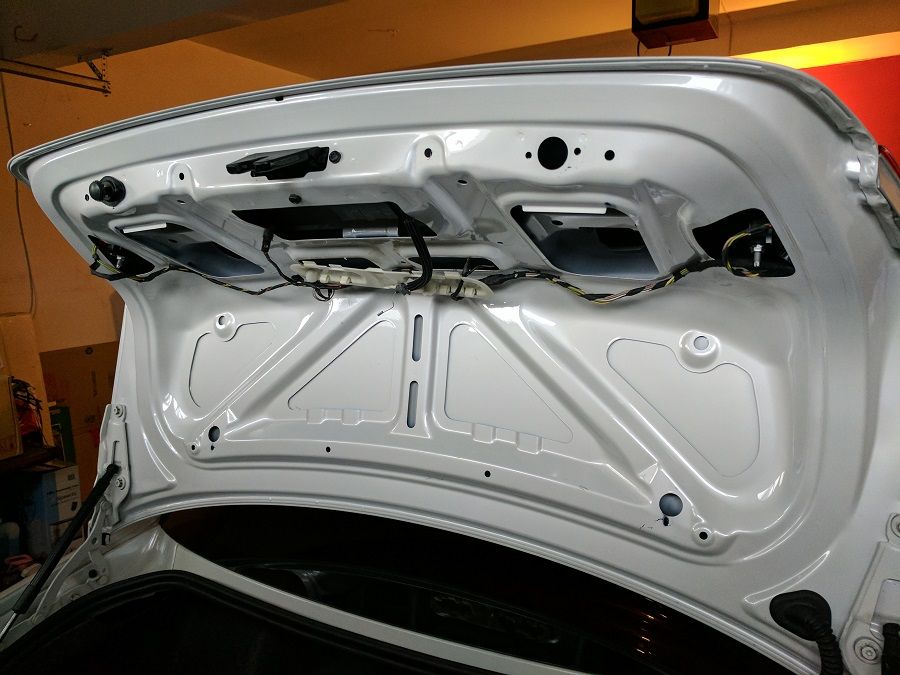
Step 2: Remove the trunk lid liner. Best way to do this is using a trim removal tool.
 Step 3:
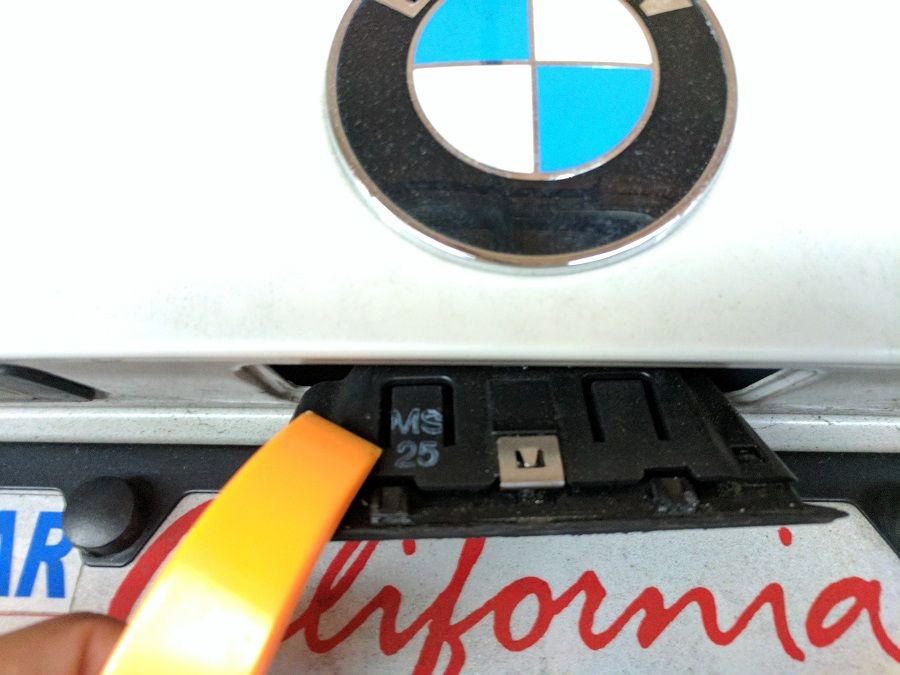
 Remove the old trunk handle and replace with the new one.
 Step 4:
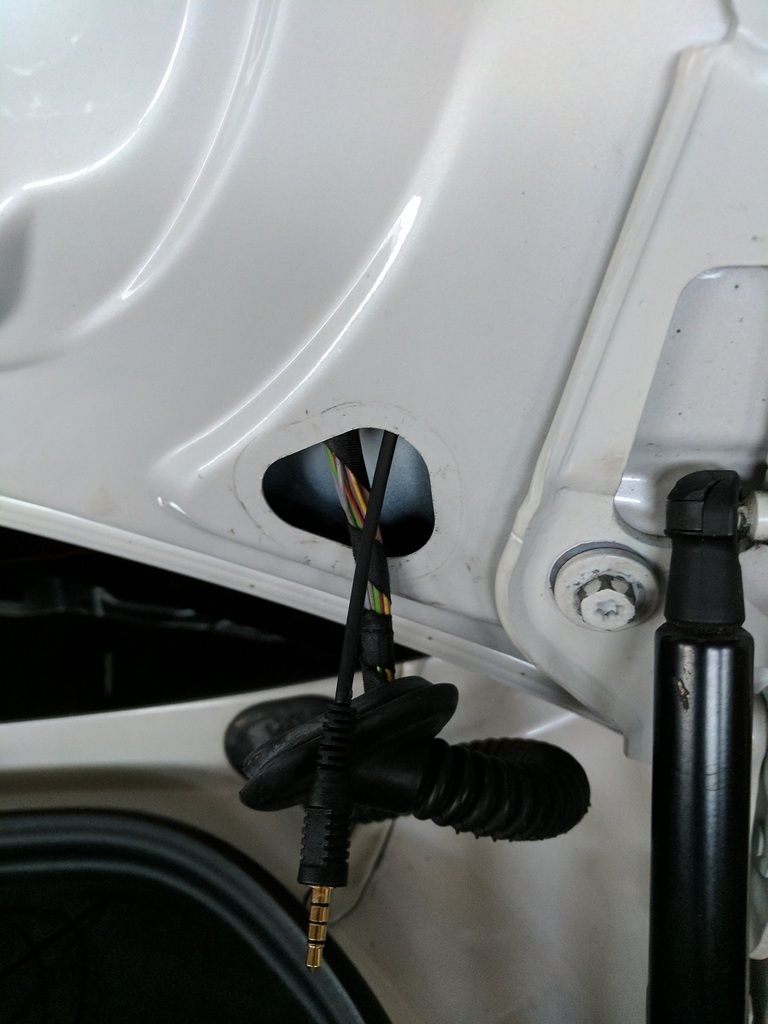
 Connect the wire to the trunk handle and start to feed it through the tube connected from the trunk lid to the trunk. Easiest way to do this using a knitting needle, tie the wire to the needle and then push the needle through the tube. Pulling the needle will basically thread the wire through the tube.
 Step 5:
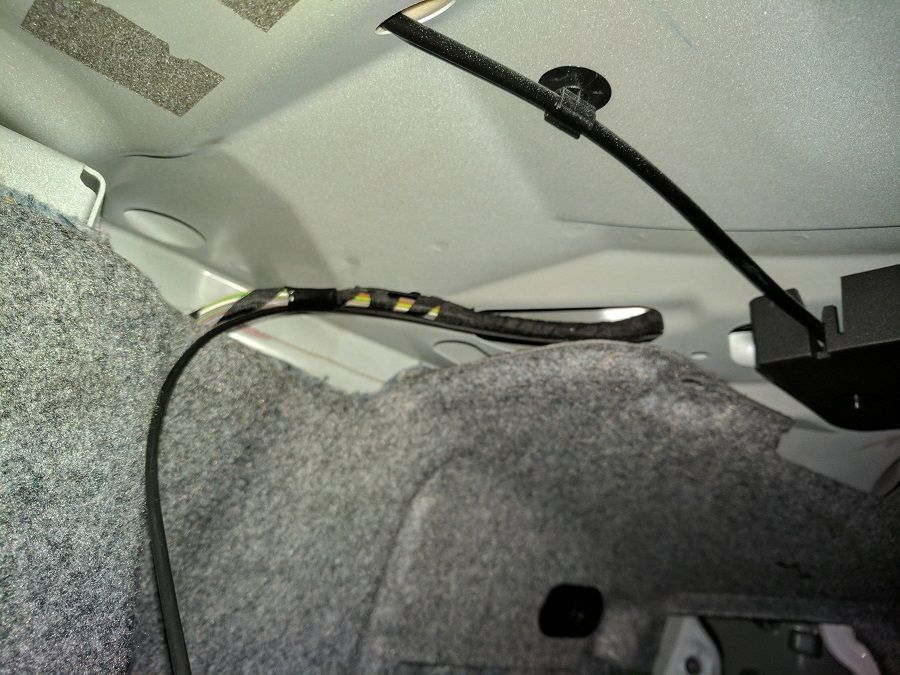
 Once you have the wire in the trunk, follow the rest of the wires and just tape the camera wire to it. It should lead you into the top of the trunk. From here just tuck the wire behind the trunk liner.
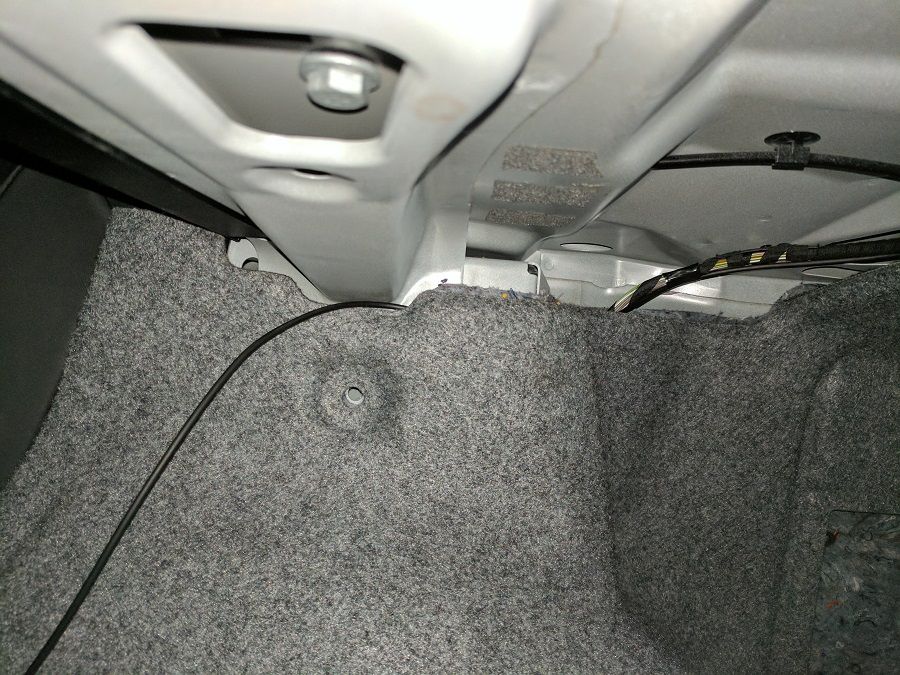 Step 6:
 When the wire is up to the back of your rear seats you can either pull out the side bolster or just tuck it in-between and push it down with a credit card. I have rear fold down seats so getting the wire to the side bolster from the trunk trim was extremely easy, just had to fold the seat down.
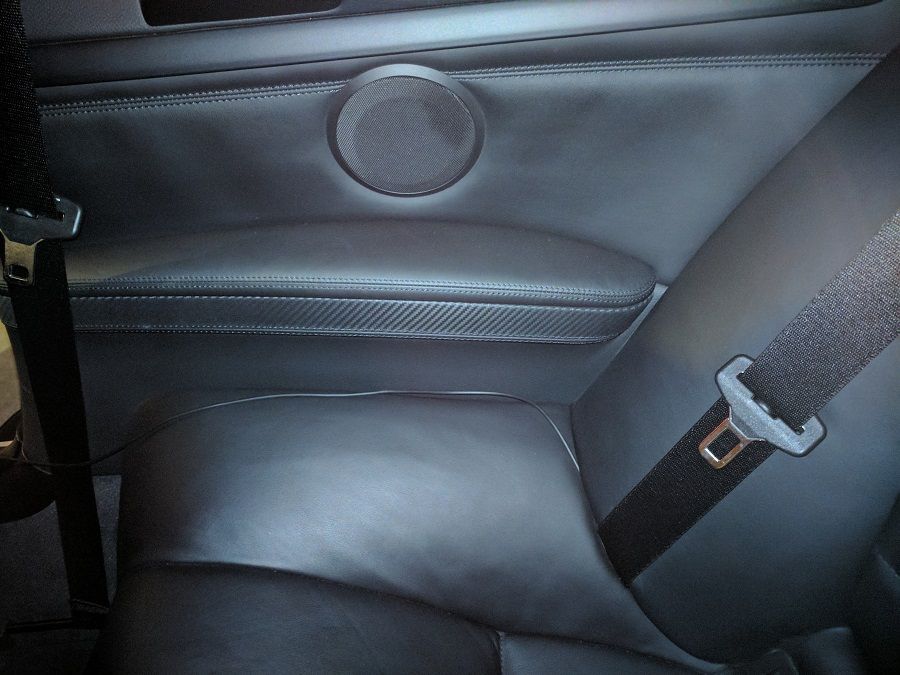 Step 7:
 From the side bolster I just continued to the tuck the wire in between the seat panels until I got to the passenger side door trim. Instead of pulling the whole trim off, I just lifted it up a bit and pushed in the wire all the way down.
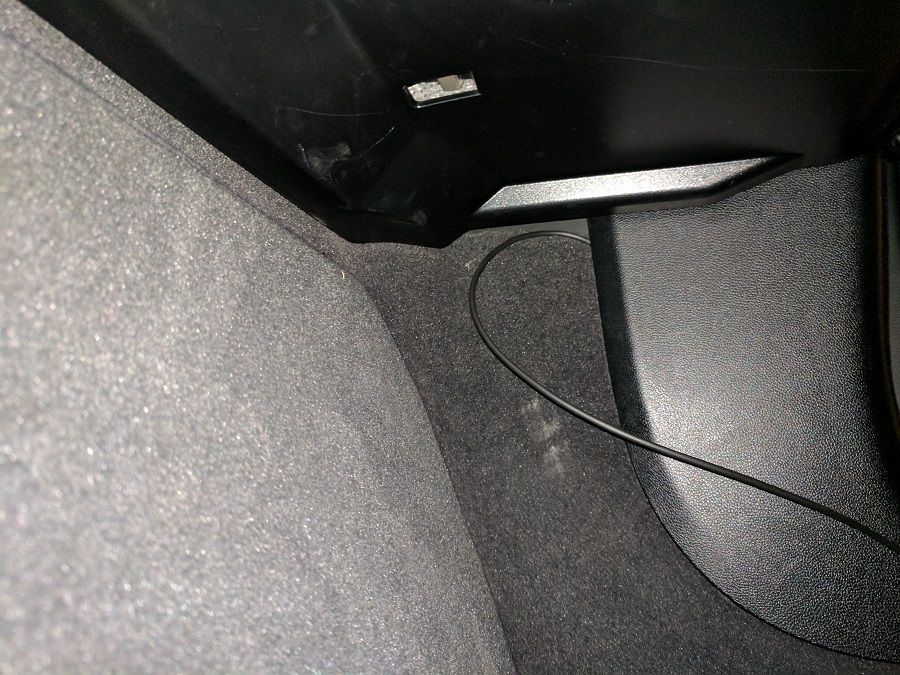
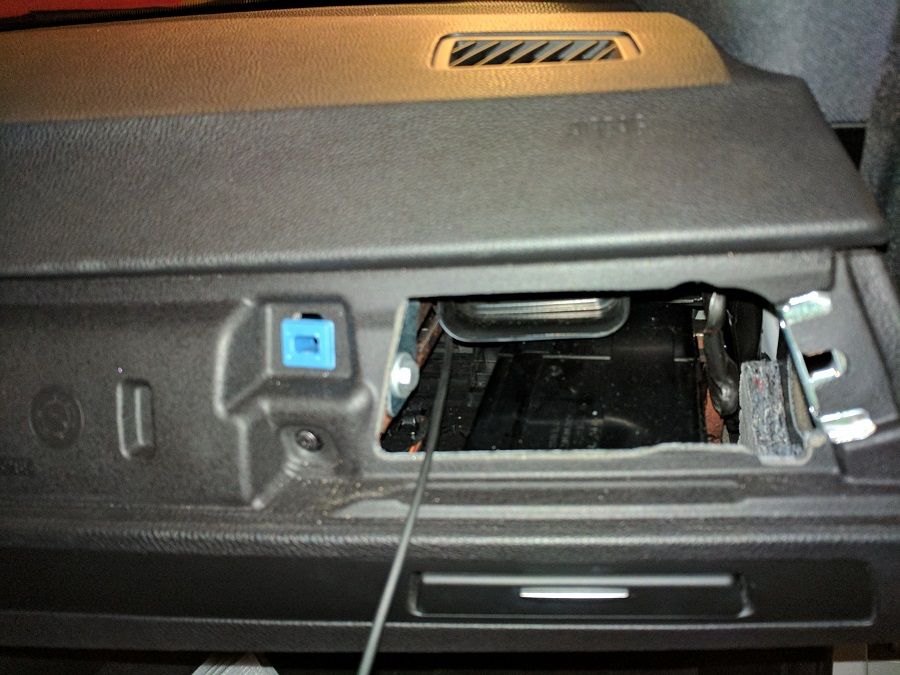
 Step: 8:
 From here you should be able to tuck the wire in the panels in the foot area and get it up into the fuse box behind the storage compartment.
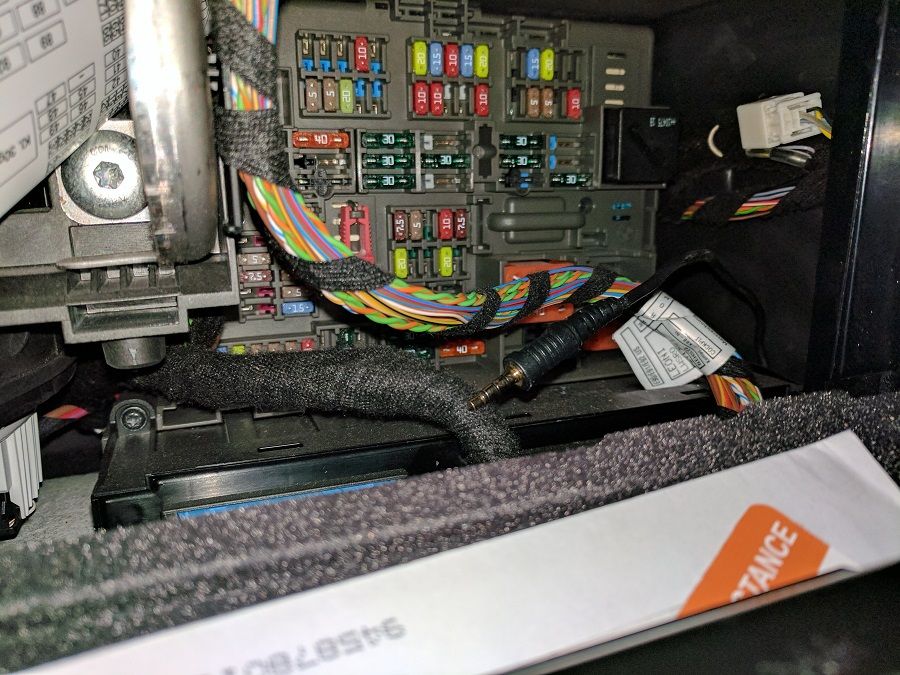 Step 9:
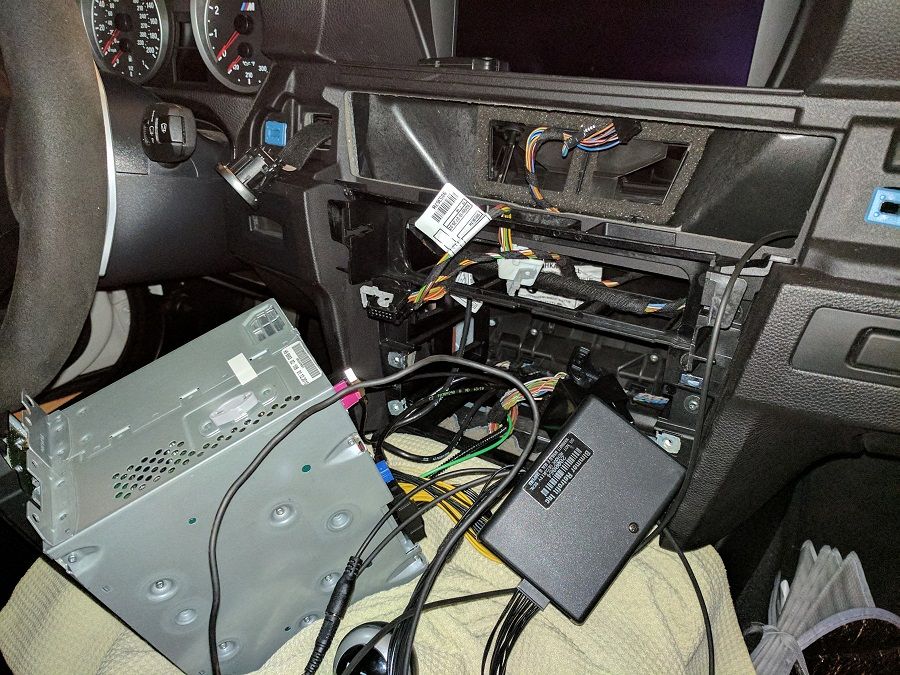
 When you have it here you should pull off the trim and pull out the navigation unit. Using trim tools the trim is very easy to pull out. Once that is out you can pull the trim around the A/C knobs and it will expose 4 screws. Remove the screws and you can pull out the whole navigation unit.
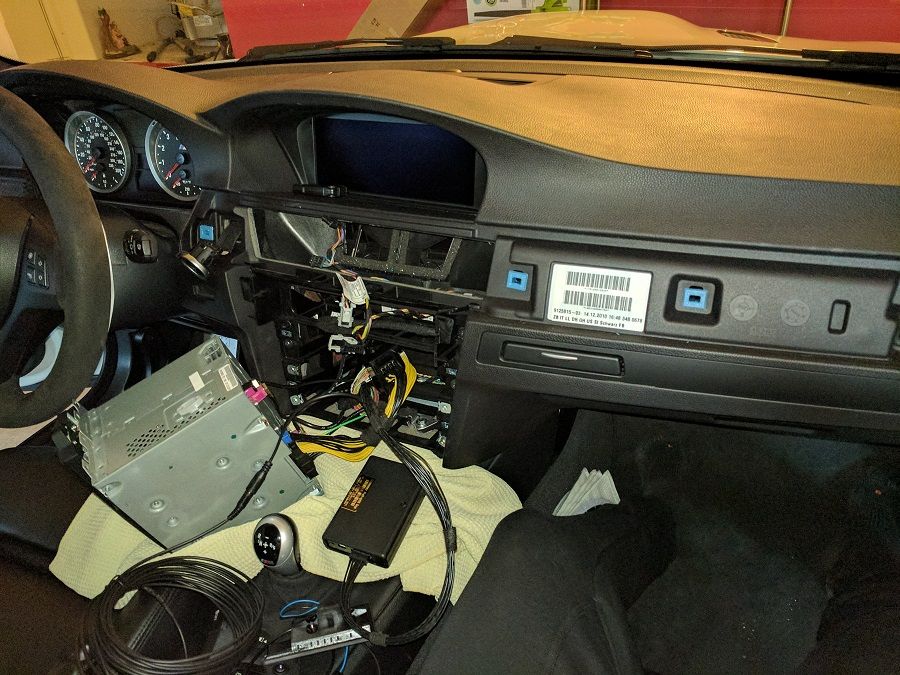 Step 10:
 Once you have the wire in the fuse box, there are many ways to get it across to the navigation unit. I chose to run it out to the A/C vents then across. Once it was across all the way youre done with wiring part!
 Step 11:
 On the navigation unit you just need to big connector in the back and replace it with the supplied adapter. Plug in the connector into the adapter, the adapter also has wires to connect to the self coding module and camera. The instructions that come with the kit explain what to do here very well. Once you are done connecting those put everything back in reverse order and youre done! But before you put everything back make sure you test everything out.