Much of this is the same as the install for the regular 3 series, but I thought it'd be nice to get some pics of an install on an M3. Our install is actually easier than the regular 3 series because we already have the hood switch sensor installed. Here goes ...
Assumptions (I won't go over how to do these):
- You know how to disconnect the negative terminal of the battery.
- You can safely jack up the car and remove a wheel.
Tools Needed:
- 10mm socket wrench
- 6mm socket wrench (someone mentioned it's an 8mm not a 6mm)
References:
E90 install:
http://www.e90post.com/forums/showthread.php?t=1487
PDF:
http://www.e90post.com/forums/attach...5&d=1171605521
1. Disconnect the negative terminal of the battery.
2. Install the motion sensor in the rear dome light (not the front light module). I found it easier to pull the module down from the front instead of at the lights.


3. Remove the two connectors (1 for the lights, 1 is plugged into nothing). Now you can snap in the motion sensor, there should be an empty space that's perfect for it. If there isn't you probably pulled off the front dome light module. Connect the connector back to the lights and now connect the other black connector to the motion sensor unit. Snap the lighting module back in place in the headliner.
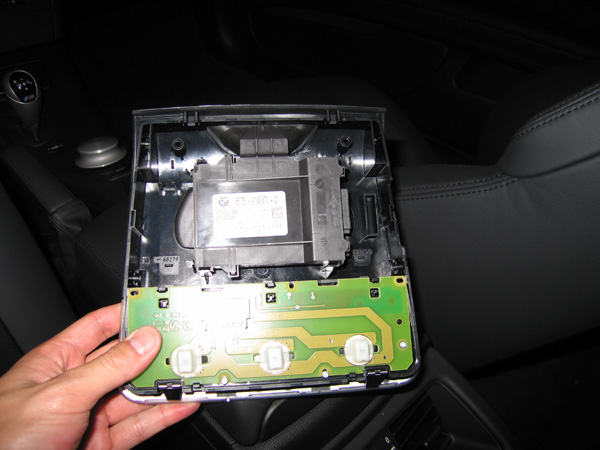
Look at that carbon fiber on the right! I should have taken a closer look. Sweet.

4. Jack up the car and remove the driver's side rear wheel to install the siren. If you don't know how we'll need to link to other DIYs for this.
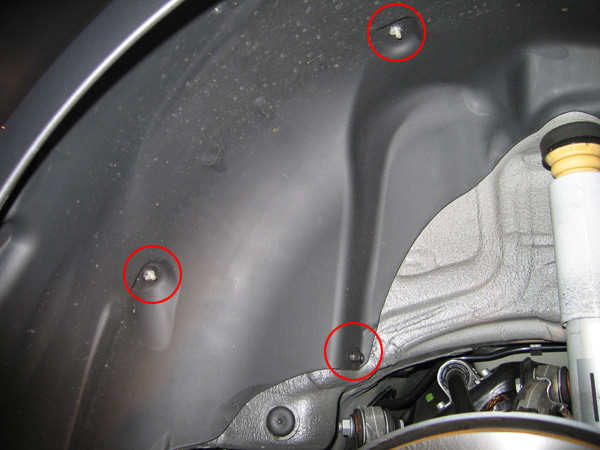
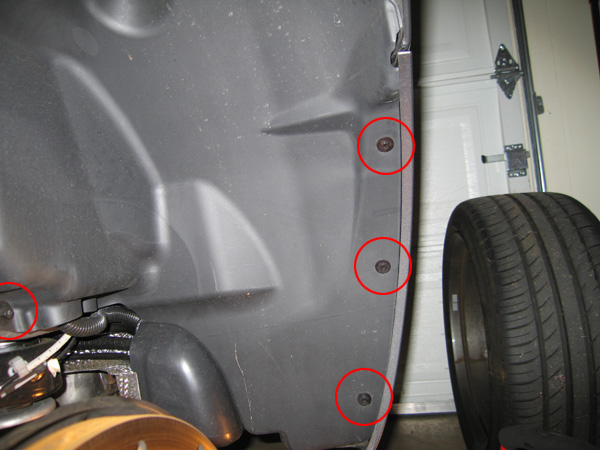
5. Unbolt various 10mm and 6mm bolts that are holding the wheel well lining in. There's quite of them so be sure to get all of them. There's a 6mm underneath the side skirt. I don't think I photographed all of them so double check. It will be much harder to remove the lining with any bolts still attached. You'll probably rip something if you forget. Haha.
M3 stamped in the wheel lining. Nice touch.

6. Carefully pull the lining out. Be careful not to force it out along the edges of your bumper because you could ruin it as well as the paint.
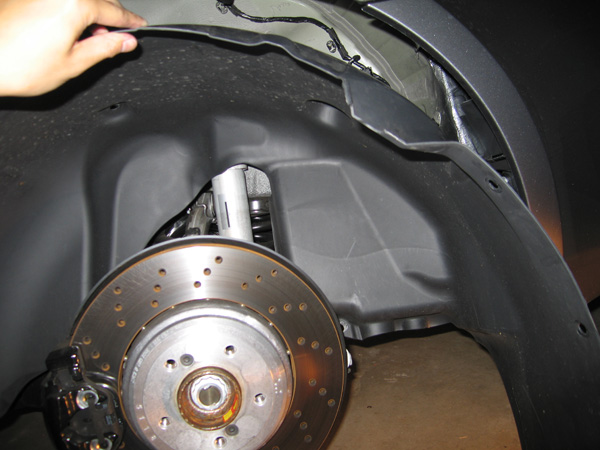
7. Now you have a bare wheel well. The siren will be installed where the red circle is.

8. First bolt the siren bracket to the 3 screws and use 3 of the 4 bolts that came with the kit.

9. Use the last bolt to fasten the siren to the big piece of rectangle plastic that comes with the kit. There should be a dangling connector for the siren and it should have a cap on it. Remove the cap and plug in the siren.

10. Use the 2 screws that came with the kit and screw the siren to the bracket. After you're done it should look like this.

11. Reassembly. Wheel well lining reinstall, wheel back on and reconnect battery. Now when you lock your car you should get a blinking red nose on your rear view mirror. Now you need to get everything programmed at the dealer.
Presto! This was one of the easier installs I've done and I think anyone with some basic skills can do this. I was amazed at all the M stamped parts in the suspension area. We even get an M stamped wheel lining. I wonder if that means they can exclude that from the list of parts that are the same as the regular 3 series. LOL. I wouldn't be surprised. Enjoy and good luck!