Disclaimer: I make no guarantees that this guide is accurate and that you won't break your car or hurt yourself doing it. Proceed and follow this guide at your own risk.
This kit isn't actually on the
www.ground-control-store.com website. To get it you need to call Ground Control at 530-667-8600 and ask for Jay. If you tell Jay how you'll be using the car he'll be able to put together a custom kit to suit your needs. He set me up with some relatively soft springs and I haven't noticed the car to be much stiffer than stock.
I've never actually done any suspension work before this but I'm a glutton for punishment so I figured I'd give it a shot and take a lot of pictures as I went. I called Ground Control whenever I had questions and they were more than happy to provide answers. Now that I've done this job once I think I could do it again in about 6 hours. I think with this DIY and the right tools, most handy people could do it in about the same time. Maybe less if your experienced and have a friend helping. Maybe more if you get in a jam.
The guys at Ground Control have looked at this DIY write up and were happy with it. I might go so far as to say it's got an unofficial seal of approval.
If you have any experience with this or similar suspension work and have something to add, please do so. I'm more than open to updating this DIY. Particularly if I've used any incorrect or inconsistent terms that you can correct me on.
I got most of the basic info on how to do this from
rldzhao's DIY: Aftermarket Spring Install thread.
Here's where I got the torque specs:
rldzhao's Torque Spec Thread
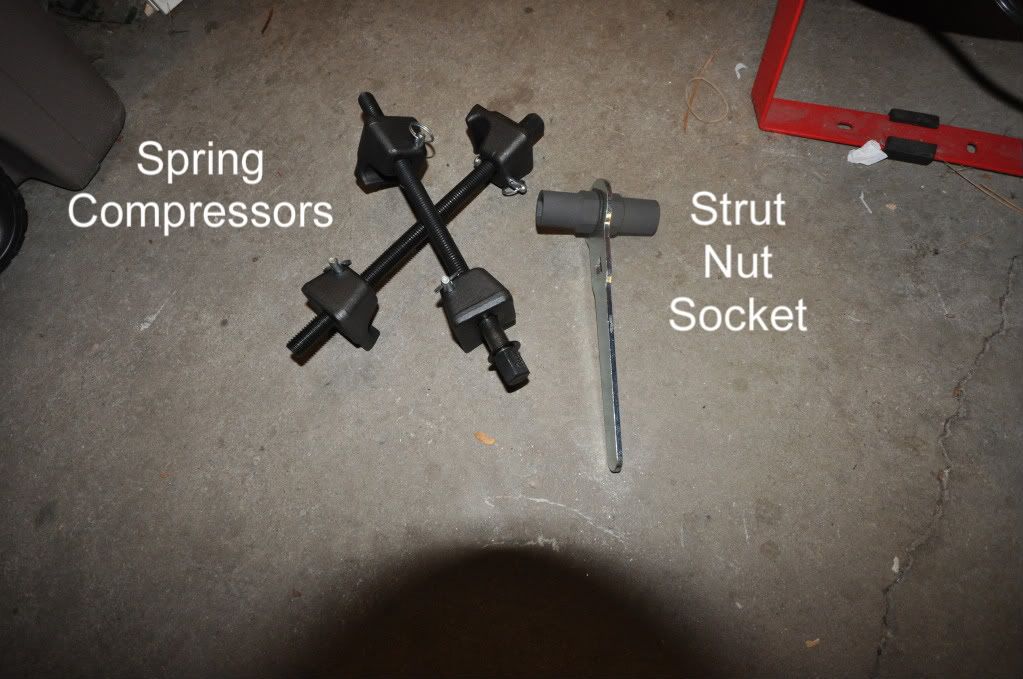
To do this you'll need a pair of spring compressors and a 21mm and 22mm strut nut socket pictured below. I picked up a
www.Metalnerd.com strut nut socket from
www.europarts.com per another members suggestion but you can find various strut nut sockets on eBay too.
You'll also need sockets AND wrenches up to 22mm, a few SAE sockets and wrenches as some of the hardware on the kit is not SAE, and a torque wrench. Obviously you'll need a jack and jack stands. Two jacks are nice but not necessary. Air tools are also nice to have but not necessary.
 Important! Before you do anything be sure to measure your ride height of all four corners and write it down.
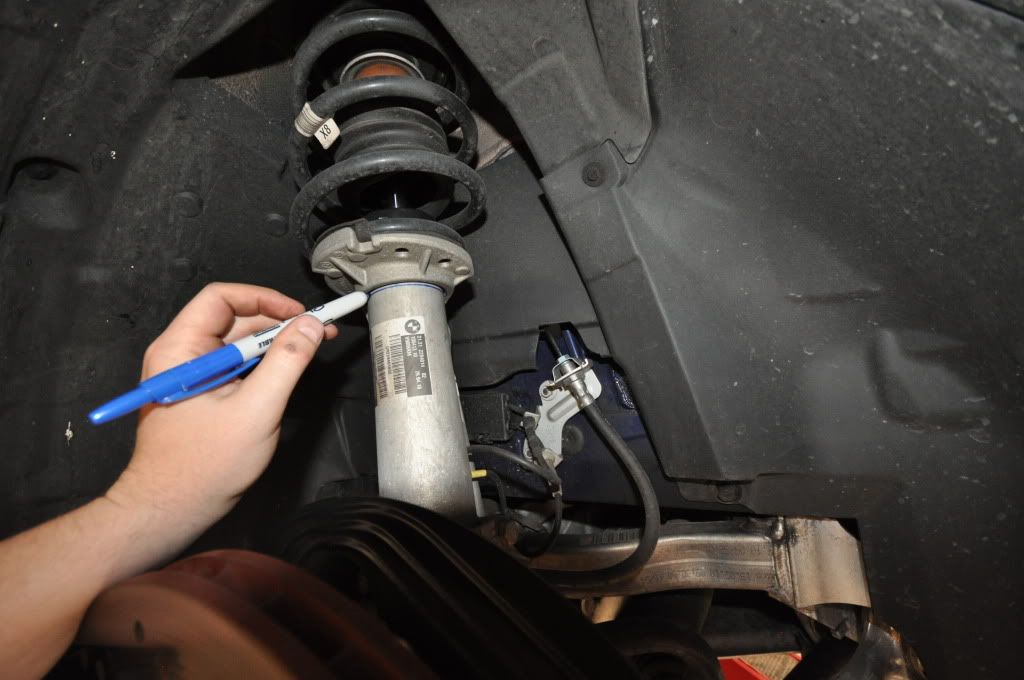
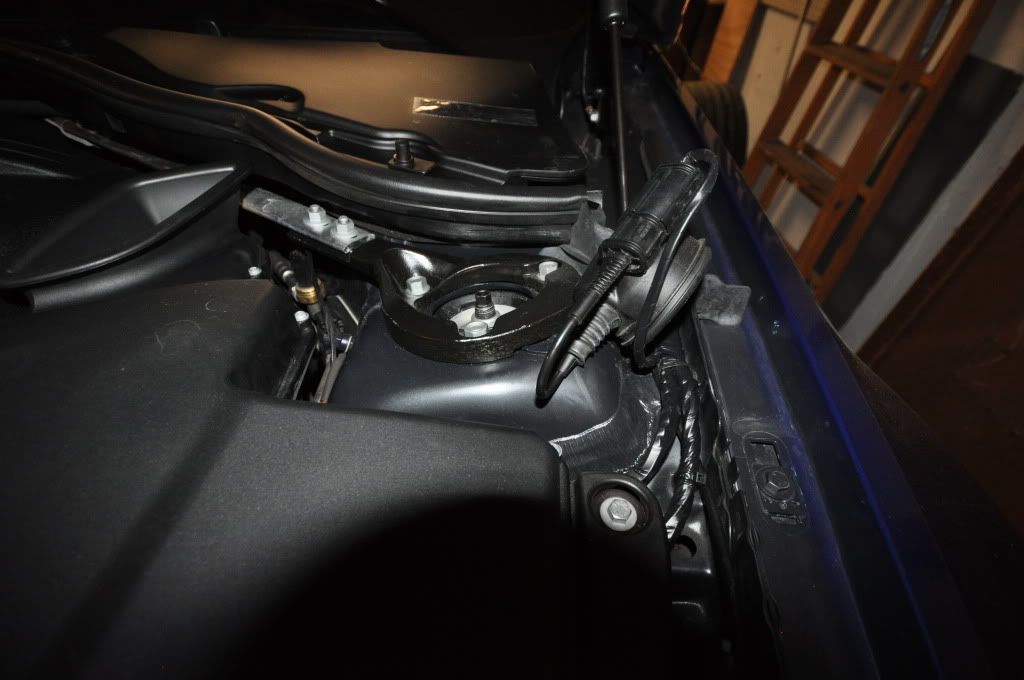
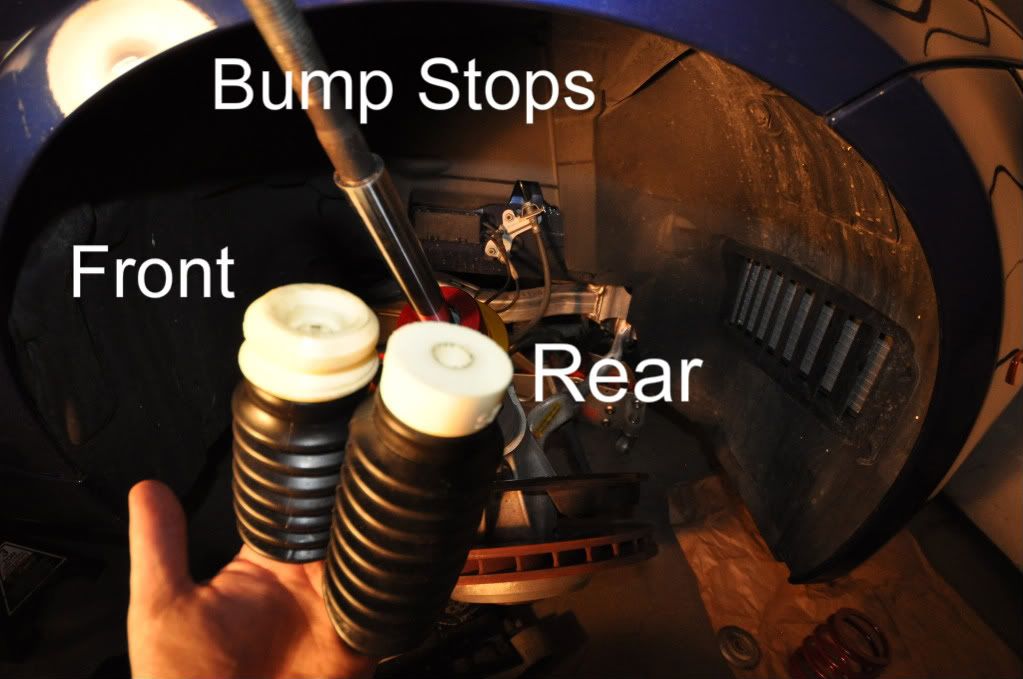
We'll start with the front. After you jack the car up and remove the wheel, start by marking the vertical position of the sway bar link bracket/spring seat. Mark all the way around this bracket so you'll be able to line it back up if you go back to stock. Ask me how I know this is important...
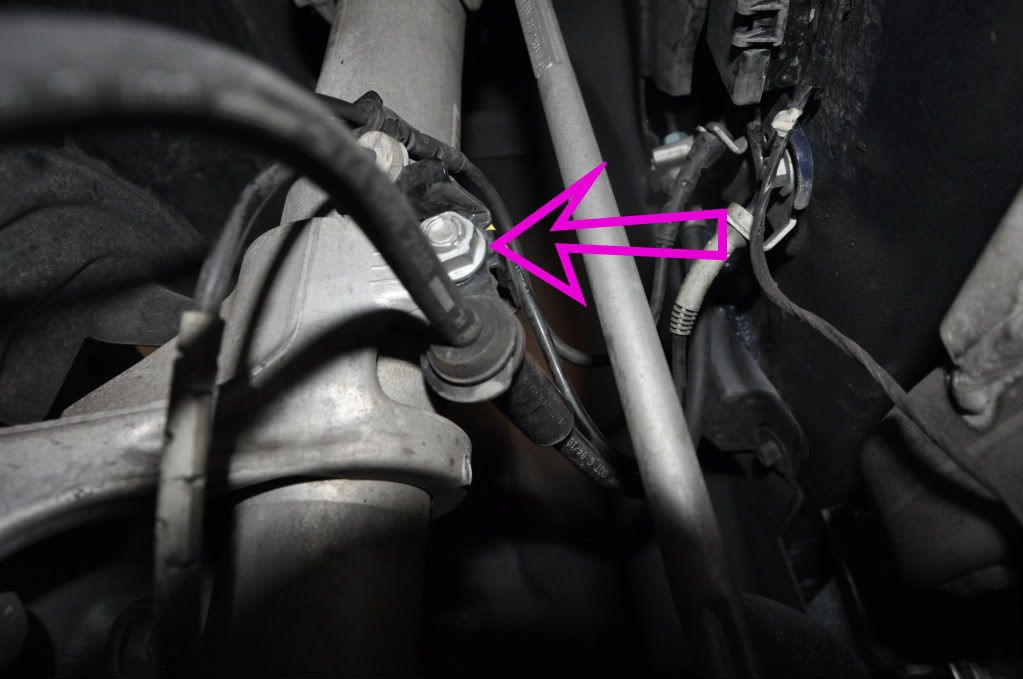
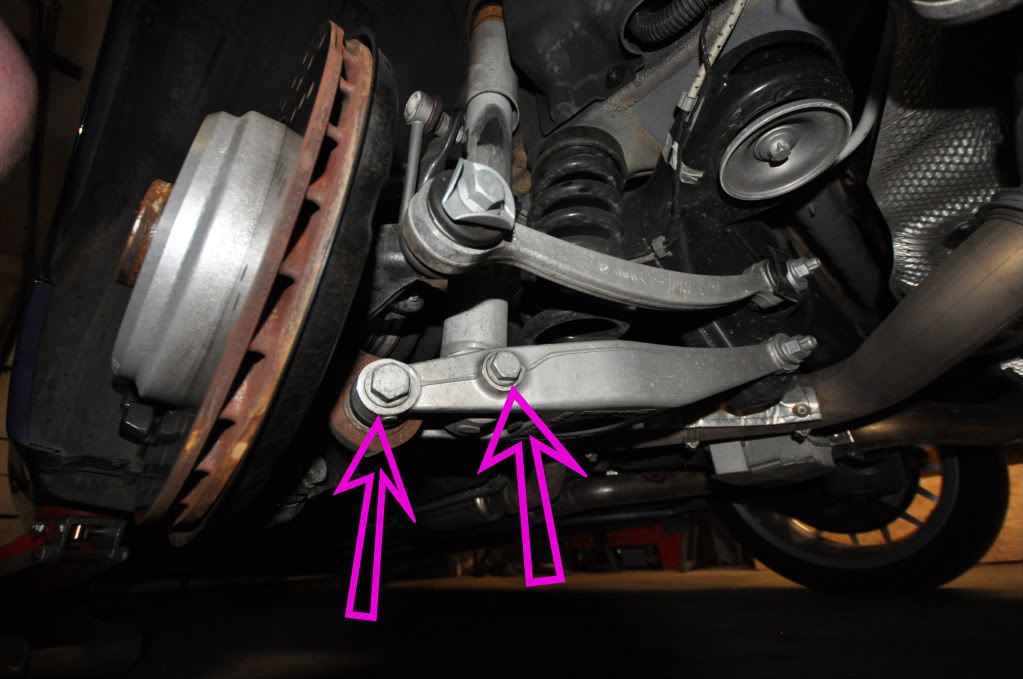
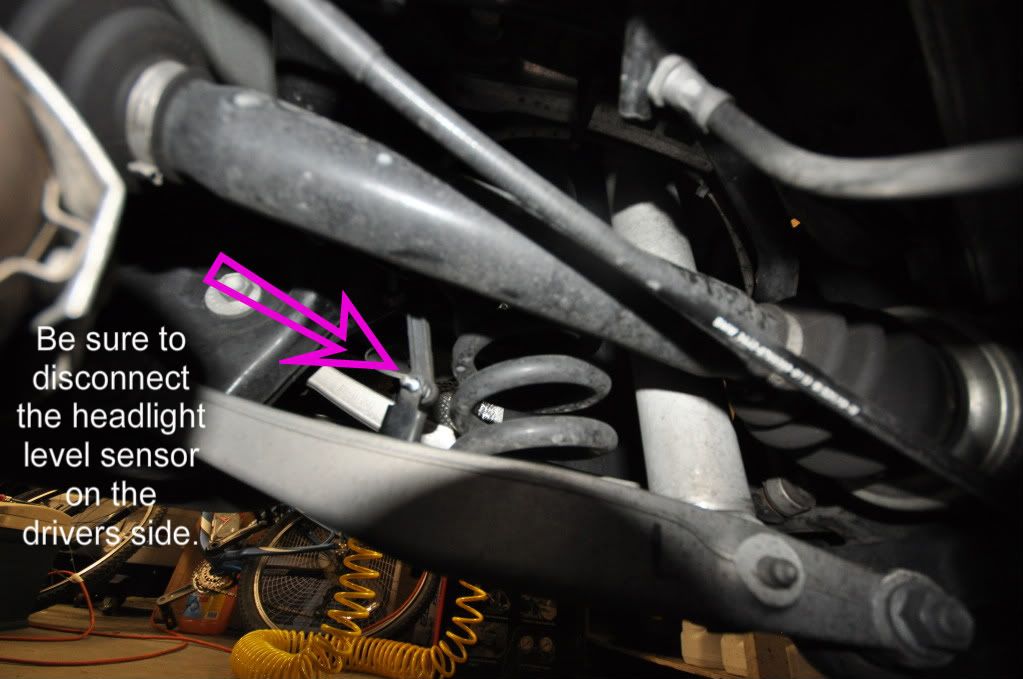
Then you can undo the sway bar link at the lower point and the brake line bracket/steering knuckle bolt. If your working on the drivers side you need to disconnect the headlight level sensor so you don't damage it with the suspension hanging on it.

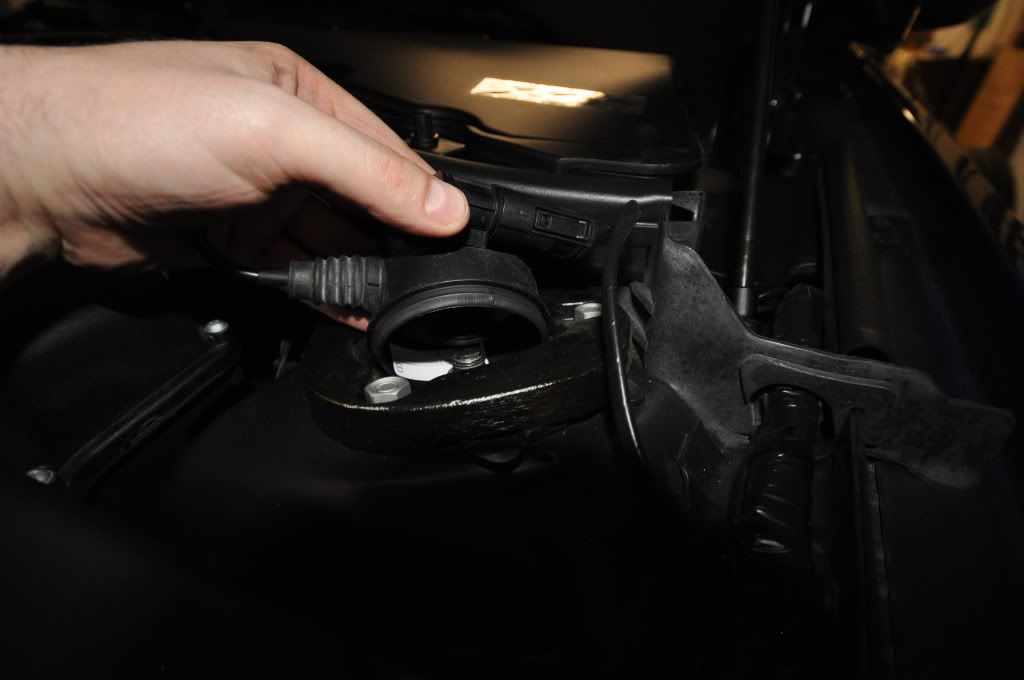
If you have ESC, and chances are you do if you purchased this kit, next you'll need to remove the plastic cover on top of the shock perch and reach under that cover with your fingers and pop the connector off the top of the shock rod. Just get a finger on each side of the connector and pull it straight up.

After this you can jack up the suspension to compress the spring and put the spring compressors on. This is much easier than trying to just tightening them down to compress the springs.
Then you can remove the top shock rod nut. To remove it, you'll need either the shock rod nut socket and 10mm socket, an open end wrench and a 10mm socket, or an impact wrench.
As an alternative, you can also unbolt the 3 nuts of the perch before taking off the shock rod nut and lower the entire assembly with the perch attached. I did one side each way and didn't find much advantage one way or another. If you do it the second way just be sure to be aware that there may be some tension on the spring when you remove the shock rod nut.
Either way, carefully lower the strut assembly. It helps to lower and let everything rest on the jack so it's not hanging on the brake line.
Remove the stock perch if you didn't leave it assembled. Then you can install the slotted Ground Control perch.
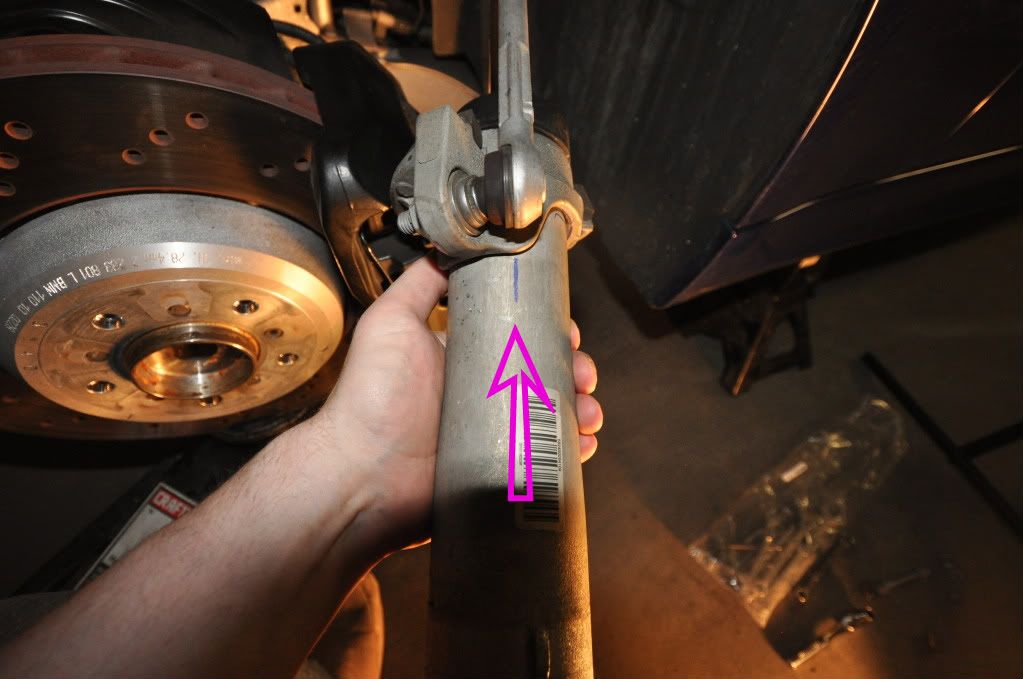
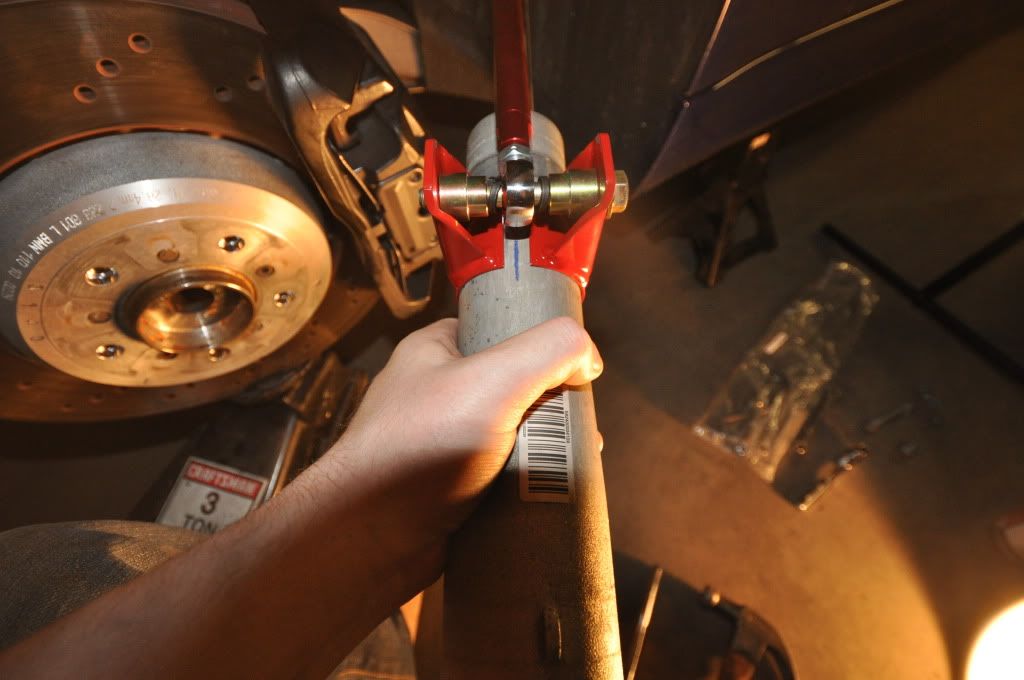
Next you'll need to pull the strut assembly out, mark the position of the sway bar link and take off all the unnecessary bits. I don't know if there's a trick to pulling the damper out of, what I think is called the steering knuckle, because I had to knock it out with a hammer.
You can see in the next few pics that I've used a sharpie to also mark on the damper body where the center of the sway bar link joint is located so when you remove the stock bracket you can put the GC bracket on and the joint will be in nearly the same position. To remove the stock bracket you'll have to hammer it off. Just be sure to mark the joint and bracket position first! Then you can put on the GC link bracket and line the joint up with where you marked the stock joint and the bracket at or just a hair below the vertical line you made a while back.
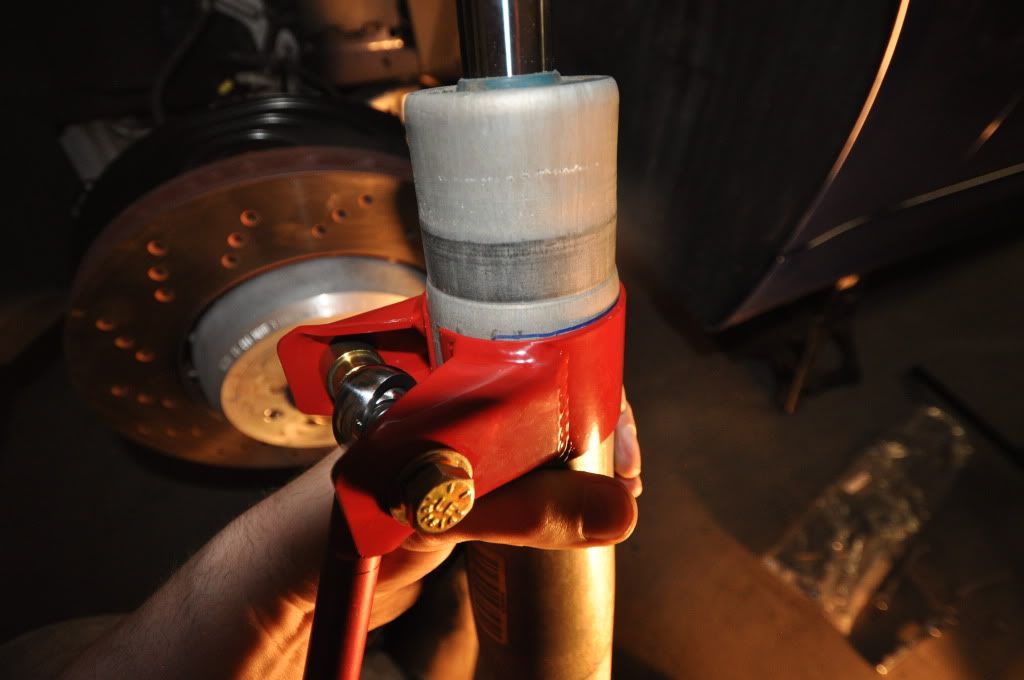
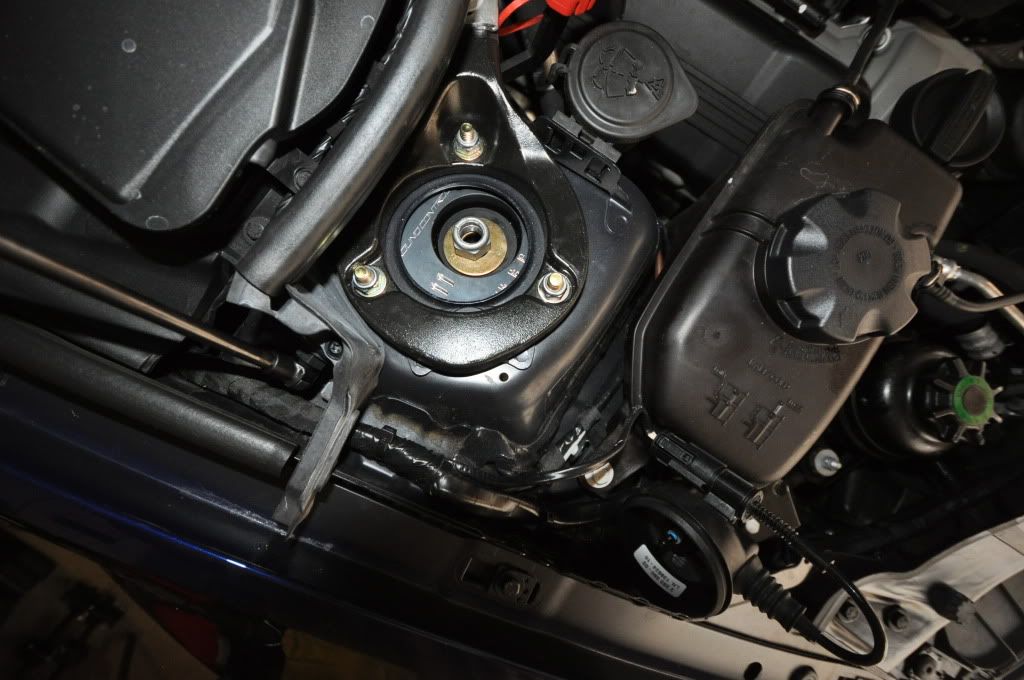
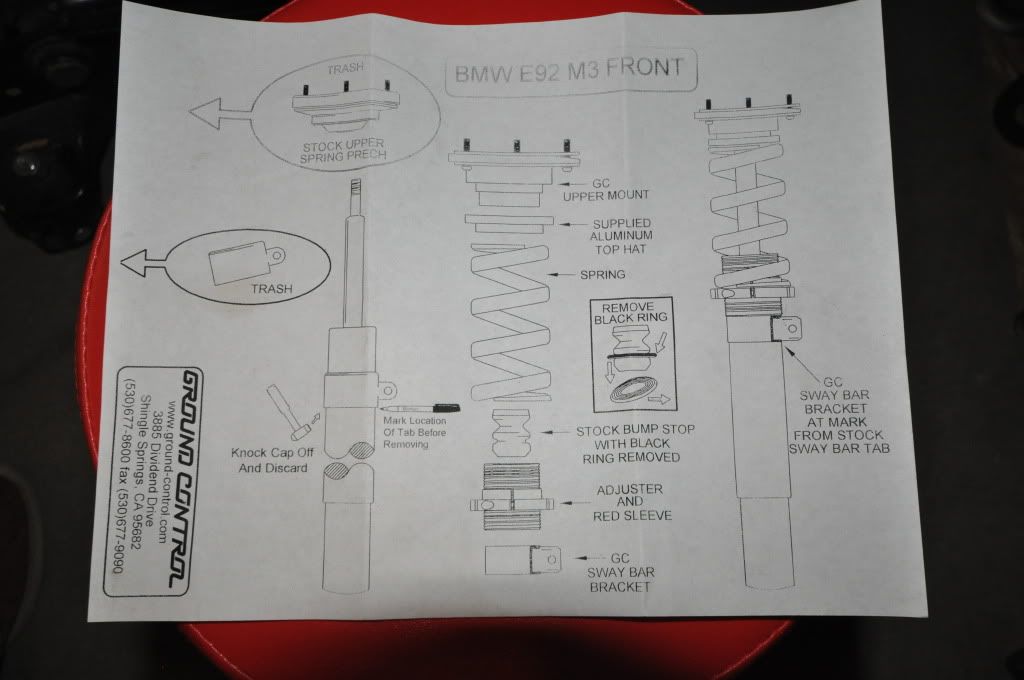
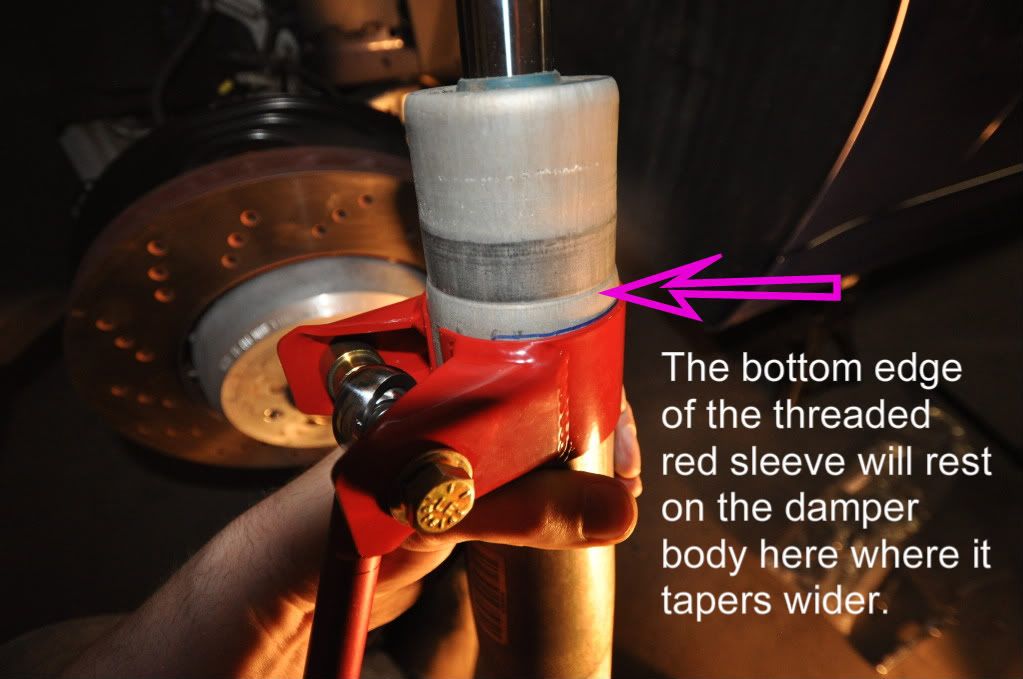
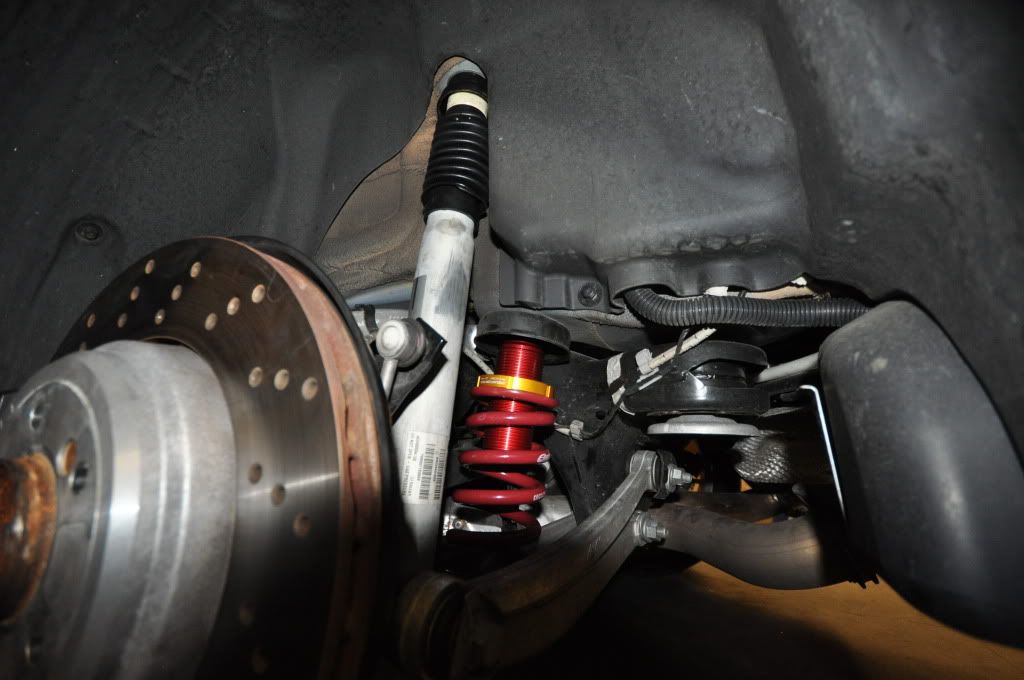
Now you can reassemble the everything according to the provided diagram. According to GC, the threaded red sleeve will rest on the damper body where it tapers out.
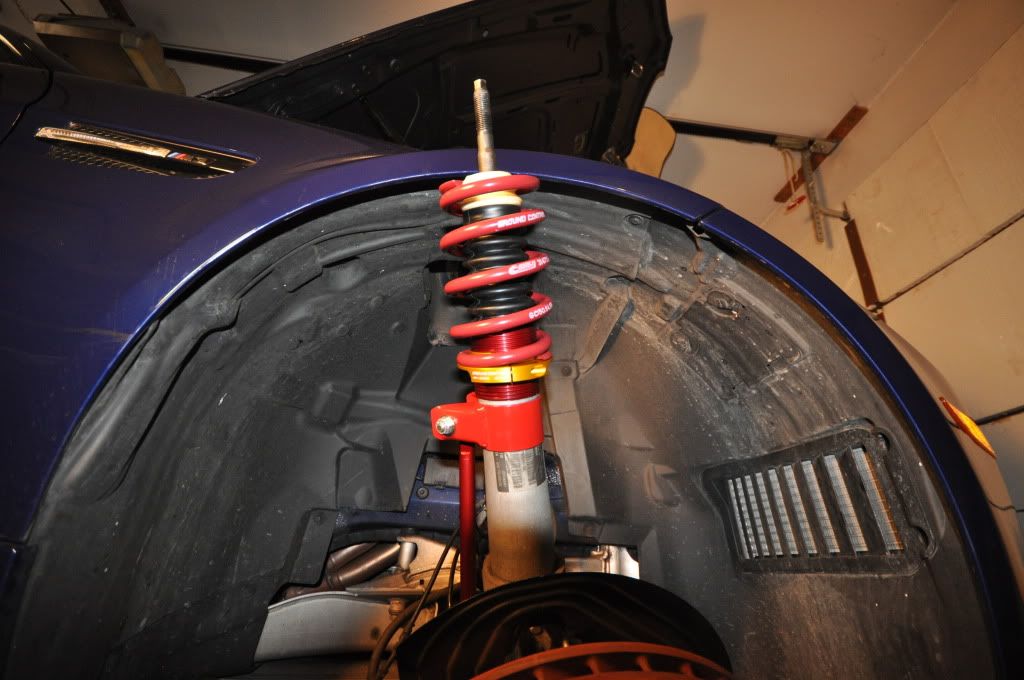
Now you can put the entire assembly back in the steering knuckle, run the shock rod up through the perch and attach the top shock rod nut. To tighten it down, this is where you really need that the shock rod nut socket and a 10mm deep socket to tighten down the shock rod nut without spinning the shock rod.
According to Ground Control, the correct way to adjust and attach the sway bar links is with the vehicle on its wheels and the suspension under the compression from the weight of the car. So you just put the wheels back on and take the car off the jacks so it's setting and compressing the suspension in a ready to drive state. Make sure the wheels are set straight forward too. Then you just have to squeeze under the car and twist the links to set the length so the bottom end of the link slides easily into the sway bar. The idea is that the links/sway bar don't have any load as the car is sitting static. Once you get the nuts tightened up just jack the car back up, take the wheels off and tighten all the link nuts up to spec.
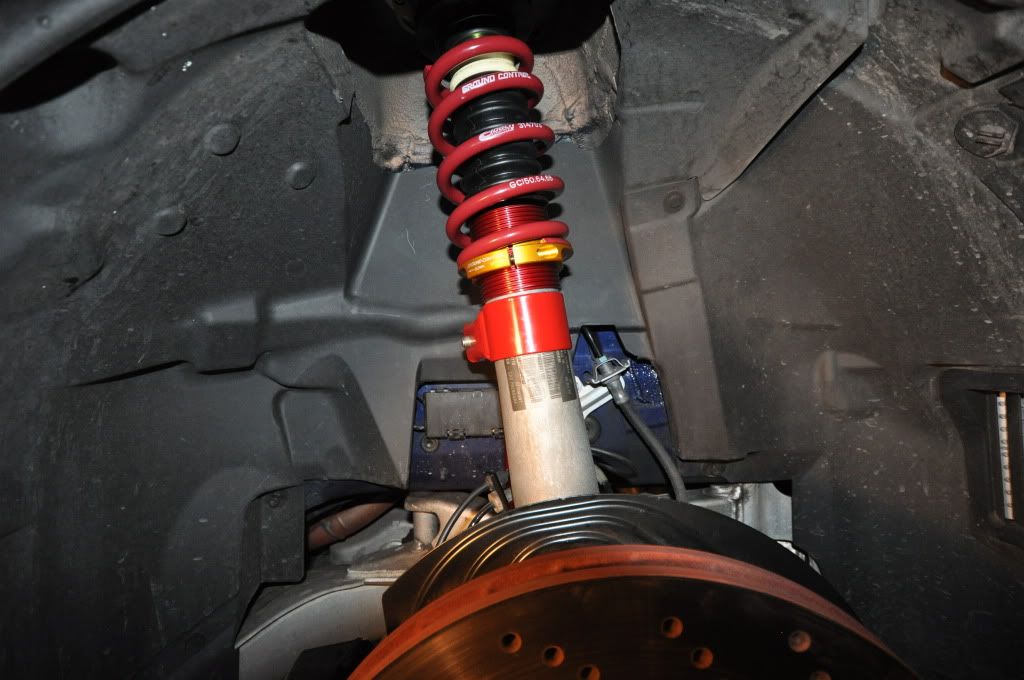
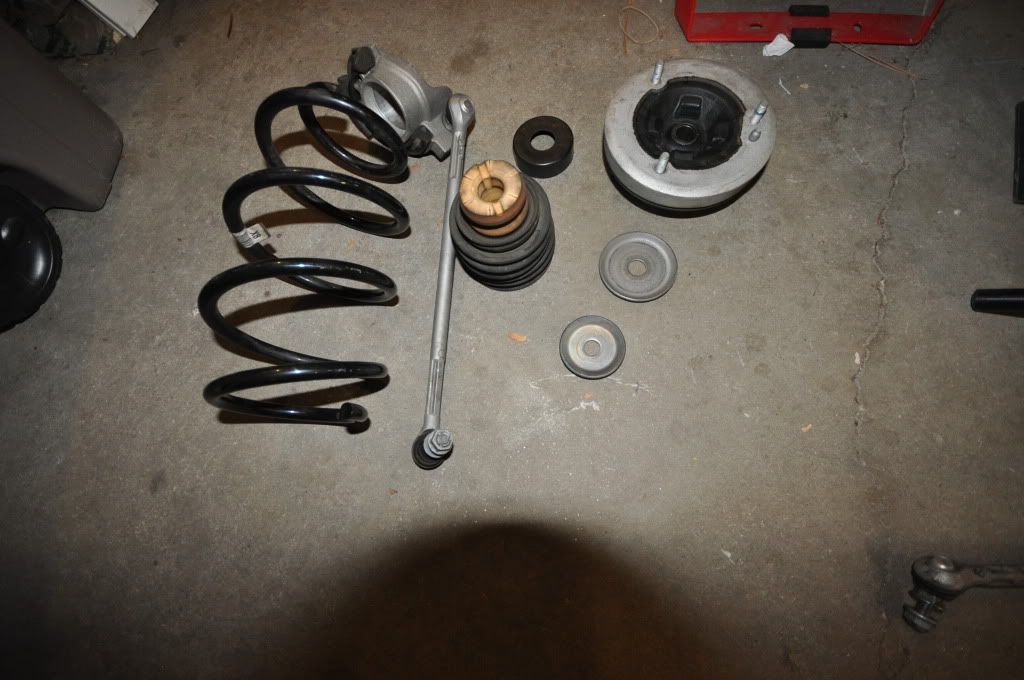
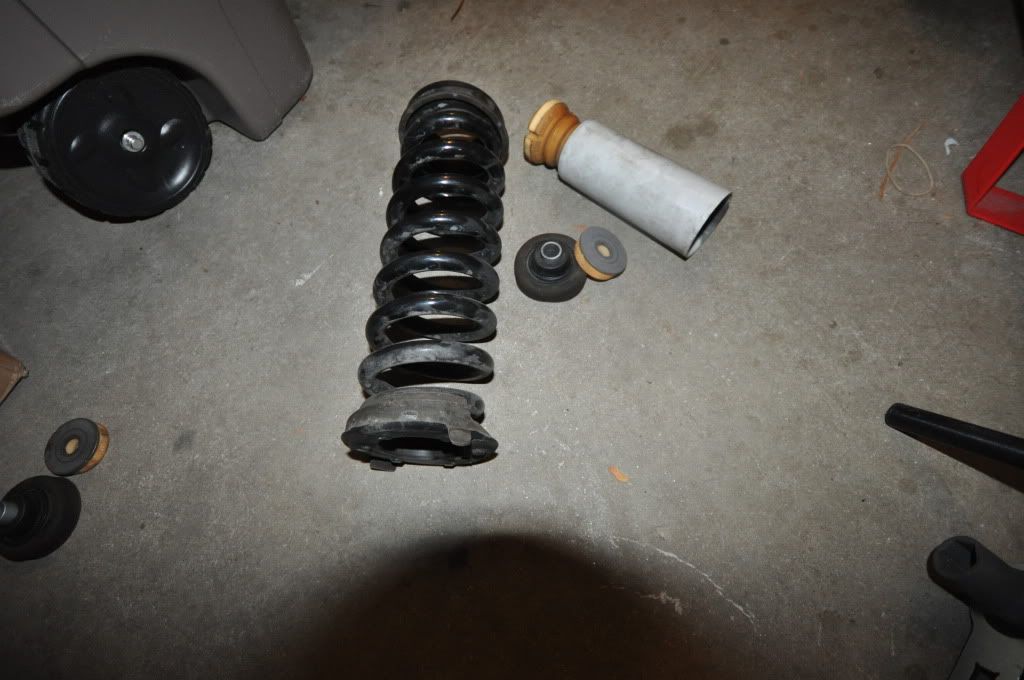
Here's what it looks like all buttoned up and a pic of all the parts that came off the front and didn't get reused.
That's pretty much it for the front. Now on to the back...
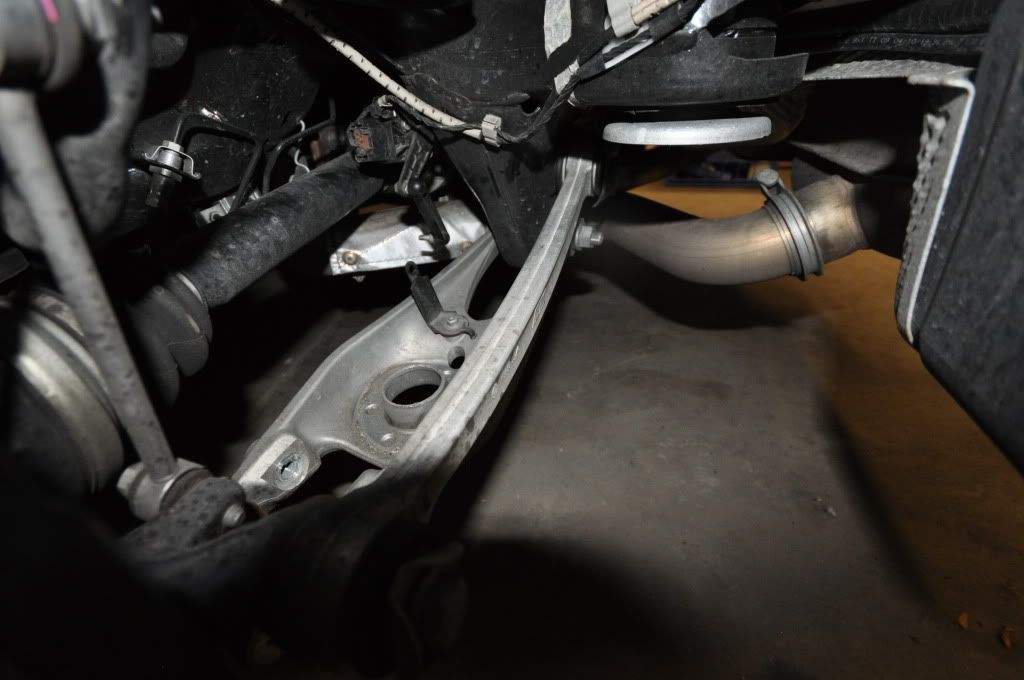
Jack up the back, pull off the wheels and remove the trunk liner. The trunk liner comes out of the E90 fairly easily once you pull out the middle section and all the black plugs. Then you just need to remove the 2 bolts on the lower suspension arm and the top shock rod nut. On the lower arm, remove the smaller damper bolt first then the larger bolt. Don't for get to unbolt the headlight level sensor when your working on the drivers side too!

To remove the spring and damper you have to push down on the lower suspension arm. Everything came out fairly easily.
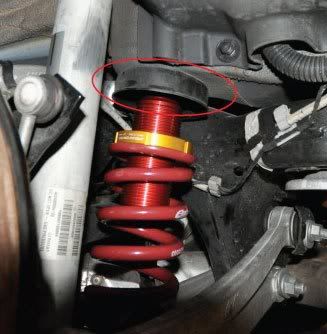
 Important update!
 Aleks of
www.alekshop.com was sharp enough to notice a stock part that should have been removed. The black cup circled in the next picture should be removed. It can be knocked out with a hammer. This should let the threaded cylinder to sit up into the frame a little more. I will take pics and add them to the DIY as soon as possible.
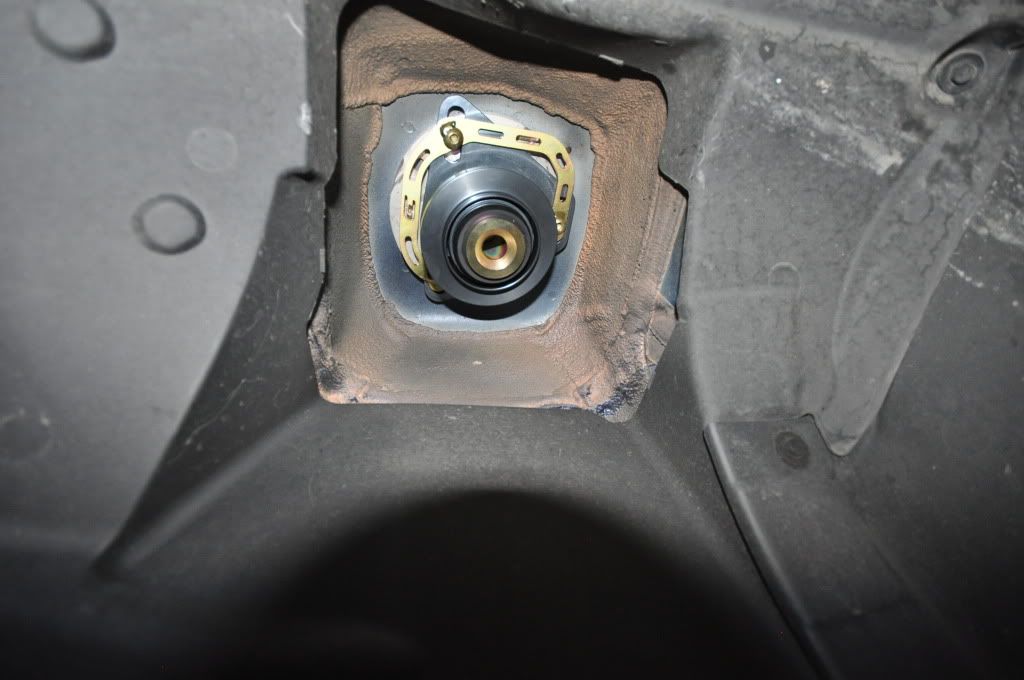
Once everything is out just take all the unused bits off the damper and the upper bushings from the frame. Then reassemble per the GC diagram. The bushings included with the kit sandwich on top (in the trunk) and on bottom (in the wheel well) of the upper mount.
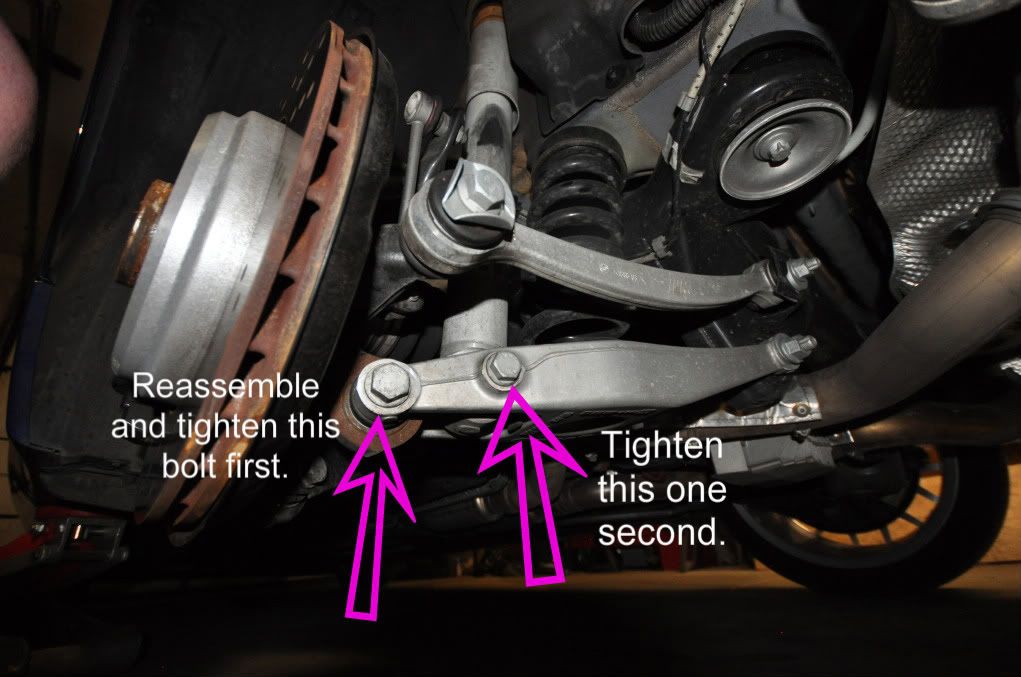
Important! When you reassemble the two bolts in the lower suspension arm be sure to get the outside bolt for the wheel carrier and arm lined up and assembled first before tightening the damper bolt. If you tighten the damper bolt first you may not be able to get the wheel carrier back in the arm as it will be too tight.
Be careful when you're lining up the wheel carrier and arm not to let wheel carrier fall behind and below where it connects to the arm. It's tough to explain but it happened to me and I spent at least an hour trying to get it unstuck and back out front so I could get it aligned and reassembled. As per the spring swap DIY, you can jack up the lower arm and use a wrench as a lever to line up the carrier and arm holes.

Here are the pieces that were replaced on the rear.
Once you get everything back together just make sure everything is torqued to spec and you're done. If you found this useful you can buy me a beer next time you come through Denver.
